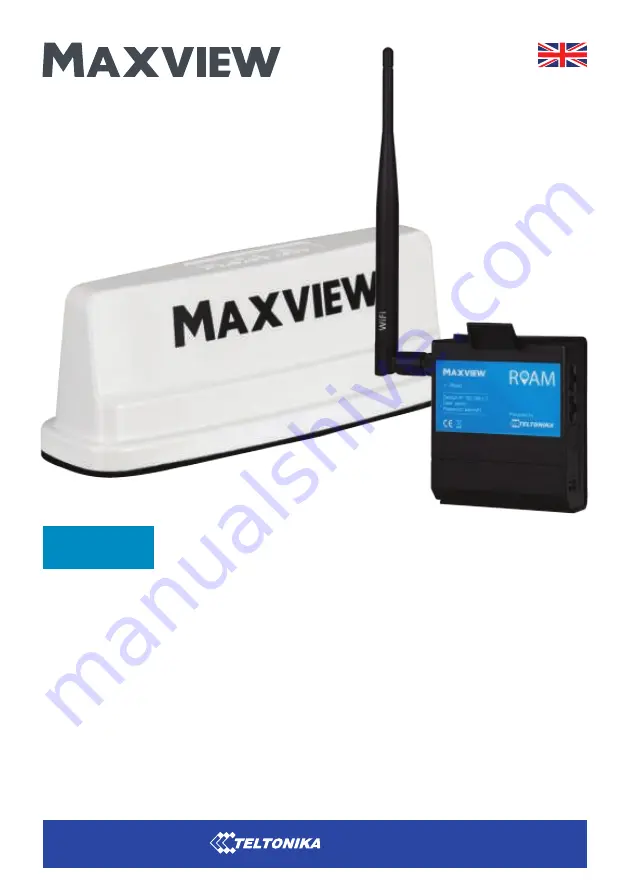
background image

Installation & User Instructions 

MXL056   

UK contact:

Helpline:   +44 (0)1553 811000
Email:  

[email protected]

Web: www.maxview.co.uk

Maxview reserve the right to change specifications without prior notice
9111441 Iss 1

Roam Campervan

We have partnered up with one of the largest 
suppliers of Wi-Fi products worldwide.

Maxview Roam Powered by

This manual provides information on how to control the Roam Router using your devices 
internet browser. Most of these functions can be completed easier and faster using the 
Maxview Roam App. See the Roam App instruction manual for more information.

Summary of Contents for MAXVIEW MXL056

Page 1: ...r notice 9111441 Iss 1 Roam Campervan We have partnered up with one of the largest suppliers of Wi Fi products worldwide Maxview Roam Powered by This manual provides information on how to control the Roam Router using your devices internet browser Most of these functions can be completed easier and faster using the Maxview Roam App See the Roam App instruction manual for more information ...

Page 2: ...9 Logging out of the Web User Interface Router Changing the Primary Internet Source from 3G 4G to Wi Fi 21 Changing the Primary Source 24 Changing the Routers LAN IP Address Router Other Functions 27 Managing and Removing Wi Fi Connections 27 Changing Wi Fi SSID name and Password 30 Entering SIM PIN 31 Controlling Data Usage Other Functions 32 Router Firmware Update Additional Information 33 Gener...

Page 3: ... A C F H B J E Tools required Power Drill 2 5mm Drill Bit 25mm Hole Saw I Choosing a Service Provider To use the Maxview Roam Campervan you will need a suitable data SIM card sold separately The Maxview Roam is unlocked so you can use any service provider The best package will depend on many factors such as data usage budget location of travel and usage habits however pre paid data plans are usual...

Page 4: ...V dc Power Supply Unit to power a Roam For indoor use only MXL050 PSUUK Weatherproof Socket with SMA Connectors The Weatherproof Socket provides an external entry point into the side of any vehicle Available with 2 SMA connections making it ideal when using the Roam Antenna with the Roam Bracket Fixing Kit See left to allow for a temporary connection or where entry into the roof is not possible It...

Page 5: ...Installation Instructions 5 ...

Page 6: ...or maximum performance You must leave enough space for this Power Supply The router comes with 12V cigarette adaptor You should ensure your router power supply can reach your preferred power source 1 The 3M seal provides a permanent installation The adhesive is extremely strong and the antenna is not designed to be removed Please ensure you are completely happy with your antenna s position and ori...

Page 7: ...th of the roof The best way to do this is to sit the Antenna clamp upside down through the hole Then from the inside mark on the clamp where the clamp passes through the ceiling and into the vehicle 3A Please Note Alternative Nut and Washer option for thin metal roof applications is supplied If this is better suited for your application ignore step 3 4 4 Remove the clamp and cut the clamp shaft to...

Page 8: ...gs as once stuck down the antenna is not designed to be removed 7 Press firmly around the edges of the antenna to ensure a watertight seal has been achieved 8 From the inside of the vehicle attach the clamp and turn clockwise onto the thread protruding from the bottom of the antenna Continue to turn until the clamp is compressing the seal underneath the antenna Once in position use 1 x No 6 Screw ...

Page 9: ...nd the SIM text on the front of the tray should be the correct way up The tray should push into the slot without resistance until it is fully inserted The SIM is now inserted Slot 3 Remove the SIM tray and lay the standard size SIM card flat with the metal chip face facing up Ensure it is in the correct orientation and sitting completely flat in the holder You can convert a Micro or Nano SIM Card ...

Page 10: ...is marked Wi FI This should be positioned so it is vertical 10 1 Position router bracket and mark hole positions Depending on material drill a pilot hole or use a bradawl Mount the router mounting bracket to the surface using the 2 x No 6 Screws provided Note Make sure the Maxview Logo is horizontal and in the correct orientation IMPORTANT Be careful when placing the Routers location that it is no...

Page 11: ...Getting Connected and Basic Functions Router 11 ...

Page 12: ...ector Roam Antenna Connector 1 Roam Antenna Connector 2 Power LED Ethernet Ports Get to know your Router Credential Router Sticker Located on the reverse of the router SERIAL XXXXXXXXXXX IMEI XXXXXXXXXXX LAN MAC XXXXXXXXXXX WIFI SSID RUTXXXXXX PASSWORD XXXXXXXX BATCH No xxxx QR CODE See page 14 for details Serial Number Password Code Wi Fi I D RUT240 XXXXXXXX ...

Page 13: ... Wi Fi network Option A Using device settings Option B Using QR Code Option A Device Settings 1 Navigate to your devices Wi Fi settings and view available Wi Fi networks 2 The Roam router will be displayed as RUT240_XXXX The last 4 characters will be unique to your Roam router If more than one Roam is being used within close proximity the Wi Fi network name is displayed on the back of the router S...

Page 14: ...ter When prompted select join Your device will automatically connect to the Roam router That s it You are now connected to the secure Wi Fi hotspot of your Roam Router The Wi Fi network name and password will remain the same as those listed on the back of the router The above processes can be repeated to connect up to 50 devices to the same network simultaneously 14 ...

Page 15: ... router to reset Once reset the Wi Fi network will be visible and available to connect to Connecting to a device using an Ethernet Cable If your device does not support Wi Fi or you would like to maximise the reliability of your connection you can access the Roam internet connection by connecting the Ethernet Cable between the LAN ports on the router and your device Possible applications for this ...

Page 16: ...end accessing and changing settings in the Web User Interface if necessary and we do not recommend changing settings which have not been outlined in this booklet Did you know The functions in this section can be completed easier and faster using the Maxview Roam App See the Roam App instruction manual for more information 16 ...

Page 17: ...wser This can be done on any device with an internet browser and a connection to the Roam Router 2 You will first be prompted to enter the Web User Interface user name and password The default details are printed on the front of the router Username admin Password admin01 3 On first use you will be required to update the password The new password must be a minimum of 8 characters and contain at lea...

Page 18: ...changing any of the dashboard settings You can return to the Web User Interface dashboard at any time by selecting the Teltonika logo in the top left hand corner of the Web User Interface Please note During some operations the router can take several minutes to load If you see this symbol please be patient as the router is working to save your settings Competent users can navigate through other se...

Page 19: ... Interface you should log out We recommend doing this every time you have finished using the Web User Interface 1 Select Log Out in the top right hand corner and confirm you wish to log out 2 Once you have logged out you can now close the web browser tab and continue to use the Roam ...

Page 20: ...Primary Internet Source from 3G 4G to Wi Fi Router Did you know The functions in this section can be completed easier and faster using the Maxview Roam App See the Roam App instruction manual for more information 20 ...

Page 21: ... of the initial set up required we recommend using this feature if you will be spending considerable time at this location or using significant amounts of data If you will only be at the site for a short period we suggest you continue to use the 3G 4G connection or connect directly to the Wi Fi connection with your Wi Fi enabled device 1 From the Web User Interface Dashboard select Network at the ...

Page 22: ...he Wi Fi connection is used when available the Wi Fi option should be selected as the Main WAN option The mobile connection should then be selected as the WAN Failover option If you plan to use an Ethernet cable to connect your router directly to another access point you should also select Wired as a WAN Failover This can then be used when the router has no other way of connecting to the internet ...

Page 23: ...er of connection methods has changed to suit your preference and a Scan box has appeared next to the Wi Fi option Select Scan 7 Depending on your WAN settings you may see the above warning message If you see this message select Start scan to begin a search of the Wi Fi networks within range of the router If you don t see this skip to 8 It is only necessary to complete steps 2 5 once Next time you ...

Page 24: ... the router will go to the wireless configuration settings You will see the new network under Wireless Station Mode 10 Select the Teltonika logo to return to the dashboard You can ensure the router is connected using the Wi Fi by checking the connection method listed in the WAN section of the dashboard Where no Wi Fi connections are available the router will return to the mobile 3G 4G SIM card con...

Page 25: ... 192 168 1 1 to 192 168 2 1 3 It is not necessary to change any other settings Select save to add these settings and return to the dashboard 4 After completing this change the Roam Wi Fi will reboot and you may temporarily loose connection to the Wi Fi Once restored it should not be necessary to reconnect your devices Note The LAN IP Address is used to access the Roam Router web user interface Web...

Page 26: ...26 Other Functions Router Did you know The functions in this section can be completed easier and faster using the Maxview Roam App See the Roam App instruction manual for more information ...

Page 27: ...ge will remove all devices which are currently connected to the router hotspot These will need to be reconnected using the new username and password Managing and Removing Wi Fi Connections 1 Navigate to Network and then Wireless From here you can then view and manage the most recent Wi Fi connection listed under the Wireless Station Mode heading This includes updating the password or removing it c...

Page 28: ... router Once complete select the Wireless Security tab Note You not need to save before changing tabs 4 Input a new password in the key box It is important this is a strong password to ensure your hotspot remains secure We recommend using a combination of uppercase characters lowercase characters numbers and symbols You should also avoid common phrases such as password and 12345 Keep your password...

Page 29: ... including the one you are currently with Your new hotspot name and password is now set up 7 You can now navigate to your device s Wi Fi settings and view available Wi Fi networks The Roam router hotspot will be displayed as your chosen name Select this network and enter the new password This step should be repeated for any device you wish to connect Please note During some operations the router c...

Page 30: ...t PIN 3 times your SIM card may be blocked If this happens you will need to contact your SIM card network provider If your SIM requires a PIN the Web User Interface will display SIM locked If it does not require a PIN it will display SIM ready 1 From the Web User Interface select Network and then Mobile from the top menu 2 In the General tab insert the PIN in PIN box Once entered select save To en...

Page 31: ...your allowance limit Typical Set Up Example Purchased 24GB data SIM which lasts for 24 months Input 11000 in SMS warning and set period to 24 months from current date and set period to yearly Input 11900 in data limit and set period to 24 months from current date and set period to yearly This will notify to the mobile number of your choice when 23GB has been used and then limit data usage when 23 ...

Page 32: ...d corner of the dashboard 2 Select the FW update available text to proceed to the Firmware page 3 Select upgrade to begin the update procedure It is not necessary to change any of the other settings here Ensure keep all settings box is ticked so router configuration and creditenials do not change 4 The firmware will now begin to download Remain on this page until the download is completed 5 Once c...

Page 33: ...refully and become familiar with your Maxview product Understand the application limitations and any hazards involved with the installation and operation Failure to follow all instructions may result in damage to your vehicle and or serious injury Maxview declines all responsibility in the event of incident or accident if they are due to a non observation of the installation instructions or the wa...

Page 34: ...se an internet connection This includes Facetime WhatsApp and Wi Fi calls but will not include traditional voice calls and SMS text messages 4 I am connected to the Roam with a good Wi Fi signal but nothing is loading If you are near to the Roam router it is likely that you will have a strong Wi Fi connection to the router However this doesn t mean that the Roam is receiving a strong signal from t...

Page 35: ... network has become available or unavailable the router will switch from receiving Wi Fi to 3G 4G or vice versa During this sequence there will be a brief period where there is no signal available to the router Because of this some devices will disconnect from the Roam hotspot If this is the case simply reconnect to the Roam hotspot and you should be back up and running See page 25 to check how th...

Page 36: ...een changed the new IP address must be used to access the WebUI 16 Why does my Apple device say the Roam Wi Fi has weak security Firstly rest assured this message is nothing to worry about and your Wi Fi connection is still perfectly secure As default the Roam router uses WPA2 PSK as the Wi Fi security standard As new standards emerge Apple have highlighted vulnerabilities in the WPA2 PSK encrypti...

Page 37: ...n gain access to the internet This page usually requires the user to input details such as an email address and accept terms of use Wi Fi sources requiring use of a Captive Portal are not supported by the Maxview Roam and therefore cannot be used as an Wi Fi source In this instance we suggest you continue to use the 3G 4G connection or connect directly to the Wi Fi connection with your Wi Fi enabl...

Page 38: ...he product This disclaimer applies both during and after terms of the guarantee This does not affect your statutory rights Due to expanding and changing telecommunications market Maxview cannot be held responsible for changes made to communication services Software updates to address such issues are not covered under guarantee Terms and Conditions of the Guarantee a Your guarantee starts from the ...

Page 39: ...39 Notes ...

Page 40: ...ousehold waste but made available for separate household collection Separate collection of used products and their packaging allows materials to be recycled and used again Re use of recycled materials helps prevent environmental pollution and reduces the demand for raw materials UK Conformity Assessed UKCA marking is a certification mark that indicates conformity with the applicable requirements f...

Reviews: