background image


Vers. 003


INSTALLATION GUIDE and USER MANUAL 

of the 

MAGIC SAT EASY


GB 

Summary of Contents for MAGIC SAT EASY

Page 1: ...Vers 003 INSTALLATION GUIDE and USER MANUAL of the MAGIC SAT EASY GB ...

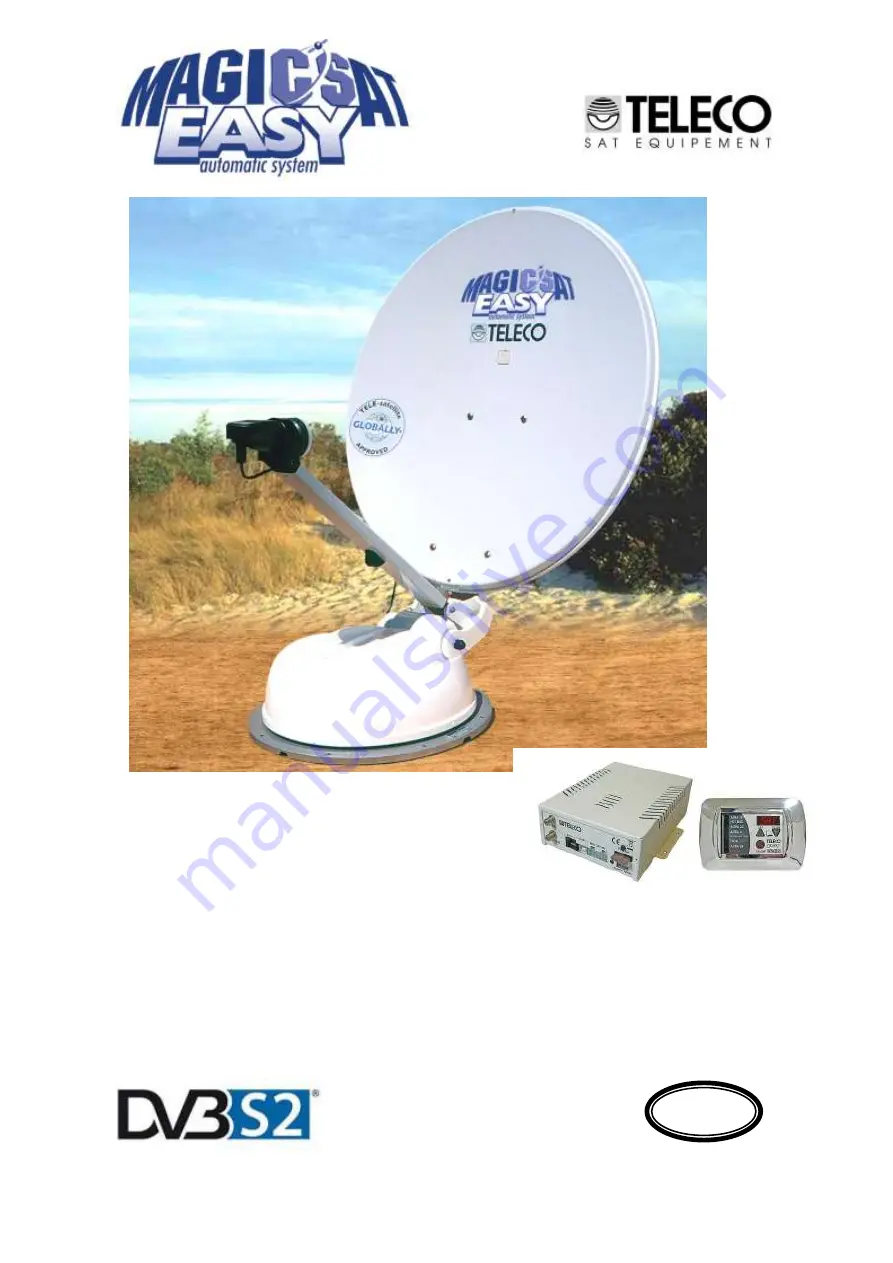
Page 2: ...Troubleshooting 18 Technical specifications 18 Information Congratulations on your purchase Magic Sat Easy is among the most technologically advanced products in the field of satellite TV reception This handbook has been prepared to provide information on how to install use maintain and technical specifications your Magic Sat Easy system For additional information please contact your local dealer ...

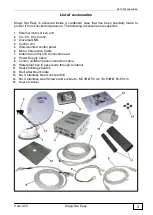
Page 3: ...driven unit 2 50 65 85 cm dish 3 Universal LNB 4 Control unit 5 Wall mounted control panel 6 Motor Connection Cable 7 Antenna Control unit connection lead 8 Power Supply Cable 9 Control unit Wall panel connection cable 10 Waterproof box to pass leads through to interior 11 Heat shrinking sheaths 12 Roof attachment plate 13 No 4 stainless steel Locknuts M6 14 No 4 stainless steel Screws and Locknut...

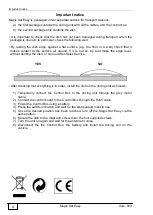
Page 4: ...d make the edge level without denting the dish or call our After Sales Service After checking that everything is in order install the dish on the driving unit as follows 1 Temporarily connect the Control Box to the driving unit through the grey motor cable 2 Connect the control board to the Control Box through the RJ45 cable 3 Power the Control Box using a battery 4 Press the switch on button and ...

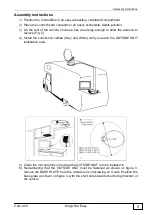
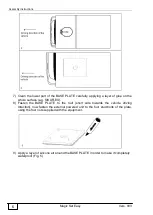
Page 5: ... enough to allow the antenna to revolve Fig 2 4 Install the connection cables Grey and White until you reach the OUTSIDE UNIT installation area 5 Clean the roof carefully in the area the OUTSIDE UNIT is to be installed in 6 Remembering that the OUTSIDE UNIT must be fastened as shown on figure 3 remove the BASE PLATE from the outside unit unscrewing all 4 nuts Position the base plate as shown on fi...

Page 6: ...hole surface e g SIKAFLEX 8 Fasten the BASE PLATE to the roof short side towards the vehicle driving direction now fasten the external powered unit to the four stud bolts of the plate using the four nuts supplied with the equipment 9 Apply a layer of silicone all around the BASE PLATE in order to make it completely waterproof Fig 5 ...

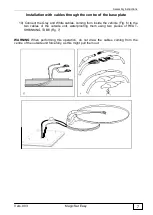
Page 7: ...onnect the Grey and White cables coming from inside the vehicle Fig 6 to the two cables of the outside unit waterproofing them using two pieces of HEAT SHRINKING TUBE Fig 7 WARNING When performing this operation do not draw the cables coming from the centre of the outside unit forcefully as this might pull them out ...

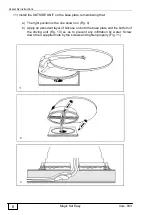
Page 8: ... plate remembering that a The right position is the one shown on Fig 9 b Apply an abundant layer of silicone on both the base plate and the bottom of the driving unit Fig 10 so as to prevent any infiltration by water Screw down the 4 supplied nuts by the screws and tighten properly Fig 11 ...

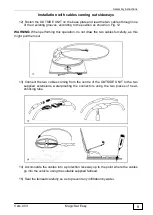
Page 9: ... this operation do not draw the two cables forcefully as this might pull them out 13 Connect the two cables coming from the centre of the OUTSIDE UNIT to the two supplied extensions waterproofing the connectors using the two pieces of heat shrinking tube 14 Accomodate the cables into a protection raceway up to the point where the cables go into the vehicle using the suitable supplied fairlead 15 S...

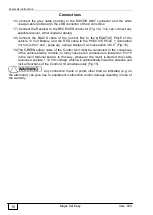
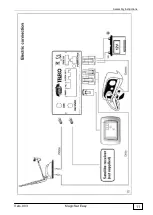
Page 10: ...SITIVE POLE remember not to mix the and poles up using 2 cables of a cross section of 2 52 Fig 15 19 The GREEN safety cable of the Control Unit must be connected to the consensus of the vehicle startup console in many cases such consensus is located on Pin 15 in the main terminal board In this way whenever the motor is started this cable receives a positive 12 Vdc voltage which will automatically ...

Page 11: ...Assembly instructions Vers 003 Magic Sat Easy 11 ...

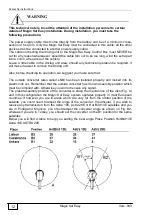
Page 12: ...efore checking its operation we suggest you make sure that The outside converter also called LNB has been installed properly and locked into its plastic lock nut Remember that the outside converter has its own assembly position which must be complied with Otherwise you will not receive any signal The preset assembly position of the converter is along the median line of the dish Fig A and in this c...

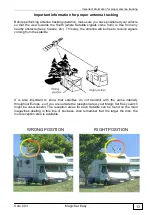
Page 13: ...obstacle trees houses etc This way the antenna will be free to receive signals coming from the satellite It is also important to know that satellites do not transmit with the same intensity throughout Europe so if you are outside the reception area your Magic Sat Easy search might be unsuccessful The reception areas for each Satellite can be found on the main magazines dealing in this line of busi...

Page 14: ...nna if lifted will come down automatically and it will not be possible to lift it again as long as the engine is running 4 Make sure that your batteries are always sufficiently charged since if the voltage falls below 10 Volts the Magic Sat Easy electronic safety circuit will prevent the antenna from rising 5 Should you use 12 Volt power supply instead of batteries be careful to use stabilized pow...

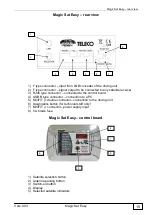
Page 15: ...type connector connected to the control board 4 USB B type connector connection to a PC 5 MiniFIT jr double connector connection to the driving unit 6 Diagnostics button for technical staff only 7 MiniFIT jr connector power supply input 8 5 A blade fuse Magic Sat Easy control board 1 Satellite selection button 2 Antenna parking button 3 Switch on button 4 Display 5 Selected satellite indicators 1 ...

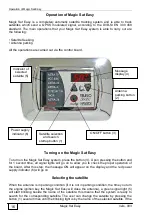
Page 16: ... allow you to check the proper operation of the board After this step the message ON will appear on the display and the red power supply indicator 6 will go on Selecting the satellite When the antenna is in parking condition if it is not in parking condition the time you turn the engine ignition key the Magic Sat Easy will close the antenna a green signal light 5 will start blinking beside the nam...

Page 17: ...ked Parking the antenna If you wish to park the antenna press the button 2 In this case the antenna will be set in travel position and the message OFF will appear on the display Turning off the Magic Sat Easy If you wish to turn off the Magic Sat Easy press the button 3 and make sure that all signal lights are off In this case the antenna remains in the position it was before turning off Proper co...

Page 18: ...llite If the control board does not turn on when you press the switch on button check the following a Are the RED and BLACK cables properly connected to the battery The RED cable must be on the pole the BLACK cable on the pole b Should you have mixed up the cables first disconnect them replace the safety fuse on the bottom of the CONTROL BOX using a similar one 5 A then re connect the RED and BLAC...

Page 19: ...Magic Sat Easy Vers 002 Page 19 ...

Page 20: ...Technical specifications 20 ...

Page 21: ...Magic Sat Easy Vers 002 Page 21 ...

Page 22: ...MagicSat Easy Tav 1 Vers 2 del 20 01 2012 ...

Page 23: ...inox Tuerca de seguridad M5 DIN 6923 inox 7 09014 N 2 Vite M5x30 UNI 5732 Screw M5x30 UNI 5732 Vis M5x30 UNI 5732 KOPFSCHRAUBE M5x30 UNI 5732 Schroef M5x30 UNI 5732 Tornillo M5x30 UNI 5732 8 06923 N 1 LNB Stark T1 LNB Stark T1 LNB Stark T1 LNB Stark T1 LNB Stark T1 LNB Stark T1 9 05468 N 1 Coperchio motore Engine cover Capot moteur Motordeckel Motorkap Tapa motor 10 07562 N 2 Rivetto autobloccante...

Page 24: ... Arandela D 8 inox 21 05696 N 1 Controdado Lock nut Contre ecrou Gegenmutter Contramoer Contratuerca 21 05697 N 1 Guarnizione PG7 Gasket PG7 Joint PG7 Dichtung PG7 Afdichting PG7 Junta PG7 21 05695 N 1 Passacavo skintop PG7 Fairlead skintop PG7 Passe fil skintop PG7 Kabeltulle skintop PG7 Kabeldoorvoer skintop PG7 Pasacable skintop PG7 22 03459 N 1 Gommino protezione connettore Connector rubber to...

Page 25: ...MagicSat Easy Tav 2 Vers 2 del 20 01 2012 ...

Page 26: ... en waterdichte uit Microinterruptor estanco 23 11161 N 2 Motore elettrico Electric motor Moteur électrique Elektricher Getriebsmotor 24 12945 N 1 Basetta supporto connettori 4 6 pin Connector strip Base de support pour connecteurs KLEMMLEISTE FUR VERBINDER Steunplaat connectoren Base soporte conectores 27 05384 N 1 Piastra base Base plate Plaque de base BASISPLATTE Onderplaat Placa de base 28 089...

Page 27: ...MagicSat Easy Tav 3 Vers 2 del 20 01 2012 ...

Page 28: ...ie negro de caucho 4 09703 N 1 Pannello di controllo Control panel Tableau de contrôle Bedientafel Bedieningspaneel Panel de control 5 13729 N 1 Scheda T0215 REV N T0215 board REV N Carte T0215 REV N Karte T0215 REV N Printplaat T0215 REV N Tarjeta T0215 REV N 6 09705 N 1 Fusibile 5A 5A Fuse Fusible 5 A Sicherung 5A Zekering 5A Fusible 5A 7 01458 N 4 Supporto Support Support Kunststoffhalterung St...

Page 29: ...MagicSat Easy Tav 4 Vers 2 del 20 01 2012 ...

Page 30: ...OP PG21 Kunststoffmutter SKINTOP PG21 Moer plastic SKINTOP PG21 Tuerca plástico SKINTOP PG21 11 07883 N 1 Cavo coassiale 9mt con connet F F 9 m coax cable F F connector Cable coaxial 9 m avec connecteur F F KOAXIALKABEL 9 m MIT F FVERBINDER Coaxkabel 9m inclusief F F connector Cable coaxial 9mt con conect F F 11 07294 N 1 Cavo coassiale 5mt con connet F F 5 m coax cable F F connector Cable coaxial...

Page 31: ... 4 32 31 5 6 6 G 6 B G 6 B B 22 G G 6 G 42 4 5 2 4 14 34 14 2 4 4 2 4 14 5 4 4 0 6 0DJLF 6DW DV ...

Page 32: ......

Reviews: