Tele System 21005221, User Manual
The Tele System 21005221 User Manual is essential for utilizing all the features of this exceptional product. Download your free manual now from manualshive.com to optimize your experience with the Tele System 21005221. Unlock its full potential with this comprehensive manual at your fingertips.
Share
Download


Reviews:
No comments
Related manuals for 21005221
FV200
Brand: Labgear Pages: 16

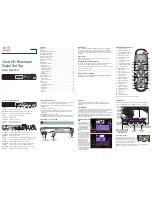
4682DVB
Brand: Cisco Pages: 4

PDS3121
Brand: Cisco Pages: 16

3413DVB
Brand: Cisco Pages: 20

Explorer 1540
Brand: Cisco Pages: 16

CIS330
Brand: Cisco Pages: 28

ITV7900
Brand: Cisco Pages: 25

Xfinity RNG150N
Brand: Cisco Pages: 28

IPV5000
Brand: Cisco Pages: 28

ISB7050
Brand: Cisco Pages: 40

Explorer 1540C
Brand: Cisco Pages: 16

SA8642 HDC
Brand: Cisco Pages: 3

ISB7000
Brand: Cisco Pages: 32

prime home
Brand: Cisco Pages: 6

Z870DVB
Brand: Cisco Pages: 13

Explorer 3350
Brand: Cisco Pages: 16
4398DVB
Brand: Cisco Pages: 2

RNG150
Brand: Cisco Pages: 28


