

Quick Start Guide
Maxim
540
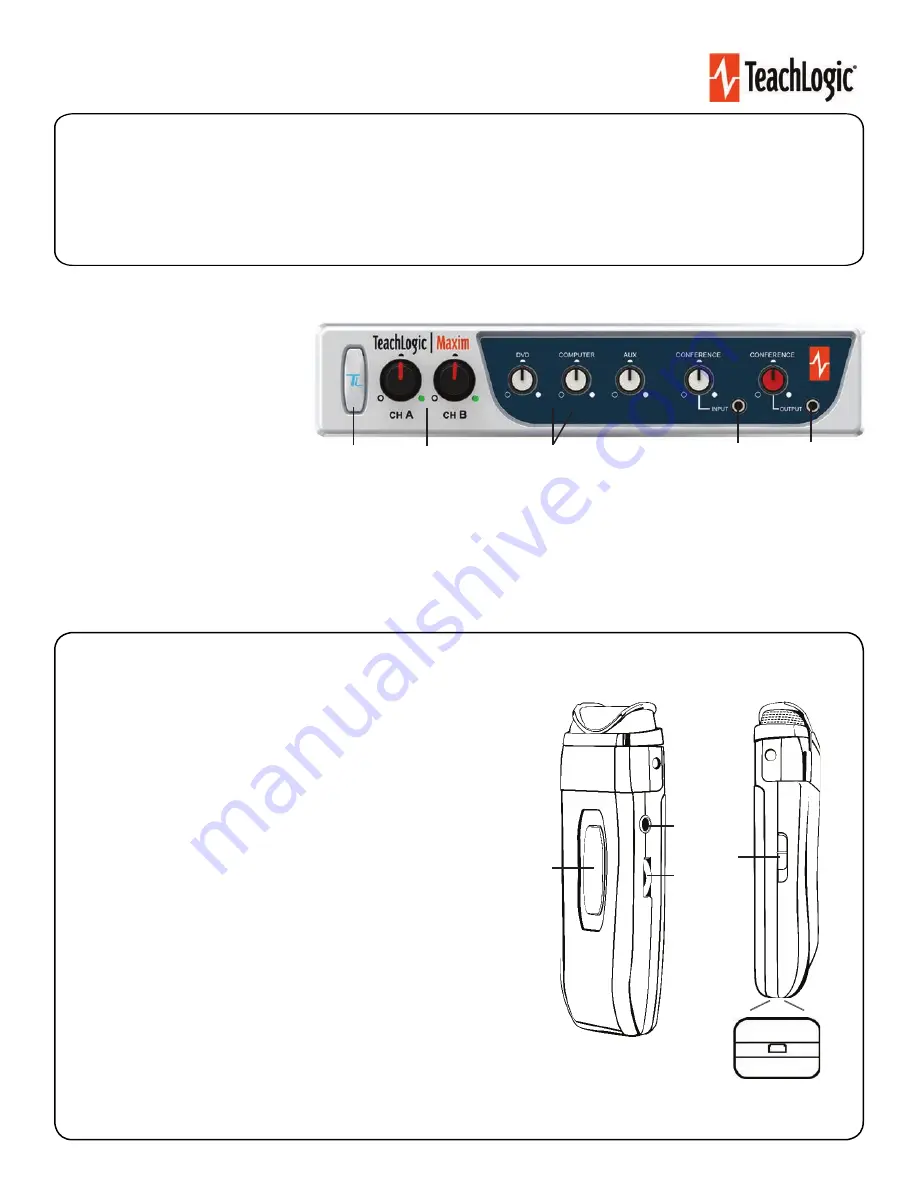
Getting to Know Your Sound System
Make note of the location of the speakers and ceiling sensor in your classroom. Ensure that you have unpacked and charged your battery-powered
microphones. Keep this guide handy for future reference.
1.
Power & Status Indicator
• Red: OFF
• Blue: ON and activated
• Amber: STANDBY
2.
Mic Channels/Volume Controls
• Green light: Microphone on and connected to
channel
• No light: Microphone is not on; and/or sensor is not plugged
in; and/or sensor is not receiving mic signal
.
Input Volume Controls
• Controls volume of connected external
devices
(1)
STEP 2. USING THE SAPPHIRE
TM
PENDANT MICROPHONE
1.
Power button and status indicator
• Solid Red: OFF
• Solid Blue: ON
• Solid Purple: External devices quieted
2.
Mute microphone:
y press power button once (flashing blue).
Unmute
microphone:
Briefly press power button again (solid blue).
.
Aux Input:
Connects devices (like music player) to microphone.
.
Priority Switch:
Changes volume of devices plugged into amp inputs
• To increase/decrease volume level: Slide button up or down
• To immediately quiet volume level of external device: Push button once
• To resume volume level of external device: Push button again
.
•
Ho d riority witch down or seconds. he power ight on the amp
wi ash green red then return to so id b ue.
.
Gain Switch
• There are 3 levels to adjust your microphone volume
• You may
reduce the volume
.
USB Charge Port
(found on the bottom of the mic)
1
2
3
4
.
.
STEP
1
. USING THE
2


