background image


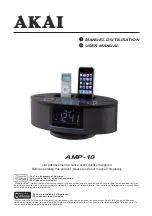
Instruction Manual 


R-4int 

FM


INTERNET Radio with  Docking for iPod® 

Summary of Contents for R-4iNT

Page 1: ...Instruction Manual R 4int FM INTERNET Radio with Docking for iPod ...

Page 2: ...ge the finish or remove the panel lettering 7 Do not block any ventilation openings The ventilation shall not be impeded by covering the ventilation openings with items such as newspapers table clothes curtains etc 8 Do not install near any heat source such as radiators heat registers stoves or other apparatus including amplifiers that produce heat 10 Protect the power cord from being walked on or...

Page 3: ...ial installation This equipment generates uses and can radiate radio frequency energy and if not installed and used in accordance with the instructions may cause harmful interference to radio communications However there is no guarantee that interference will not occur in a particular installation If this equipment does cause harmful interference to radio or television reception which can be deter...

Page 4: ...e climates Operate turning controls and switches as instructed in the manual Before turning on the power for the first time make sure the power cord is properly installed For safety reasons do not remove any covers or attempt to gain access to the inside of the product Refer any servicing to qualified personnel Do not attempt to remove any screws or open the casing of the unit there are no user se...

Page 5: ... to be exposed to dripping or splashing or objects filled with liquids such as vases to be placed on the equipment DON T place hot objects or naked flame sources such as lighted candles or nightlights on or close to equipment High temperatures can melt plastic and lead to fires DON T use equipment such as personal stereos or radios so that you are distracted from the requirements of traffic safety...

Page 6: ...es 18 Music player Mode 19 FM Mode 20 iPod Mode 22 AUX IN Mode 23 General Operation 24 Return to Main Menu 24 Setting Equaliser 24 Changing Volume 24 Changing the Station Information 25 Setting Station Presets 26 Selecting a Preset station 26 Setting Clock 27 Daylight savings 29 Setting Alarm 30 Sleep Function 33 System settings 34 Network setup 34 Language 34 Factory reset 35 Software Updates 36 ...

Page 7: ...Contents page ...

Page 8: ...2 Package Content Main unit adapter Instruction Manual ...

Page 9: ...or Wi Fi Protected Access WPA data encryption then you need to know the WEP or WPA code so you can get the Internet Radio to communicate with the network If your wireless network is configured for trusted stations you will need to enter the Radio s MAC address into your wireless access point To find the Radio s MAC address use menu items as follows Main menu System settings Network View settings M...

Page 10: ...b Press and hold to enter menu options BACK Press to return to previous menu page INFO Press to Display Queue information Press to decrease volume level Press to increase volume level a Turn the knob to change options press the knob to select b FM mode Press to searching next available station a When alarm is coming press to play SNOOZE function b Another condition press to setting SLEEP ...

Page 11: ...play pause 3 iPod mode press to repeat 4 MENU button Press or to scroll up or down iPod mode Press or to previous or next track 5 SNOOZE button 13 SELECT button 6 SLEEP button 14 iPod mode press to shuffle 7 MEMORY button 15 MUTE button 8 INFO button 16 VOLUME button 9 PRESET button 1 10 17 Press to adjust TIMBRE 10 clock button 18 DIMMER button ...

Page 12: ...switched on or off by press button For initial use it will ask you Setup wizard Step 2 Setup wizard 1 Continue above show press SELECT to confirm YES and then turn to your ideal hour format press SELECT to confirm 2 Turn to Update from Network and then press SELECT to confirm 3 Turn to your local timezone and then press SELECT to confirm ...

Page 13: ... confirm Radio will save it in memory Note In some cases radio may find more than one network Turn to your favorite one press SELECT to confirm 7 If your network is not configured to request a password WEP WPA radio will connect to the network and display 8 If a WEP WPA key password is required radio will ask you to input the WEP WPA code and display the password entry screen as follows ...

Page 14: ... a character Note a for its full name is Backspace b the method of select or icon is when cursor director to backward turn to select in turn c Select will be returned to previous track d Radio will automatically save the WEP WPA you ve input so no bother to re enter these codes e After selecting the final character of your password turn to and then press SELECT to confirm 9 Press SELECT to exit Th...

Page 15: ...U 10 While cursor point to Internet radio press SELECT While cursor point to Station list press SELECT to confirm After trying to connect to network if it say Please follow a Check your router see it working normally or not b Relocate your radio to a stronger signal position is necessary c Make sure your password is correct input ...

Page 16: ...oose a station as above photo show Note LOCATION enables you to choose from the radio stations provided by any country which you choose from a list a While cursor point to Location press SELECT to confirm b Turn until the display showing the region you want press SELECT to confirm use the same method to choose country station in turn Radio will now loading Note GENRE enables you to choose radio st...

Page 17: ... c Turn until the display shows the station you want press SELECT to confirm Note a Some radio stations do not broadcast 24 hours per day and some stations are not always on line b If this station has on demand content that is it gives an option of listening the old programs which have already been broadcast ...

Page 18: ...ress and hold MODE MENU to goes into Main Menu and then turn to System setup press SELECT to confirm 2 Turn to Network press SELECT and then turn to Manual settings press SELECT to confirm 3 While cursor point to Wired press SELECT to confirm and then turn to DHCP enable press SELECT to confirm The LAN setting is OK now ...

Page 19: ...ng Note Press MODE MENU you can view Internet Radio Music player FM and iPod AUX mode in turn Step3 Access Network Continue above steps few seconds later and it will say Or If this happens please follow a Check your Router see it working normally or not b Check your LAN cable make sure it hasn t damaged c See the port of cable which insert to LAN socket well ...

Page 20: ... Setting 1 Refer choose LAN setting which u can find at page 12 turn to Wireless press SELECT to confirm 2 While cursor point to DHCP enable press SELECT to confirm 3 Turn to the region of your location press SELECT to confirm Now setting to wireless is OK ...

Page 21: ...o your favorite option 3 Press SELECT to confirm and then step by step to your purpose program How to get Access code 1 After your radio has successfully connected to network turn to Help and then press SELECT to confirm Note at this step you can also listening radio FAQ solutions 2 While cursor point to Get access code press SELECT to confirm then you get it ...

Page 22: ...mber your registered Email address and Password 4 You will able to take advatage of the various additional features and services offered by the Frontier internet Radio Portal 5 How to play My favourites Your need two steps a While cursor point to My favourites press SELECT to confirm b Turn to your favourite station press SELECT to to loading Note You added my favourites stations will shows up at ...

Page 23: ... the various additional features and services offered by the Frontier internet Radio Portal 4 How to play My added stations Your need two steps a When cursor point to My added stations press SELECT to confirm b Turn to your favourite station press SELECT to to loading Note Your added stations will show up at my added stations subdirectory Doing a factory reset cannot erase them ...

Page 24: ...f the type of programme provided by either internet radio station or broadcaster 3 Reliability of Station This will show the degree of reliability of station which you are listening to 4 Signal Information of Station This shows the digital bit rate and the signal mode 5 Playback Buffer of Station This displays the playback buffer strength of current station 6 Date of Station This displays the date...

Page 25: ...is showing up Note Or enter Main menu and then turn to Music player press SELECT to confirm 2 While cursor point to Shared media press SELECT to confirm and then step by step to your selecting Music B Repeat play mode a At above step 1 turn to Repeat play Off press SELECT to shift Off to On C Shuffle play mode a At above step 1 turn to Shuffle play Off press SELECT to shift Off to On ...

Page 26: ...confirm 2 Turn to increase or decrease the frequency by 0 05MHz per step 1 To auto searching simply press SELECT Note a To auto searching the next active station repeat step 3 b The unit will display the frequency changing until it stops on the next station c After it reached to the end of the frequency range it will search again from the beginning of range B SCAN SETTING 1 FM mode at any step by ...

Page 27: ...21 C AUDIO SETTING 1 FM mode at any step by press BACK to enter and then turn to Audio setting press SELECT to confirm 2 Turn to select YES or NO and then press SELECT to confirm ...

Page 28: ... iPod Touch 1st Gen 16 iPod Touch 2 nd Gen 17 iPod Nano 4 th Gen 2 Insert your iPod into the iPod dock the Dock will begin to charge your iPod if necessary Charging will stop when the iPod is fully charged check the iPod screen 3 Press MODE MENU repeatedly until iPod is displayed 4 Select and play a track using your iPod or by turning to previous track or next track press SELECT to Play Pause 5 Ad...

Page 29: ...udio speaker system 3 Connect one end of the audio cable to the headphone or auxiliary out socket of your source device the other end connect to AUX IN socket on the rear of your radio The radio display will show 4 To gain optimal volume levels adjust the output volume level on both the source device and on radio itself is recommended Note AUX IN allows for quick and easy connection the MP3 player...

Page 30: ...at any time by pressing the BACK button Setting Equaliser Note set it can be change your radio timbre 1 It can be activated from Main menu System settings while cursor point to Equaliser press SELECT to confirm 2 Turn to your ideal one press SELECT to confirm Changing Volume Adjust the volume level by pressing or repeatedly Radio will remember its previous volume level ...

Page 31: ... It is possible to view the information that is displayed on the second line of the display when listening Internet Radio program To view more information you can press INFO repeatedly Note for this function AUX in mode is out of service ...

Page 32: ...ttons 1 10 on remote control until it say Selecting a Preset station To select a stored station 1 Enter corresponding mode by press MODE MENU repeatedly 2 Press one of PRESET buttons 1 10 on remote control is OK Note a Do not hold the button down if you do then the station currently playing will overwrite the one stored in the preset be careful ...

Page 33: ... confirm using the same method to set month year hour and minutes The Set Time Date is OK now You can also through Auto update for setting the clock Note Choose Auto update please ensure your radio is connecting to internet successfully 1 Turn to Auto update press SELECT to confirm 2 Turn to Update from Network press SELECT to confirm The Auto update is OK now ...

Page 34: ...rmat press SELECT to confirm 2 Turn to your selecting one press SELECT to confirm Set timezone 1 Turn to Set Timezone press SELECT to confirm 2 Turn to your location timezone press SELECT to confirm Until now the setting clock is perfect ...

Page 35: ...29 Daylight savings 1 It can be activated from Main menu System settings Time Date Daylight savings press SELECT to confirm 2 Turn to ON press SELECT to confirm ...

Page 36: ...menu Alarms press SELECT to confirm 2 Turn to the one you want setting press SELECT once more 3 While cursor point to Enable Off press SELECT to confirm and then turn to your desire alarm frequency press SELECT to confirm 4 Turn to Time 00 00 press SELECT to confirm turn to change hours and then press SELECT to confirm using the same method setting minutes ...

Page 37: ...urn to your purpose one Note Alternatively you may also turn to Preset Last listened to choice alarm sound 6 Press SELECT to confirm and then turn to Volume 12 press SELECT to confirm and then turn to to your desire volume 9 Press SELECT to confirm finally turn to Save press SELECT to confirm ...

Page 38: ... time is 5 minutes per step Note While in SNOOZE function the relative alarm should be twinkling and shows how long it will be elapsed To cancel Alarm you need to convert alarm On to Off a Press ALARM 1 or ALARM 2 on remote control to enter alarms setting mode b While cursor point to Enable Daily or other frequency press SELECT to enter c Turn to Off press SELECT to confirm d Turn to Save remember...

Page 39: ...e sleep period which between 0 60 minutes 3 When your purpose period is appeared simply stop turning Note a The interval time is 15 minutes per step B At this step and sleep icon shows up as well as show how long it will be expired 4 Radio will now automatically put itself into standby mode after it has elapsed 5 To continue enjoying your program press button ...

Page 40: ...ction to another wireless network or to manually configure the network parameters 1 It can be activated from Main menu System settings Network press SELECT to confirm 2 Turn to your purpose one press SELECT to confirm Language 1 It can be activated from Main menu System settings Language press SELECT to confirm 2 Turn to your purpose one press SELECT to confirm ...

Page 41: ...ively return to its default factory settings 1 It can be activated from Main menu System settings Factory reset 2 Press SELECT to confirm and turn to YES 3 Press SELECT to confirm Note If you do not wish to continue at step 2 turn to select NO and then press SELECT to cancel this order radio will revert to its previous operating condition ...

Page 42: ...setting press SELECT and then turn to YES 3 Press SELECT to confirm then your radio shows as above step 2 turn to Check now press SELECT to confirm Following is It s completed until now Note software update can take several minutes do not switch Radio off until this procedure has been completed Otherwise may cause permanently damaged ...

Page 43: ...System settings Setup wizard press SELECT to confirm 2 Then step by step to set it SW Version and Radio ID 1 It can be activated from Main menu System settings Info 2 Press SELECT to confirm This information may be requested when dealing with technical support issues ...

Page 44: ...s Backlight and then press SELECT to confirm 2 While cursor point to Power On level press SELECT to confirm 3 Turn to your purpose one press SELECT to confirm B Setting Power On level 1 At above step 1 turn to Standby level press SELECT to confirm 2 Turn to your purpose one press SELECT to confirm ...

Page 45: ... the network you need to set up media sharing so that you can share music with your Radio The following steps describe how to set up media sharing in Windows Media Player 11 1 In Windows Media Player 11 click the small arrow below the Library tab and then click Media Sharing 2 In the Media Sharing dialogue box select the Share my media check box ...

Page 46: ...d select Properties your Radio s MAC address will be shown Step 2 Play Music on the Internet Radio After installing and configuring your Radio and Windows Media Player 11 you are now ready to play music via a wireless connection The following steps describe how to play music with your Radio 1 Select UPNP Servers in the Media Player menu 2 Select the computer you wish to play the music files from 3...

Page 47: ...tch off the firewall Under the Internet section switch off Internet Sharing Accounts Setup From the System Preferences window in the System section click on Accounts Select an account and remember its Short Name and password This will be used for the Radio to connect to the MAC Directory Setup From the Dock click on Finder From Finder click on Applications then Utilities Click on More Info for Dir...

Page 48: ...rect key or password into the Radio Remember that text format keys are case sensitive If when attempting to connect to an encrypted network your Radio displays Wireless error followed by a 5 digit number then please ensure that you enter the correct passphrase for the network If the problem persists then you may need to consult your network configuration 5 If your Radio can connect to the network ...

Page 49: ...n 300mm x 200mm x 50mm This product has been designed specifically to work with iPod and has been certified by the developer to meet Apple performance standards This symbol on the product or in the instructions means that your electrical and electronic equipment should be disposed at the end of its life separately from your household waste There are separate collection systems for recycling in the...

Reviews: