Teac DVW-D110, User Manual
The Teac DVW-D110 user manual is a comprehensive guide for successfully operating your device. This manual is available for download absolutely free at manualshive.com, ensuring easy access to all the information you need to fully utilize and enjoy your Teac DVW-D110.
Share
Download


Reviews:
No comments
Related manuals for DVW-D110
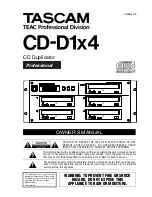
CD-D1X4
Brand: Tascam Pages: 22

EXPLORER 1
Brand: Teac Pages: 2

SAS-MS118
Brand: U-Reach Pages: 23

BravoPro Xi
Brand: Primera Pages: 2

BravoPro autoprinter
Brand: Primera Pages: 42

CD Color Printer IV
Brand: Primera Pages: 44

CD Color Printer Pro
Brand: Primera Pages: 44

Disc Publisher II
Brand: Primera Pages: 47

DP-4202 XRP
Brand: Primera Pages: 56

DP-XRP
Brand: Primera Pages: 64

CD Color Printer III
Brand: Primera Pages: 68

DUP-07
Brand: Primera Pages: 77

DeskJet 9xx
Brand: Alea Systems Pages: 41


