TCL S4310, Quick Start Manual
The TCL S4310 user manual is available for free download at manualshive.com. This quick start manual provides easy-to-follow instructions, allowing users to effortlessly set up and maximize the potential of their TCL S4310. Enhance your product experience by downloading the comprehensive manual today.
Share
Download


Reviews:
No comments
Related manuals for S4310

HT-UP30
Brand: Samsung Pages: 36

TVHS10100
Brand: Abus Pages: 15

TVVR30004
Brand: Abus Pages: 162

Terxon MX
Brand: Abus Pages: 82

V300
Brand: Tannoy Pages: 11

SB600
Brand: Salus Pages: 2

Multiplexer
Brand: U-Prox Pages: 3

TVAC71070
Brand: Abus Pages: 14

4.3
Brand: Uconnect Pages: 45

GROOVE
Brand: YA Pages: 14

OTC ARXIS pulse P403L
Brand: Daihen Pages: 188

Assist Media
Brand: Loewe Pages: 100
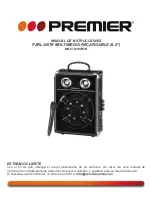
BB-5123USBTB
Brand: Premier Pages: 17

DIN-100AT
Brand: J.W. Davis Pages: 2

NC - mod4
Brand: Alphatech Pages: 38

M-10SV2
Brand: iKEY-AUDIO Pages: 20

LHD60008
Brand: LONGHORN Pages: 15

VT592
Brand: M-E Pages: 4


