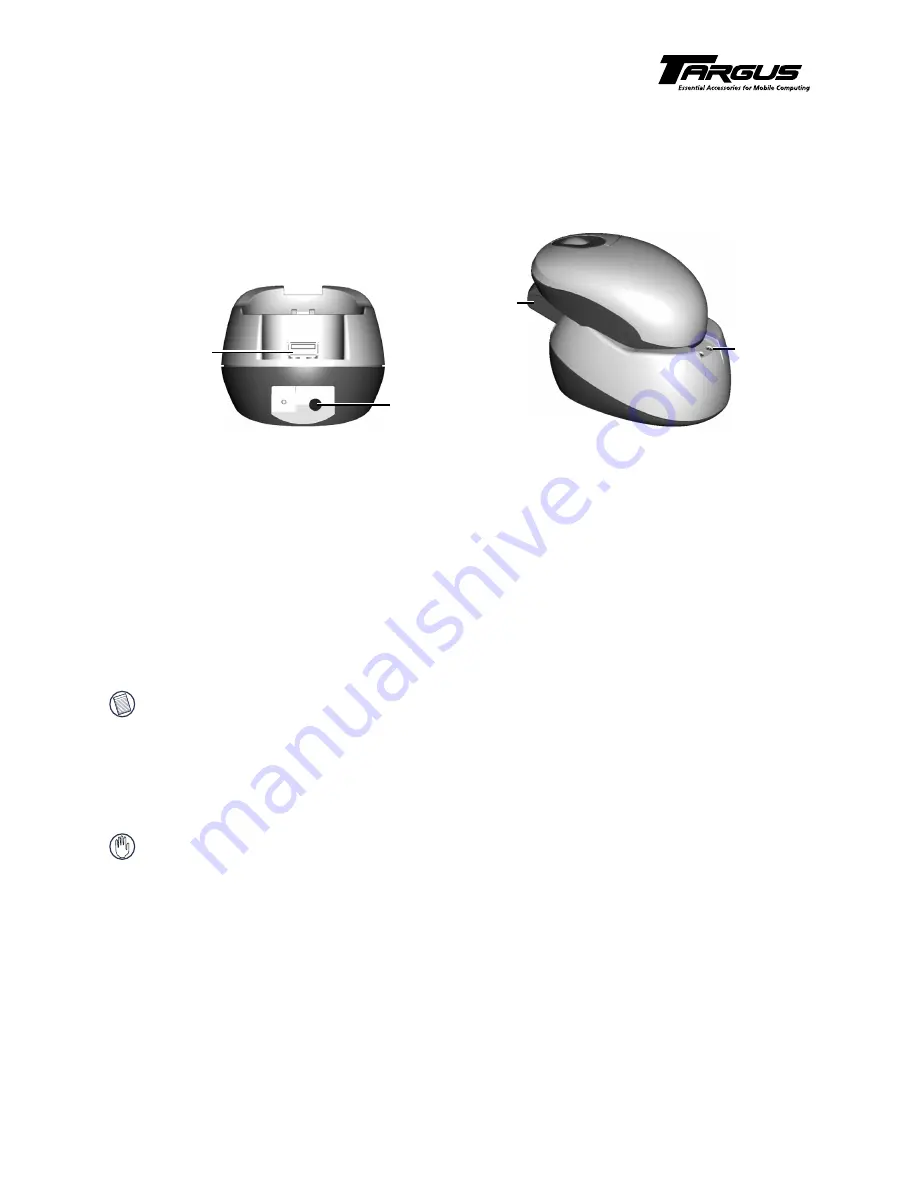
RF Optical Mouse Charger
Setting Up the Charger
1 Insert the DC connector end of the adapter into the DC jack on the back of the charger.
RF Optical Mouse Charger
2 Plug the adapter into an available power outlet.
The charger’s LED light glows red.
3 Plug the standard USB end of the receiver into the USB port on the back of the charger.
For optimal performance and RF reception, place the charger at least 8 inches (20 cm) away from all electrical
devices, such as your monitor, speakers or external storage devices.
Installing the Batteries
Before seating your mouse in the charger, you must install the supplied heavy-duty NiMH rechargable batteries to
avoid possible damage.
To install the batteries:
1 Remove the battery cover from the bottom of the mouse by pressing the battery cover tab and sliding it off.
NOTE: The battery cover is also the top cover of the mouse.
2 Remove the current batteries (if installed).
3 Insert the supplied batteries, making sure that the positive (+) and negative (-) ends of each battery match the
polarity indicators inside the battery housing.
4 Slide the battery cover back into position until it “clicks” firmly into place.
The optical sensor, located on the bottom of the mouse, glows red.
WARNINGS: When replacing the batteries, use only heavy-duty NiMH rechargeable batteries. Avoid mixing new
and used batteries in a device. Never use an alkaline battery with a NiMH battery in a device.
Charging the Batteries for the First Time
Before you use your mouse, you must fully charge the batteries. To do this:
1 Seat your mouse in the charger so that it makes a firm connection with the charging plates.
2 Plug the power adapter into an available power outlet (if unplugged).
3 Allow the mouse to remain in the charger for at least ten hours before using it.
USB port
DC jack
LED
Mouse
receiver


