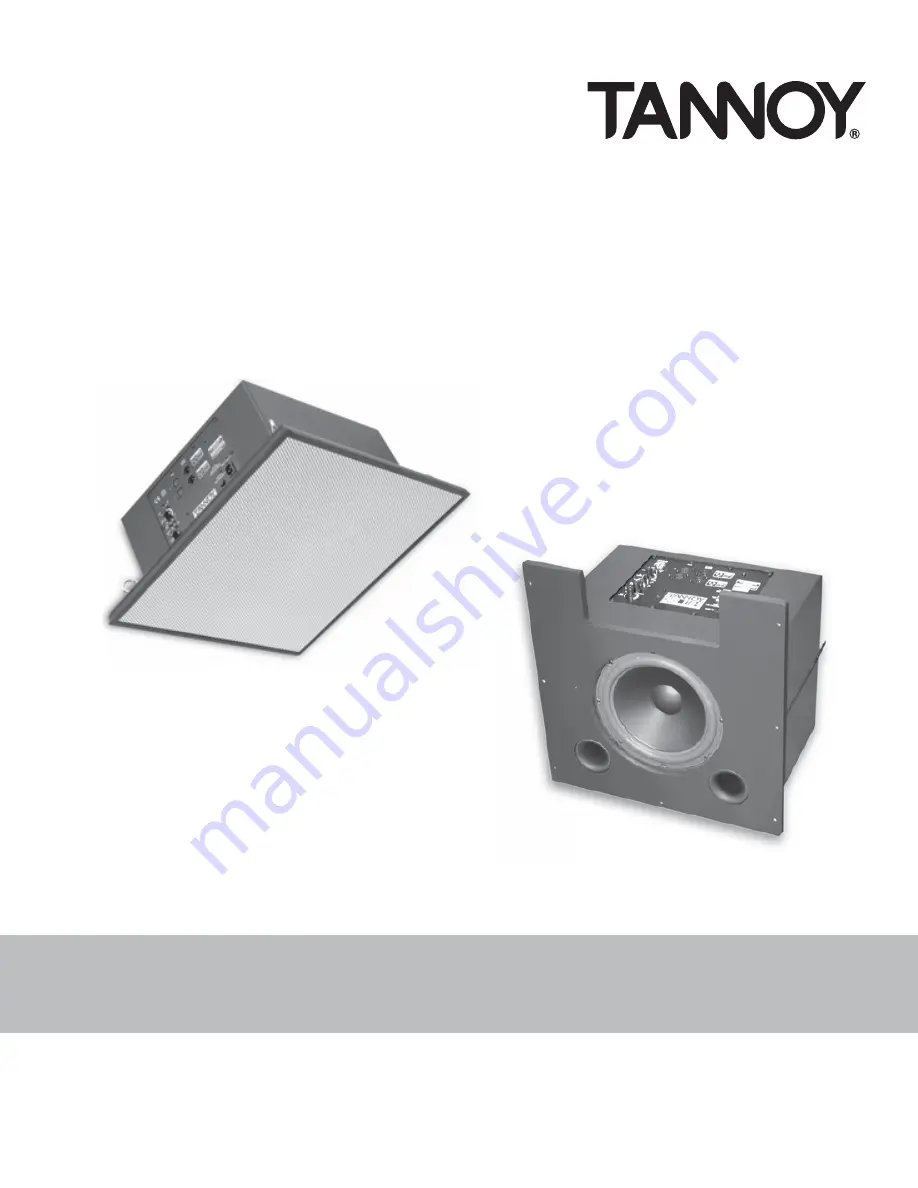
Tannoy 110 Series, Owner'S Manual
The Cisco 110 Series product offers seamless networking solutions for small businesses. To get started quickly and conveniently, you can download the free Quick Start Manual from our website. Explore the comprehensive user manual, download it for free at manualshive.com, and unlock the full potential of your Cisco 110 Series device.
Share
Download


Reviews:
No comments
Related manuals for 110 Series

PS60
Brand: JBL Pages: 38

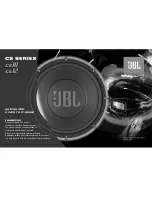
CS1014
Brand: JBL Pages: 4
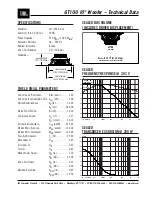
GT100
Brand: JBL Pages: 2
CS10
Brand: JBL Pages: 3

8
Brand: JBL Pages: 16
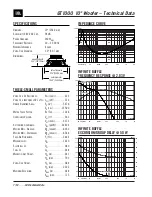
GT1000
Brand: JBL Pages: 3

PS110
Brand: Tannoy Pages: 4

SW-200
Brand: Aaron Pages: 3

SW-200
Brand: Aaron Pages: 4

SW-200
Brand: Aaron Pages: 2

GT series
Brand: JBL Pages: 8
SW-10
Brand: Tapco Pages: 16

ES Series
Brand: YORKVILLE Pages: 16

BC Series
Brand: Danley Pages: 8
X8
Brand: M&K Sound Pages: 20

SUB-120
Brand: Aaron Pages: 4
SW-400
Brand: Aaron Pages: 2
SANTORIN 21
Brand: CABASSE Pages: 14


