Tajfun RCA 400 joy, Operating Instructions Manual
Introducing the Tajfun RCA 400 joy, a remarkable power-packed machine designed for all your forestry needs. To assist you in harnessing its full potential, we provide a comprehensive Operating Instructions Manual. Download this manual for free from our website and unlock the key to operating your Tajfun RCA 400 joy effortlessly.
Share
Download


Reviews:
No comments
Related manuals for RCA 400 joy

THPLS7TP
Brand: The Handy Pages: 24

486.2454
Brand: Craftsman Pages: 8

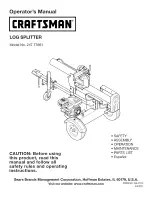
247.77640
Brand: Craftsman Pages: 60

247.77614
Brand: Craftsman Pages: 96

247.794500
Brand: Craftsman Pages: 29

247.776411
Brand: Craftsman Pages: 56
247.77661
Brand: Craftsman Pages: 60

247.794510
Brand: Craftsman Pages: 28

247.794520
Brand: Craftsman Pages: 28

L110-075001
Brand: Swisher Pages: 20

L108-224015
Brand: Swisher Pages: 40

AE95K105-8
Brand: Asist Pages: 94


