205
ENGLISH 782, 781, 760, 761, 782A / 502, 501, 560, 561, 502A_V1.4
USER’S MANUAL
Please read instructions thoroughly before operation and retain it for future reference.
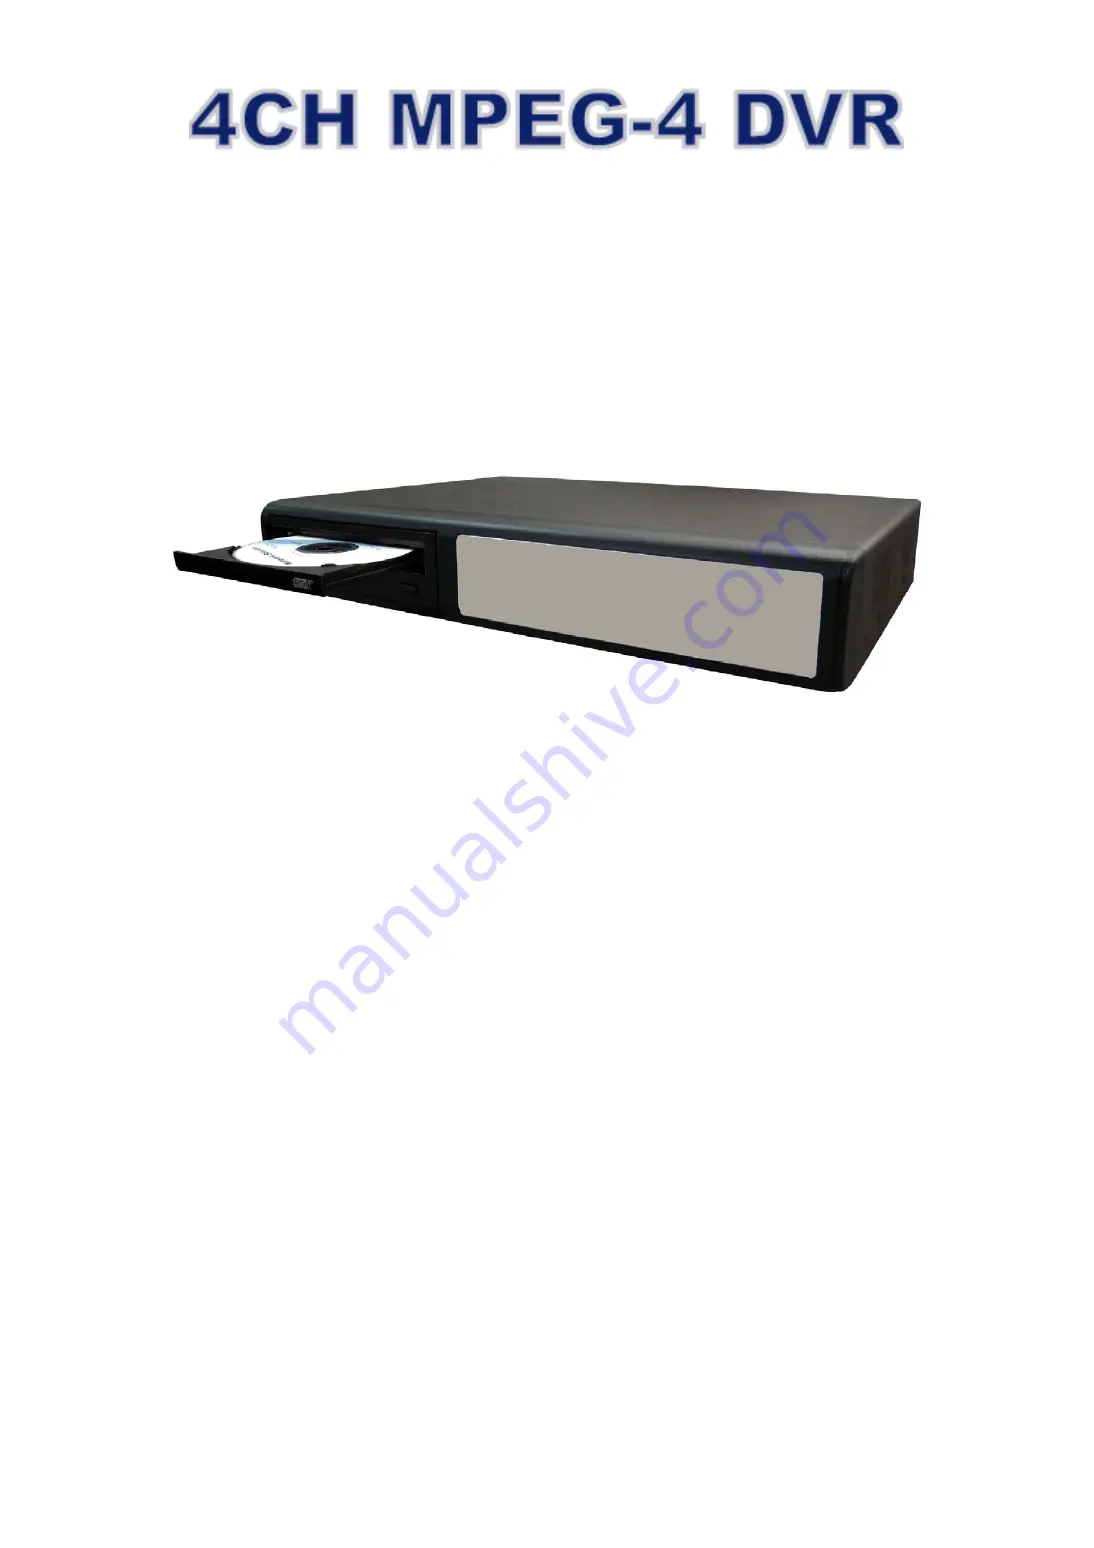
The image shown above may differ from the actual product appearance.
Page 1: ...82 781 760 761 782A 502 501 560 561 502A_V1 4 USER S MANUAL Please read instructions thoroughly before operation and retain it for future reference The image shown above may differ from the actual product appearance ...
Page 2: ...ATENT PORTFOLIO LICENSE FOR THE PERSONAL AND NON COMMERCIAL USE OF A CONSUMER FOR i ENCODING VIDEO IN COMPLIANCE WITH THE MPEG 4 VISUAL STANDARD MPEG 4 VIDEO AND OR ii DECODING MPEG 4 VIDEO THAT WAS ENCODED BY A CONSUMER ENGAGED IN A PERSONAL AND NON COMMERCIAL ACTIVITY AND OR WAS OBTAINED FROM A VIDEO PROVIDER LICENSED BY MPEG LA TO PROVIDE MPEG 4 VIDEO NO LICENSE IS GRANTED OR SHALL BE IMPLIED F...
Page 3: ...etting 9 3 6 LAN or Internet Setup 9 3 6 1 STATIC IP 9 3 6 2 DDNS Apply 10 3 6 3 Dynamic IP PPPOE 10 3 6 4 Dynamic IP DHCP 11 3 7 Password and User Name Setting 12 3 7 1 DVR Password Setting 12 3 7 2 Remote Login Password and User Name Setting 12 3 8 System Diagram 12 4 BASIC OPERATION 13 4 1 Recording 13 4 2 Playback 14 5 MAIN MENU 15 5 1 Menu Tree 15 6 MENU FUNCTION 16 6 1 Record 16 6 2 Timer 17...
Page 4: ... 4 1 AP Playback Functions 35 7 4 2 Convert the recorded file to AVI format 36 7 5 System Configuration 36 7 5 1 Network 36 1 DDNS 37 2 Mail 38 3 FTP 38 7 5 2 DVR 39 1 Device 39 2 Detection 40 3 Network Backup 40 4 Search List 42 5 Timer Record 43 6 Date 43 7 Record Setting 44 7 5 3 Alarm 44 1 Alarm List For Model 5 Only 45 7 5 4 General 46 1 Account 46 2 Online User Info 47 3 File Path 47 7 6 Ope...
Page 5: ... Free Upgrade to Advanced Functions Allow you to upgrade DVR functions without any charges Long Recording Hours Model 1 2 5 500GB can record more than 18 days 4CH Frame Best Quality 30IPS Model 3 4 500GB can record more than 5 days 4CH Frame Best Quality 30IPS Backup Function For model 1 5 support CD writer USB flash drives and network remote recording backup For model 2 4 support image backup wit...
Page 6: ... 3 IPS PAL CIF 120 60 30 15 IPS NTSC 100 50 25 12 IPS PAL Multi language OSD YES Image Quality Setting Best High Normal and Basic Hard Disk Storage Accommodate 1 HDD IDE type ATA66 support HDD capacity over 500GB HDD is optional HDD Quick Cleaning Quick clean up the index system of the recorded files 500GB under 2 seconds Recording Mode Manual Timer Motion Alarm Remote Watermark YES Refresh Rate 1...
Page 7: ...stable Hue Color Contrast Brightness Date Display Format YY MM DD DD MM YY MM DD YY and Off Power Source DC 19V Power Consumption 42 W Operating Temperature 10 40 50 104 Dimensions mm 375mm W 61mm H 281mm D 343mm W 59mm H 223mm D 343mm W 59mm H 223mm D 345mm W x 68 3mm H x 225mm D 375mm W 61mm H 281mm D System Recovery System auto recovery after power reconnected Optional Peripheral VGA converter ...
Page 8: ...ep3 Press or to select the channel you want to switch its position with the one selected in Step2 Step4 Press ENTER button to confirm the setting For example the position of CH2 CH4 is switched as shown on the right side Under the playback mode you can select a channel to display the live video instead of the playback video Step1 Press Set to highlight one channel Step2 Press UP DOWN LEFT RIGHT bu...
Page 9: ... fast rewind forward 14 SLOW ZOOM AUDIO or Audio Press these two buttons at the same time to select live or playback sounds of the audio channels 15 SEQ P T Z or PTZ Press these two buttons at the same time to enter exit the PTZ control mode In the PTZ control mode Zoom in Press button Zoom out Press button Adjust PTZ angle Press direction buttons to turn up down left right 16 Switch NTSC PAL Syst...
Page 10: ...UT LAN ACT LINK 1 CALL MONITOR IN OUT 2 USB INP UT V D MODEL 3 INP UT DC 19V V D 1 LOOP EXTERNAL I O INPUT 2 LOOP LOOP LOOP 3 INP UT 4 INP UT LAN ACT LINK 1 CALL MONITOR IN OUT MODEL 4 USB INP UT DC 19V V D 1 LOOP EXTERNAL I O IR INPUT 2 LOOP LOOP LOOP 3 INP UT 4 INP UT LAN ACT LINK 1 CALL MONITOR IN OUT MODEL 5 1 LOOP EXT ERNAL I O INP UT 2 LOOP LOOP LOOP 3 INP UT 4 INPU T LAN ACT LINK 1 CALL M O...
Page 11: ... Audio IN Connect to audio sources such as cameras equipped with the audio function When users start recording the audio input will also be recorded 6 Audio OUT Connect to a monitor or speaker with 1 mono audio output 7 USB For MODEL 1 2 4 5 Support USB flash drive firmware update and file backup Note For the list of compatible USB flash drives please refer to APPENDIX 5 COMPATIBLE USB FLASH DRIVE...
Page 12: ...ra please connect the RS485 A line brown of the PTZ camera to the PIN11 of the DVR DSUB solder side and connect RS485 B line orange to the PIN10 of the DVR DSUB solder side And then solder them together in case of loosening Note For detailed camera ID protocol and baud rate setup at DVR side please refer to section 6 4 5 Remote at page 22 For detailed camera ID protocol and baud rate setup at remo...
Page 13: ...y when the recording function is activated it s recommended to clear all HDD data and start recording again 3 6 LAN or Internet Setup 3 6 1 STATIC IP 1 Build a Local Area Network LAN between DVR and PC NB with network cable Your NB PC and DVR must be under the same network domain to build the area network Please change the IP address of your PC NB into 192 168 1 X X can be the number between 1 255...
Page 14: ...ith network cable Your NB PC and DVR must be under the same network domain to build the area network Please change the IP address of your PC NB into 192 168 1 X X can be the number between 1 255 except 10 and the subnet mask into 255 255 255 0 for communicate with the DVR Install the supplied AP software on your NB PC And then login the DVR with the supplied AP software for the following default D...
Page 15: ...ollowing default DVR settings The DVR default IP address 192 168 1 10 The DVR default account password admin The DVR default port 80 2 Set DVR network setting in SYSTEM CONFIG Network of the supplied AP In the SYSTEM CONFIG Network of the supplied AP select the DHCP in IP TYPE section Then press APPLY button to confirm the setting Set DVR DDNS setting in the SYSTEM CONFIG DDNS of the supplied AP s...
Page 16: ...ming video and sequencing display shifting the channel display and locking keys 3 7 2 Remote Login Password and User Name Setting In the SYSTEM CONFIG Account of the supplied AP software you can set up user accounts max 5 accounts password life time and authority level max 5 users on line at the same time for remote login to the DVR For detailed instructions please refer to 1 Account in the sectio...
Page 17: ...d time Recording is scheduled by TIMER function Indicated by the wording TIMER RECORD on the monitor Note When the recording function is activated please DO NOT change the date or time on your DVR The recorded data will be disordered and you will not be able to find the recorded data to backup by time search If users change the date or time accidentally when the recording function is activated ple...
Page 18: ...ive monitoring mode Channel Display Mode Display mode Press button to show the 4 channel display modes Full screen view Press one of the number buttons from 1 4 to show the selected channel in the full screen Under the playback mode you can select a channel to display the live video instead of the playback video For details please refer to Position of Channel Display in section 2 1 Front Panels at...
Page 19: ...DOWN LEFT RIGHT Move the cursor Choose numbers selections ENTER Go to the submenu confirm the selection MENU Go to the menu list confirm the change exit the menu list Note The supported functions of Backup IR remote control and R E T R vary according to the model you re using Please refer to the specification ...
Page 20: ...your HDD When the HDD is full under O W recording mode this device will clear 8GB data from the oldest for continuous recording without notice 5 RECORD IMG SIZE Select one of the image sizes FRAME or CIF Note When changing the record image size please stop recording first 6 RECORD QUALITY Select one of the 4 quality options BEST HIGH NORMAL BASIC 7 MANUAL RECORD IPS Select the images per second fo...
Page 21: ...st For details please refer to the section 6 1 Record at page 16 6 3 Date In this menu list you can set up the system date and time for this device Note When the recording function is activated please DO NOT change the date or time on your DVR For details please refer to the section 4 1 Recording at page 13 Press MENU button on the front panel to enter the main menu list Move the cursor to DATE an...
Page 22: ...efault title is the channel number Move the cursor to the camera title you want to change and press ENTER to access the character selection screen Assign a new name to the camera up to six characters letters or symbols 2 BRIG CONT SATU HUE You can adjust the brightness contrast saturation hue of each channel here The default value of BRIG is 110 and others are 128 The value is adjustable from 0 to...
Page 23: ... size of one object the number of the grids on the screen The smaller the value is the higher sensitivity for motion detection The highest sensitivity setting is 00 and the lowest sensitivity setting is 15 The default setting is 03 Note The default setting of SS is 03 which means once an object is detected more than 3 grids the system will get triggered So the value of SS must be less than the num...
Page 24: ...TOR OUT MAIN HDD INFO OSD SETUP EVENT LOG WATERMARK ON The submenu items are described below 1 TITLE DISPLAY Select to display the channel title or not ON OFF 2 DATE DISPLAY Select to display the date or not ON OFF 3 HDD INFO Select to display HDD remaining capacity or not ON OFF 4 LOSS SCREEN Set the color for the video loss screen BLUE BLACK 5 PLAYBACK INFO Set the position where playback inform...
Page 25: ...will see a similar screen as the following ADVANCE ALERT CAMERA EXT ALERT ON DETECTION INT BUZZER ON DISPLAY KEY BUZZER ON ALERT VLOSS BUZZER ON REMOTE MOTION BUZZER ON SYSTEM ALARM BUZZER ON NETWORK HDD BUZZER ON BACKUP HDD NEARLY FULL GB 05 HDD INFO ALARM DURATION SEC 05 EVENT LOG PRE ALARM OFF The submenu items are described below 1 EXT ALERT Select to enable or disable the sound when any exter...
Page 26: ... the connected camera for each channel 3 ID Set the ID number 0 255 for a PTZ camera After connecting to a PTZ camera correctly the default ID of the PTZ camera will be shown on the screen 4 PROTOCOL Select NORMAL our protocol or P D PELCO D protocol 5 RATE Set the baud rate of each channel 2400 4800 9600 19200 57600 For the connected cameras such as PTZ and speed dome cameras etc please make sure...
Page 27: ...for Model 1 2 4 and 5 Press ENTER and select YES to confirm upgrade or NO to cancel Note To use this function you need to have the upgrade file saved in a compatible USB flash drive and insert it into the USB port at the front or rear panel Note Do not disconnect the power of your DVR while the upgrade process is in progress or the DVR functions may not work normally or be unable to use 9 R E T R ...
Page 28: ...This PPPoE function needs to have one username and one password subscribed from one ISP supplier For detailed PPPoE settings please follow the AP Licensed Software AP setup and then refer to the section 3 6 4 Dynamic IP DHCP at page 11 and 1 DDNS in section 7 5 1 Network at page 37 DHCP The DHCP function needs to be supported by a router or a cable modem network with DHCP services For detailed DHC...
Page 29: ...ETWORK BACKUP HDD INFO EVENT LOG 1 USB BACKUP USB backup function is only for Model 1 2 4 5 Before making USB backup please check if a The USB flash drive is supported by your DVR If not the message USB ERROR will be shown on the screen For the list of the compatible USB flash drives please refer to APPENDIX 5 COMPATIBLE USB FLASH DRIVE BRAND at page 55 b The format of your USB flash drive is FAT ...
Page 30: ...LE SIZE 600 MB CHANNEL z 01 z 02 X 03 X 04 HDD NUM HDD MASTER 1 BACKUP TO DISK START The submenu items and their functions are the same as USB BACKUP except for BACK TO DISK item The process below describes how to make a disk backup Press EJECT button to open the disk tray Put the CD into a CD RW drive and press EJECT button again to close the disk tray Go to DISK BACKUP menu and set the start tim...
Page 31: ...CTION NET LIST DISPLAY SYSTEM LOG ALERT OTHERS REMOTE CLEAR ALL SYSTEM NETWORK BACKUP HDD INFO EVENT LOG The submenu items are described below 1 VLOSS LIST Show the information of the video loss time 2 NET LIST Show the information of the net login time 3 SYSTEM LOG Show the error codes for system errors For the meaning of each error code please see the following list Error Code in SYSTEM LOG Mean...
Page 32: ...tters stand for the following R RECORD S SYSTEM A ALARM MS MOTION T TIMER 3 RECORD LIST List the time of manual recorded files 4 SYSTEM LIST List the time of system recorded files Under the manual recording mode the DVR system will save one recorded file every one hour 5 ALARM LIST List the time of alarm trigger recorded files 6 MOTION LIST List the time of motion trigger recorded files 7 EVENT SE...
Page 33: ...tions may not work normally or be unable to use 1 Firmware Multilanguage OSD Upgrade Use USB to upgrade Please format the USB memory device as FAT 32 format first Get the upgrade files from your distributor Save the upgrade files in your USB device do not change the file name Go to MAIN MENU SYSTEM UPGRADE and press ENTER button Select YES and press ENTER button again to confirm upgrade For detail...
Page 34: ...the motion detection area first 1 Setup Motion Detection Function Activate motion detection function and setup the motion detection area and sensitivity Please refer to section 6 4 2 Detection at page 18 or section 2 Detection at page 40 AP software system configuration 2 Activate the R E T R Function From DVR front panel Press Menu and buttons on the DVR front panel at the same time R E T R funct...
Page 35: ... IP PPPOE at page 10 and section 3 6 4 Dynamic IP DHCP at page 11 For detailed DDNS apply please refer to section 3 6 2 DDNS Apply at page 10 4 User Name and Password Setting For detailed user name and password setting please refer to section 3 7 2 Remote Login Password and User Name Setting at page 12 7 2 Login Panel After setting up the network information remote login user name and password dou...
Page 36: ...the specified destination set in SYSTEM CONFIG FILE PATH Snapshot Path g Record Press this button to start recording and press this button again to stop recording The recorded files will be saved to the specified path on the PC Each recorded file can be up to 18 000 frames When the recorded file is full a new recorded file will be saved as the second file If the HDD space is less than 200MB the pr...
Page 37: ...to confirm the selection and return to the upper menu exit the menu mode Via software AP or IE browser you can remote login to the DVR but if the user name and password that you used is not the supervisor level you are not allowed using this function For detailed user name and password setting please refer to 1 Account in the section 7 5 4 General at page 46 Press buttons to move the cursor and ma...
Page 38: ...s m Zoom Tele Zoom Wide n Focus Near Focus Far o Continuously Zoom In Continuously Zoom Out p Enter Press this button to confirm the settings or enter your selection q Menu Up Down Left Right Press button to enter the PTZ menu to confirm the selection and return the upper menu exit the menu mode Press buttons to move the cursor and make the selection r Turbo ON OFF To speed up menu selection or th...
Page 39: ... with the audio and video synchronously Watermark Proof the authenticity of the backup video In the playback mode of the software AP you can press this button to check the authenticity of the BACKUP VIDEO If the BACKUP VIDEO had been altered the video image will turn to light red and the playback will be paused Open Previous File Open the previous backup video When users pause the playback press t...
Page 40: ...to an LAN or Internet PPPoE and DHCP network connection types are required to apply a DDNS service to get a Hostname to correspond to a dynamic IP address Please refer to section 3 6 2 DDNS Apply at page 10 for details Web Port The DVR can be viewed over the network with the licensed software AP or the IE web browser Typically the default TCP port used by HTTP is 80 However in some cases it is bet...
Page 41: ...7 for details When all the settings are completed press APPLY DHCP This DHCP function needs to be supported by a router or cable modem network with DHCP services Choose DHCP IP type Then select Network DDNS to set DDNS settings see 1 DDNS at page 37 for details When all the settings are completed press APPLY Note Some router brands may need to restart the DVR to get the IP address 1 DDNS You need ...
Page 42: ...he Alarm menu first Note Users can assign up to 4 mail accounts for E mail notification Mail Notification Function a Add the recipients E mail accounts in Mail Account column Please type the entire E mail address in the Mail from column to ensure E mails will not be blocked by SMTP For detailed information SMTP server username and password please check with your E mail service supplier b Some mail...
Page 43: ...e CAMERA PTZ according to the connected cameras for each channel Press Edit to enter the setting box The submenu items are described below a Device Type Choose either normal camera or PTZ camera b ID No Set the ID number 0 255 of the installed external PTZ device c Protocol Type Choose NORMAL protocol for our own brand camera Choose P D protocol for PELCO D protocol camera d Baud Rate Set the baud...
Page 44: ...K and then press APPLY button to confirm Note This function can also be setup at the DVR side Please refer to section 6 4 2 Detection at page 18 3 Network Backup You can backup the recorded data from the DVR directly to your PC and CD via the network The backup file can be played directly in your PC via the supplied licensed AP or via other media players Ex Windows Media Player or RealPlayer after...
Page 45: ...to a CD After pressing Start Write CD Setting pop up window will show on the screen Choose Close Disc when you don t want to write any more data to this CD after this burning choose Append Player when you want to play the backup file on another PC which doesn t have any available player to play it Press OK to start making a CD backup or press CANCEL WRITING CD to only make a backup file to your PC...
Page 46: ... page 35 4 Search List In DVR Æ Search List you can quickly search the event logs from 4 kinds of recording and directly backup the event recording of the chosen event log HDD Number Select the HDD from which you want to search recording data in the drop down menu List Type Select the event type you want to view from the drop down menu ALL MANUAL SYSTEM ALARM MOTION Max List Number Set the maximum...
Page 47: ...date for your DVR Please DO NOT change the date or time when the recording function is activated For details please refer to the section 4 1 Recording at page 13 Note The same settings can also be made in the DVR Refer to the section 6 3 Date at page 17 for details DATE Choose the current date from DATE drop down menu and enter the current time When you click the drop down menu a calendar shown fo...
Page 48: ... drop down menu OVERWRITE Specify whether to overwrite the HDD capacity when the HDD is full YES NO RECORD IMG SIZE Choose FRAME or CIF This selection will affect the available IPS options of the recording modes described above RECORD QUALITY 4 options are available from the drop down menu BEST HIGH NORMAL and BASIC TOTAL IPS SHARE Choose the total IPS share as FIX or GROUP Press APPLY to confirm ...
Page 49: ... Network Æ FTP if any alarm is triggered Post Numbers Set the number of MJPEG pictures 1 10 which will be sent with the chosen alarm method s Alarm Duration Set the duration time of motion trigger recording 5 SEC 10 SEC 20 SEC 40 SEC Alarm Refresh Press to clear the alarm icon shown on the screen 1 Alarm List For Model 5 Only In Alarm Æ Alarm List you can view the detailed information of alarm eve...
Page 50: ...wn on the top of the AP live viewer up to 8 characters 1 Account In General Æ Account you can view the current user account information set the maximum user number and add delete edit user accounts To set the maximum user number key in the number from 1 5 in Max User s To create a new account press ADD and you will see the setting window as the following To confirm account creation press OK to dis...
Page 51: ...ill be removed and this operation cannot be recovered 2 Online User Info In General Æ Online User Info you can view the current online user account information This view can be updated by pressing Info Refresh button 3 File Path In General Æ File Path you can view and change the file path for saving snapshots and recorded data and customize the alarm audio file in WMV format To change and customiz...
Page 52: ...f you already installed latest Java program If no click Download Java to connect to Sun Java official website and download the latest Java Runtime Environment JRE version a Press Download to go to the download page b Select Accept License Agreement c Choose offline installation or online installation and follow the onscreen instructions Step 4 Enter the user name and password the same as the ones ...
Page 53: ... with another HDD for testing Replace with another HDD cable for testing HDD detection failed Make sure HDD Master Slave mode is correctly set Can t detect your USB flash drive Replace with another USB flash drive for testing Update the JAVA program Can t view the DVR images over the network with IE web browser Update the firmware of the licensed software AP Can t play the recorded data on my DVR ...
Page 54: ... HDD to the power connector and IDE BUS make sure to align the HDD precisely for pin connection And then close the upper cover of the DVR and fasten all the screws you loosened in the step 1 HDD Installation for Model 2 3 and 4 Step 1 Loosen the screws on the upper cover and open the upper cover of the DVR Step 2 Screw out the HDD bracket Step 3 Get suitable brand HDD and set the HDD mode master o...
Page 55: ... COM connects with NC and disconnects from NO But when any alarm is triggered COM disconnects with NC and connects with NO Attention The voltage restriction is under DC24V 1A 8 EXTERNAL ALARM NO Under the normal operation COM disconnects with NO But when any alarm is triggered COM connects with NO Attention The voltage restriction is under DC24V 1A 9 GND Signal GND 10 RS485 B DVR can be controlled...
Page 56: ...x52 R KEY_CH7 0x37 7 KEY_POWER 0x57 W KEY_CH8 0x38 8 KEY_REC 0x72 r KEY_CH9 0x39 9 KEY_PLAY 0x50 P KEY_CH10 0x41 A KEY_SLOW 0x53 S KEY_CH11 0x42 B KEY_ZOOM 0x5A z KEY_CH12 0x43 C KEY_KEY LOCK 0x4B K KEY_CH13 0x44 D KEY_AUDIO 0x64 d KEY_CH14 0x45 E KEY_SEARCH 0x73 S KEY_CH15 0x46 F KEY_PTZ_MODE 0x70 p KEY_CH16 0x47 G KEY_PTZ_PRESET 0x71 q KEY_EJECT_DVD 0x6a j KEY_PTZ_ZOOM_IN 0x69 i KEY_IRIS_NEAR 0x...
Page 57: ... 15 767 6 32 7 1398 58 2 BEST 3 2258 6 94 1 30 552 8 23 15 971 3 40 5 7 1768 9 73 7 HIGH 3 2857 9 119 1 30 726 2 30 3 15 1276 53 2 7 2323 9 96 8 NORMAL 3 3754 5 156 4 30 1173 7 48 9 15 2062 2 85 9 7 3755 9 156 5 FRAME BASIC 3 6068 1 252 8 120 520 8 21 7 60 915 1 38 1 30 1666 7 69 4 BEST 15 2692 7 112 2 120 734 2 30 6 60 1290 53 8 30 2349 5 97 9 HIGH 15 3795 9 158 2 120 966 2 40 3 60 1697 6 70 7 30...
Page 58: ... 30 179 17 7 5 15 352 78 14 7 7 626 11 28 6 NORMAL 3 1263 88 52 7 30 222 22 9 3 15 405 56 16 9 7 927 78 38 7 FRAME BASIC 3 1637 5 68 2 120 763 89 31 8 60 1416 67 59 30 2156 94 89 9 BEST 15 4134 72 172 3 120 965 28 40 2 60 1655 55 69 30 3398 61 141 6 HIGH 15 4833 31 201 4 120 1120 83 46 7 60 2166 38 90 3 30 4105 56 171 1 NORMAL 15 5154 17 214 8 120 1563 89 65 2 60 2494 44 103 9 30 4472 22 186 3 CIF...
Page 59: ... supported by the DVR the USB ERROR message will be shown on the screen Note Please use your PC to format the USB flash drive as FAT 32 Compatible USB Flash Drives MANUFACTURER MODEL CAPACITY 256MB Transcend JetFlash 110 512MB 256MB Kingston DataTraveler DTI KUSBDTI 256FE 512MB 256MB PQI Cool Drive U339 512MB 256MB APACER HANDY STENO HF202 512MB 128MB 256MB SANDISK Cruzer Micro 512MB ...
Page 60: ...0 6L200R0 200GB 7200 rpm DiamondMax 10 6L200PO 200GB 7200 rpm MaxLine Plus Model 7Y250P0 Ⅱ 250GB 7200 rpm DiamondMax 10 6L250R0 3 250GB 7200 rpm Maxtor DiamondMax 10 HDMA6L300RO 3 300GB 7200 rpm Barracuda 7200 7 Plus ST3160023A 160GB 7200 rpm Barracuda 7200 8 ST3200826A 200GB 7200 rpm Barracuda 7200 8 ST3250826A 250GB 7200 rpm Barracuda 7200 8 ST3300831A P 300GB 7200 rpm Barracuda 7200 8 ST3400832...