Virtual PUCK for media:scape
®
Kiosk and Answer
If you have a problem, question, or request, call
your local dealer, or Steelcase Line 1 at
888.STEELCASE (888.783.3522)
for immediate action by people who want to help you.
(Outside the U.S.A., Canada, Mexico, Puerto Rico,
and the U.S. Virgin Islands, call: 1.616.247.2500)
Or visit our website: www.steelcase.com
©
2016 Steelcase Inc.
Grand Rapids, MI 49501
U.S.A.
Printed in U.S.A.
®
Page 1 of 13
23291401 Rev J
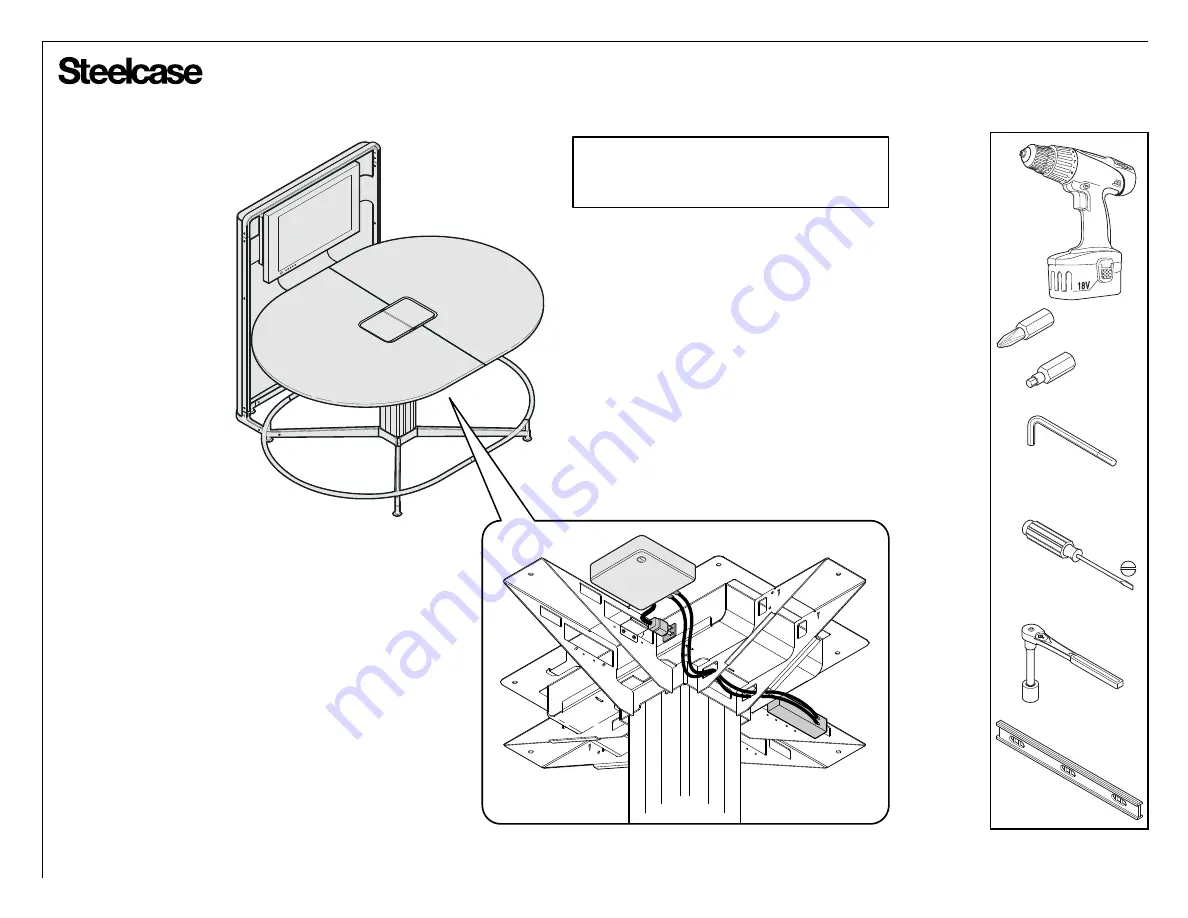
3/16" HEX DRIVE
#2 PHILLIPS
SOCKET WRENCH
WITH 1/2" SOCKET
3/16", 1/8" (all tables)
plus 5/32" (attached totems)
plus 9/64" (offset stool-height)
FLAT BLADED
SCREWDRIVER
(for data connections)
Note: For VP for media:scape on Kiosk,
see page 12. For VP for media:scape on
Answer, see page 13.