

Quick-Start Guide
To view manuals, FAQs, videos, drivers, downloads, technical drawings, and more, visit www.startech.com/support.
Manual Revision: November 6, 2021 12:28 AM
To view manuals, FAQs, videos, drivers, downloads, technical drawings, and more, visit www.startech.com/support.
Product ID
M2-USB-C-NVME-SATA
Product Diagram
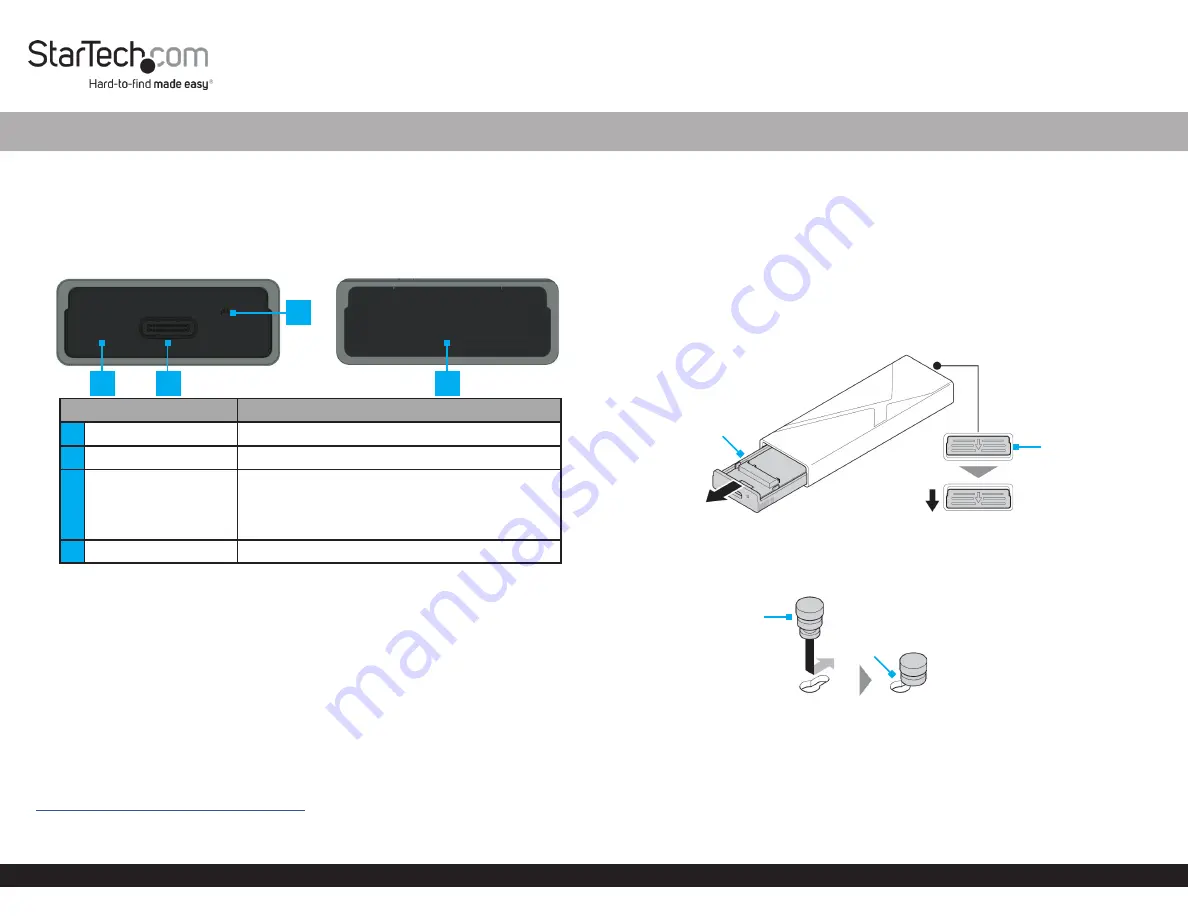
Front
Back
Component
Function
1
Drive Tray Cover
• Enclosure component
2
USB-C Port
• Connect the
Enclosure
to the
Host Computer
3
Power and Activity
LED Indicator
• Solid Blue
indicates the
Enclosure
is receiving
power
• Flashing Blue
indicates
Drive
read/write
activity
4
Drive Tray Release Tab
• Pull down to eject the
Drive Tray
Package Contents
• M.2 SSD Enclosure x 1
• USB-C to USB-C Cable x 1
• USB-C to USB-A Cable x 1
• Thermal Pad x 1
• SSD Fastener Pegs x 2
• Quick-Start Guide
Product Information
For the latest product information, technical specifications, manuals, and Declarations
of Conformance, please visit:
www.StarTech.com/M2-USB-C-NVME-SATA
M.2 SATA/NVMe SSD Enclosure - Tool-less - USB 3.2 (10Gbps) w/ USB-C and USB-A Cables
Product Requirements
• SSD x 1
• M-Key and B+M-Key PCI Express M.2 NVMe and M.2 SATA
• 30 mm, 42 mm, 60 mm, or 80 mm Drive Length
Installation
Install a Drive
Warning!
Handle
Drives
with care.
1. Pull the
Drive Tray Release Tab
down to eject the
Drive Tray
. (Figure 1)
2. Carefully pull the
Drive Tray
out of the
Enclosure
.
3. Insert one
SSD Fastener Peg
into the
Drive Tray Hole
that corresponds with the
length of the
Drive
and slide the
SSD Fastener Peg
into the
Notch
. (Figure 2)
4. Gently slide the
Connector
on the
Drive
at a 30-degree angle into the
corresponding
Drive Connector
, located on the
Drive Tray
. (Figure 3)
Note:
The
Connector
on the
Drive
is keyed so that it only fits one way.
5. Pull the
SSD Fastener Peg
away from the
Drive
, lightly push the
Drive
down into
position on the
Drive Tray
, and release the
SSD Fastener Peg
. (Figure 3)
1
3
2
4
Figure 2
SSD Fastener Peg
Notch
Figure 1
Drive Tray
Drive Tray
Release Tab


