background image

•  Keep keys and combination in a secure 

place away from children.

•  Do not store back up key or this document 

in the safe.

•  NOTE:  Stack-On is not responsible for any 

cost incurred if the safe is replaced due to a 

flood.
•  Do not store electronic media, computer 

disks, audio-visual media or photographic 

negatives in this safe.  This material will 

not survive the rated internal temperature 

of the safe.  This material may be damaged 

or destroyed.

Combination #:

Serial # :

•  Warning:  Keep your safe closed and 

locked at all times when not in use.  Children 

could accidentally be locked inside the safe.

•  Do not move this safe using its handle.  The 

handle should only be used for opening and 

closing the door of the safe.

•  Record the serial number from the tag on the 

back of the safe or from the tag on the front 

bottom corner of the safe.

®

Instructions

WARNING

Tip Over Hazard

A child or adult can tip the safe and 

be killed or seriously injured.
Failure to secure the safe as shown in 

these instructions can result in death 

or serious injury to children and adults.
Children should not play with or 

around the safe at any time.

Screw the 5 handle spokes into the hub and hand 

tighten.  These spokes are located in the front foam 

packaging.

NOTE:  Do not use this handle to move the safe.

HANDLE ASSEMBLY

IMPORTANT:

TD-24-GP-E-S

TD-40-GP-E-S

TD-40-SB-E-S

TD-69-GP-E-S

Hardware Included:  

(2) M10x70 Lag screws

(2) gasket  washers  

(2) plastic anchors

Tools required:  

drill

3/8 drill bit

5/16 drill bit

7/16 drill bit

17mm socket wrench

Phillips screwdriver.

40652-1512

1 18

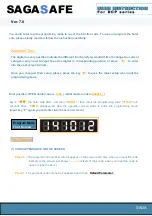
NOTE:  You can store your Key #, Serial # and 

Combination on Stack-On’s SECURE web site – 

www.stack-on.com under Customer Service.

Storing your Key # or Combination will provide instant 

access to this important information should you ever 

lose your keys or your combination.  

Only you will have access to this information.

Summary of Contents for TD-24-GP-E-S

Page 1: ...tions WARNING Tip Over Hazard A child or adult can tip the safe and be killed or seriously injured Failure to secure the safe as shown in these instructions can result in death or serious injury to ch...

Page 2: ...ght will come on momentarily To replace the battery remove the cover by pressing the tab and turning the cover as shown in the illustration Replace the old battery and screw the cover back in place TA...

Page 3: ...u will hear a beep The yellow light on the faceplate will be activated and will stay on for a period of time that should allow you to enter your code You can only enter your code while the yellow ligh...

Page 4: ...unted to the floor For optimal safety and security the safe should be installed adjacent to a side wall with minimal space on either side of the safe in an isolated dry and secure area The safe should...

Page 5: ...over causing personal injury NOTE This safe must be mounted to the floor Failure to do so will compromise the safety and security of the safe NOTE This safe must be secured to the floor Use the hardw...

Page 6: ...move the key and screw the cover back in place 4 Enter your new security code following the instructions for entering your security code TAB GUN REST INSTALLATION The gun rests are supported on the wa...

Page 7: ...structions on the attached form DOOR ORGANIZER ACCESSORIES Your door organizer provides a variety of storage options for your supplies Note Make sure the door accessories do not interfere with items i...

Page 8: ...Purchased___ ___ ____ Owner s Address ___________________________ Unit or Apt Number _________________ City ___________________________ State _______________ Zip Code________________ Telephone Number...

Page 9: ...of the safe and its contents Any repair dismantling or tampering undertaken without the prior written approval or direction of Stack On will nullify this guarantee Personal property in the safe is no...

Page 10: ...VERTENCIA Peligro de Vuelco Un ni o o un adulto puede volcar la caja fuerte y ser matado o herido gravemente El fracaso para asegurar la caja fuerte como se muestra en estas instrucciones puede causar...

Page 11: ...e Para reemplazar la bater a retire la cubierta presionando la leng eta y girando la cubierta como se muestra en la ilustraci n Reemplace la bater a vieja y atornille la tapa en su lugar La Tapa IMPOR...

Page 12: ...luego soltarlo se escuchar un pitido La luz amarilla en la placa frontal se activar y permanecer encendida durante un per odo de tiempo que debe permitir que ingrese su c digo S lo se puede introduci...

Page 13: ...ad y la seguridad ptima la caja de seguridad debe ser instalado adyacente a una pared lateral con un espacio m nimo a cada lado de la caja de seguridad en una zona aislada seco y seguro La caja fuerte...

Page 14: ...te seguro se debe montar en el suelo De no hacerlo pondr en peligro la seguridad y la seguridad de la caja fuerte NOTA Este seguro debe fijarse al suelo Utilice el hardware proporcionado Colocar la ca...

Page 15: ...r en el nuevo c digo retire la llave y el tornillo de la tapa en su lugar 4 Ingrese su nuevo c digo de seguridad siguiendo las instrucciones para ingresar su c digo de seguridad TAB RESTO DEL ARMA INS...

Page 16: ...adjunto PUERTA ORGANIZADOR ACCESORIOS Su organizador puerta ofrece una variedad de opciones de almacenamiento para sus suministros Nota Aseg rese de que los accesorios de la puerta no interfieran con...

Page 17: ...ra___ ___ ____ Direcci n propietario _____________________________ No Interior _________________ Ciudad ________________________ Estado _______________ C P ________________ No Tel fono ____ __________...

Page 18: ...instalaci n de la caja fuerte y su contenido Cualquier reparaci n desmantelamiento o la manipulaci n realizada sin la aprobaci n previa por escrito o la direcci n de Stack On anular esta garant a La p...

Reviews: