background image

40787-2205

1 12

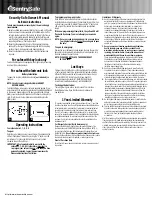
Your Electronic Safe Combination:

Serial #:

 Instructions

Drill

Thin Bladed Flat Head Screwdriver

10 mm Wrench 

3/8” (9.5 mm) Masonry Drill Bit for drilling into masonry

3/16” (5 mm) Drill Bit for drilling into wood and wall studs

(4) M6 x 50 mm (2” long) Lag Screws

(4) Washers

(4) M6 x 40 mm (1-1/2” long) Plas�c Masonry Anchors 

PS-1808-E

PS-1814-E / PS-1814-EF /SPSE1814BK22

PS-1815-E

PS-1820-E

IMPORTANT

Record the serial number from the tag on the back 

of the safe or the tag on the inside of the lock cover 

plate on the front of the safe.
Record your combination number.

Keep keys and combination in a secure place away 

from children.

DO NOT STORE KEYS OR YOUR COMBINATION 

INSIDE SAFE

NOTE:  This key has also been provided in case 

you lose or forget your security code or the 

ba�eries run low.  If you lose your key, you may 

purchase a replacement key by referencing the 

serial number located under the removable lock 

cover.  See sec�on at the end of this instruc�on 

regarding replacement keys.

Locate the ba�eries inside the safe. Open the 

ba�ery compartment on the back of the door 

by pushing the tab in the direc�on of the arrow 

and install the ba�eries.

GETTING STARTED

When you first receive your new electronic safe 

you will need to open the door with the key in 

order to install the ba�eries. Ba�eries are 

included and are located inside the safe.

To open the door with the key, first remove the 

lock cover from the front of the faceplate using 

a thin bladed flathead screwdriver as shown. 

Insert the key and turn counterclockwise.  

Hold the key in the open posi�on and turn the 

knob to the right to open the door.

LOCK COVER

Battery Disposal 

Please dispose the used batteries

per municipal or provincial law.

HARDWARE INCLUDED:  

TOOLS REQUIRED:  


WARNING:


This product can expose you to 

chemicals including Di(2-ethylhexyl)phthalate (DEHP) 
which is known to the State of California to cause cancer 
and birth defects or other reproductive harm. For more 
information go to www.P65Warnings.ca.gov

REGISTER THIS PRODUCT

For warranty and customer support, please register this 
product at “www.Stack-On.com/product-registration”

Summary of Contents for PS-1808-E

Page 1: ...struc on regarding replacement keys Locate the ba eries inside the safe Open the ba ery compartment on the back of the door by pushing the tab in the direc on of the arrow and install the ba eries GET...

Page 2: ...NTIL YOU HAVE CONFIRMED THAT YOUR NEW SECURITY CODE HAS BEEN ENTERED CORRECTLY 3 With the door open enter your own personal security code which can be 3 8 digits long and con rm your new code by press...

Page 3: ...ock the safe close the door and turn the knob to the le to the 12 00 posi on LOCKING THE SAFE NOTE ON LOCKING THE SAFE Because the locking mechanism is deac vated for approximately 3 to 6 seconds a er...

Page 4: ...using the predrilled moun ng holes in the safe NOTE The safe must be secured to a wall stud on one side of the safe in the top and bo om holes in the back of the safe so that it is anchored to the wa...

Page 5: ...ination RFID devices for your security product In order to receive a replacement Key or Combination or RFID devices for your security product 1 Please visit the following link https www stack on com c...

Page 6: ...OT COVER ANY ACCESSORIES OR PARTS USED WITH OR IN THE PRODUCT WHICH ARE NOT INCLUDED WITH THE ORIGINAL PURCHASE THIS WARRANTY IS EXCLUSIVE AND EXPRESSLY IN LIEU OF ALL OTHER WARRANTIES EXPRESSED OR IM...

Page 7: ...rie ubicado debajo de la tapa de la cerradura extra ble Vea la secci n al nal de esta instrucci n con respecto a las llaves de repuesto Localice las pilas adentro de la caja fuerte Abra el compar mien...

Page 8: ...luz parpadear en rojo 5X y emi r un pi do 5X si el sonido est encendido y la alarma sonar durante 30 segundos lo que har que la caja fuerte se bloquee autom camente durante 5 minutos antes de volver...

Page 9: ...l cerrar la caja fuerte siempre aseg rese de que el mando se gira completamente a la izquierda a la posici n de las 12 00 Si el bot n no se gira a la posici n de las 12 00 durante el proceso de bloque...

Page 10: ...la caja de seguridad en los ori cios superior e inferior en la parte posterior de la caja fuerte de modo que se ancla al montante de la pared en dos lugares Soportes de pared se deben u lizar en el ot...

Page 11: ...uesto o Combinaci n o Dispositivo RFID para su producto de seguridad 1 Favor visite el siguiente enlace https www stack on com customer service 2 Encuentre y haga clic sobre el icono para reponer sus...

Page 12: ...ACCESORIO NI PARTES USADAS CON O DENTRO DEL PRODUCTO QUE NO VIENEN INCLUIDOS CON LA COMPRA ORIGINAL ESTA GARANT A ES EXCLUSIVA Y EXPRESAMENTE EN LUGAR DE TODA Y CUALESQUIER OTRA GARANT A SEA EXPRESA...

Reviews: