Spot-on SRL300G, Operating Instructions Manual
The Spot-on SRL300G is a top-of-the-line laser level with precision accuracy. Ensure optimal performance by consulting the Operating Instructions Manual, available for free download at manualshive.com. This manual provides easy-to-follow instructions for calibration and usage, ensuring your projects are completed with impeccable accuracy.
Share
Download


Reviews:
No comments
Related manuals for SRL300G
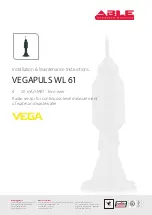
VEGAPULS WL 61
Brand: Vega Pages: 60

DLL-10T-K
Brand: Defort Pages: 16

MLL 3-20
Brand: Metabo Pages: 96

320.48292
Brand: Craftsman Pages: 20

320.48252
Brand: Craftsman Pages: 20

320.48249
Brand: Craftsman Pages: 28

CMHT77630
Brand: Craftsman Pages: 32

CMHT77629
Brand: Craftsman Pages: 34

320.48251
Brand: Craftsman Pages: 32

93PLL
Brand: Klein Tools Pages: 24
Ecosys P2235dn
Brand: Kyocera Pages: 28

4200H
Brand: David White Pages: 20

AutoCross-Laser 7C PowerBright
Brand: LaserLiner Pages: 10

LL500
Brand: Spectra Pages: 2

HM-30 Series
Brand: HITROL Pages: 17

GA70.V2
Brand: Sealey Pages: 4

Sprinter 250M
Brand: Leica Pages: 4

TPS1200 series
Brand: Leica Pages: 6


