SportsPlay 581-422, Installation Instructions Manual
The SportsPlay 581-422 is a top-quality playground equipment designed for fun and safety. Easily assemble using the Installation Instructions Manual. Download the manual for free from manualshive.com to ensure correct assembly. Get your kids playing and having a blast with this fantastic product!
Share
Download


Reviews:
No comments
Related manuals for 581-422

TLH-007-BN-GG
Brand: Belnick Pages: 5

ORIGINAL CUMARU ROPE PORCH SWING
Brand: Nags Head Hammocks Pages: 2

Johnny Tractor
Brand: M&M Pages: 2

Grow With Me 3in1
Brand: Jamara Pages: 12

Swoon Evolution
Brand: babymoov Pages: 36

6013
Brand: Backyard Discovery Pages: 117

55010B
Brand: Backyard Discovery Pages: 87

Tummy Time Snuggle Me Penguin
Brand: PLAYGRO Pages: 2

Woodlands Music and Lights Projector Gym
Brand: PLAYGRO Pages: 4
9303SS
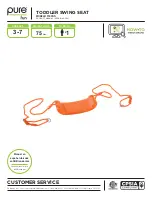
Brand: PureFun Pages: 5

9008SJ
Brand: PureFun Pages: 12


