


Checking your model
name
The instructions in this manual are
for the 7 models: SLV-GA60MJ,
GA50ME, GA50PS, GA50SG,
GA30ME, GA30PS and GA30SG.
Check your model number by
looking at the rear panel of your unit.
The SLV-GA60MJ is the model used
for illustration purposes. Any
difference in operation is clearly
indicated in the text, for example,
“SLV-GA60MJ only.”
3-864-837-12 (1)
Video Cassette Player
Operating Instructions
SLV-GA60MJ
SLV-GA50ME/PS/SG
SLV-GA30ME/PS/SG
©1998 by Sony Corporation
PAL NTSC
Getting Started
Step 1
Unpacking
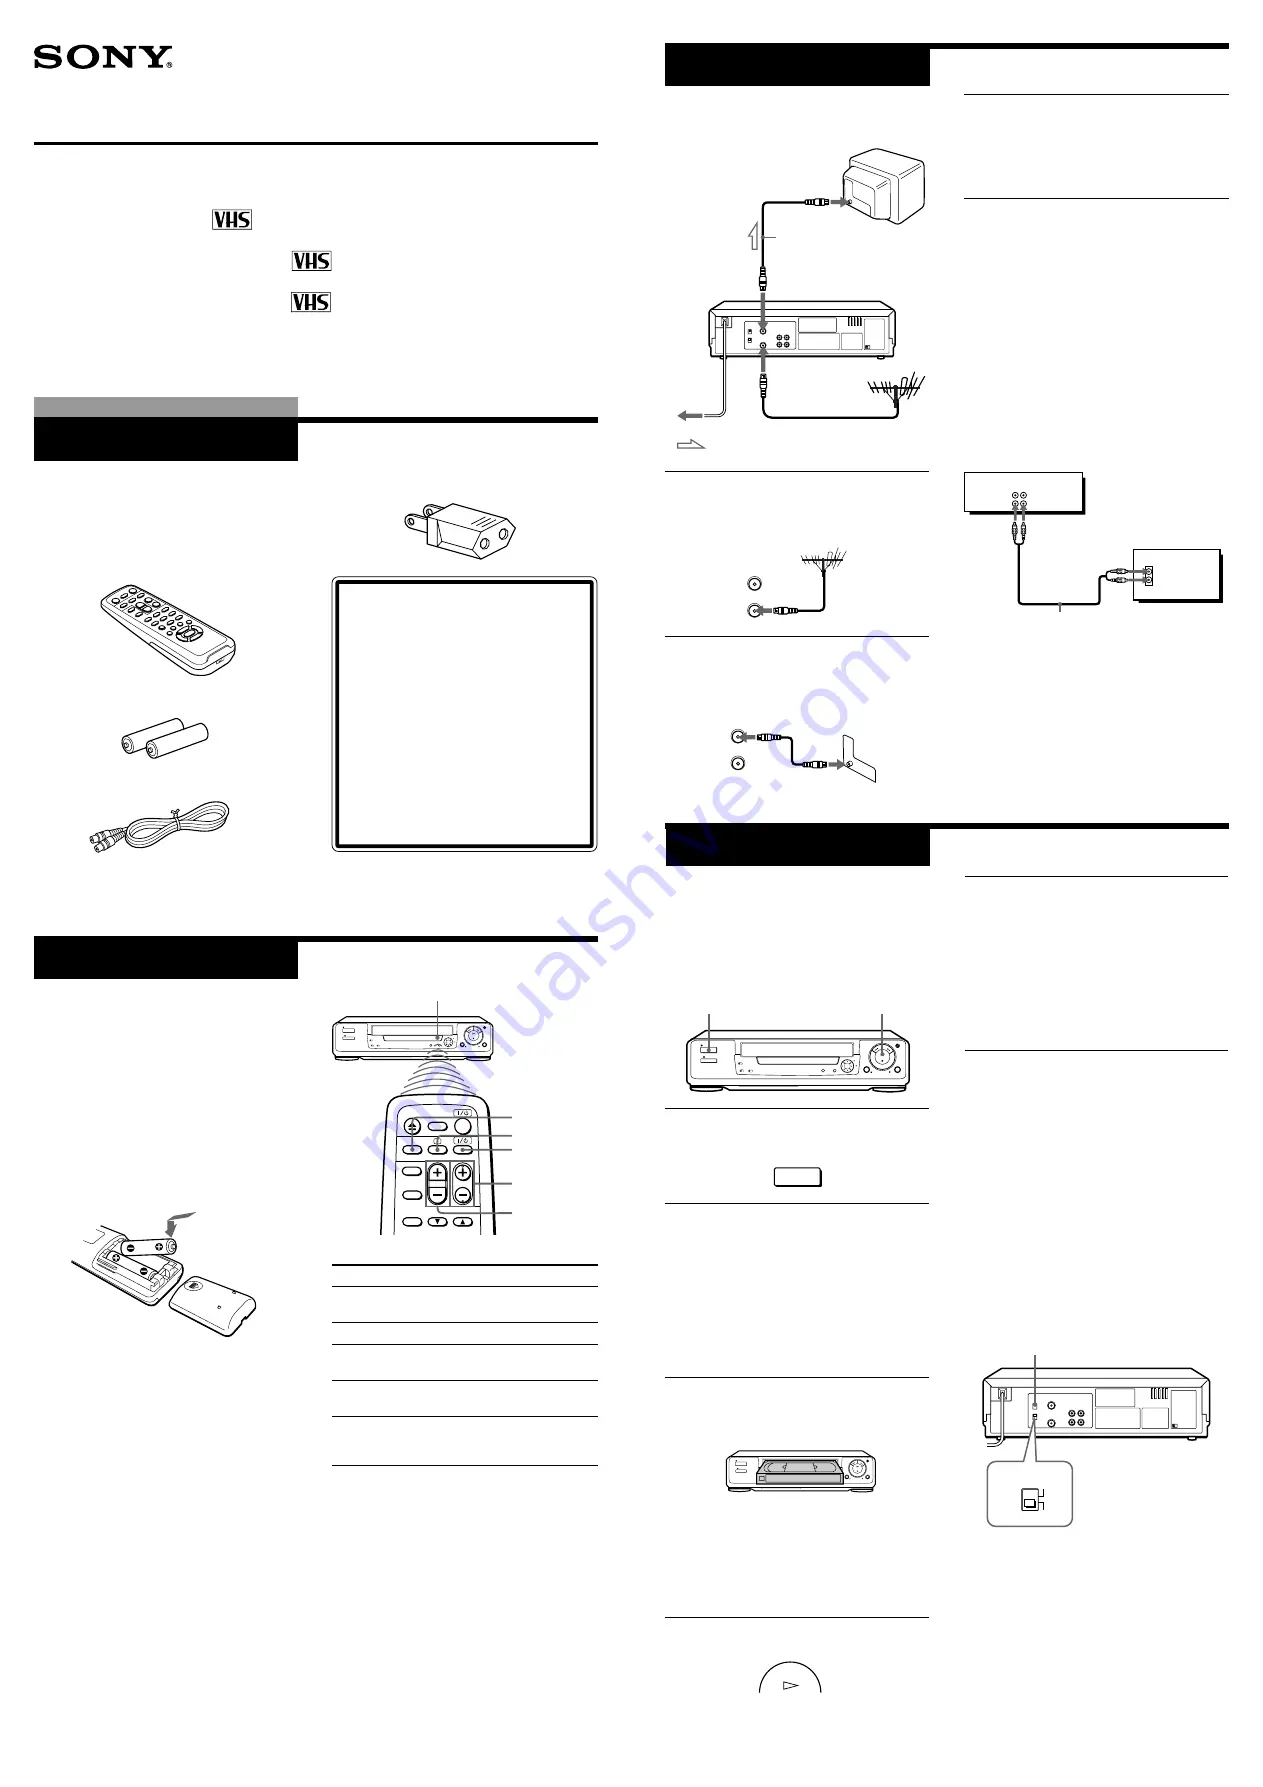
Check that you have received the following
items with the unit:
• Remote commander
• R6 (Size AA) batteries
• Aerial cable
• Plug adaptor (SLV-GA60MJ, GA50ME and
GA30ME)
Step 2
Setting up the
remote commander
Inserting the batteries
Insert two R6 (size AA) batteries by
matching the + and – on the batteries to the
diagram inside the battery compartment.
Insert the negative (–) end first, then push
in and down until the positive (+) end
clicks into position.
Using the remote commander
You can use this remote commander to
operate the unit and a Sony TV. To operate
this unit, point at the remote sensor on the
unit. To operate the TV, point at the remote
sensor on the TV. Buttons in the shaded
area of the remote commander can be used
to operate your Sony TV. If the TV does not
have the
g
symbol near the remote sensor,
this remote commander will not operate the
TV.
To
Turn the TV to standby
or active mode
Turn on the TV power
Increase (+) or decrease (–)
the TV volume
Change the TV
programme position
Select an input source
of the TV either from aerial
in or from line in
Notes
• With normal use, the batteries should last
about three to six months.
• If you do not use the remote commander for an
extended period of time, remove the batteries
to avoid possible damage from battery leakage.
• Do not use a new battery with an old one.
• Do not use different types of batteries.
Remote sensor
;
(TV power)
1
/
u
(on/standby)
TV/VIDEO
PROG (CH) +/–
VOL +/–
Press
1
/
u
(on/standby)
;
(TV power)
VOL +/–
PROG (CH) +/–
TV/VIDEO
Step 3
Connecting the unit
to mains
1
Disconnect the aerial cable from your
TV and connect it to AERIAL IN on the
rear panel of the unit.
2
Connect AERIAL OUT of the unit and
the aerial input of your TV using the
supplied aerial cable.
: Signal flow
AERIAL IN
AERIAL OUT
Aerial cable (supplied)
AERIAL
IN
OUT
AERIAL
IN
OUT
3
Connect the mains lead to the mains.
Use the supplied plug adaptor, if
necessary, depending on the design of
the mains (SLV-GA60MJ, GA50ME and
GA30ME).
Additional connections
To a TV that has audio/video input jacks
This additional connection improves picture
and sound quality. Connect the TV as
shown below.
If you want to use the Trinitron TV Synchro
Play function, this connection is necessary.
(If your TV has two or more inputs, connect
the audio/video cable to the VIDEO IN 1
jacks.)
For SLV-GA60MJ and GA50ME/PS/SG only
1
Press ON/STANDBY to turn on the
unit.
2
Turn on your TV and select a
programme position for video
playback.
Choose a channel between UHF 30 and
39 on the TV where there is no picture
and no sound or only a steady rustling
sound.
This channel will now be referred to as
the video channel.
3
Insert a tape recorded in the colour
system matching your TV into the
cassette compartment.
(SLV-GA30ME/PS/SG)
The unit starts playing automatically.
(SLV-GA60MJ and GA50ME/PS/SG)
The unit starts playing automatically if
you insert a tape with its safety tab
removed.
4
Press
·
PLAY on the unit.
Step 4
Tuning your TV to
the unit
If you have connected your unit to the TV
using the audio/video cable, skip this step.
5
Tune the TV until the video playback
picture is clearly displayed on the TV
screen.
Refer to your TV manual for tuning
instructions.
You have now tuned your TV to the
unit. From now on, whenever you want
to play a tape, set the TV to the video
channel.
To obtain a clear playback picture
If the playback picture does not appear
clearly in step 5 above, turn the RF
CHANNEL screw on the rear panel of the
unit with a screwdriver to a position where
the TV clearly displays the playback
picture.
To select the TV system
For your TV to receive the correct signal
from your unit, you must set the TV
SYSTEM switch on the rear panel of the
unit to either G (for system B/G) or K (for
system D/K). If this switch is set to the
wrong position, the sound will be distorted.
PAL NTSC 4.43
Audio/video cable (not supplied)
This unit
TV
ON/STANDBY
·
PLAY
RF CHANNEL
PAL NTSC
ON/STANDBY
PLAY
AUDIO VIDEO
LINE IN
LINE OUT
IN
VIDEO
AUDIO
TV SYSTEM
K
G


