background image

4-170-534-

11

(1)

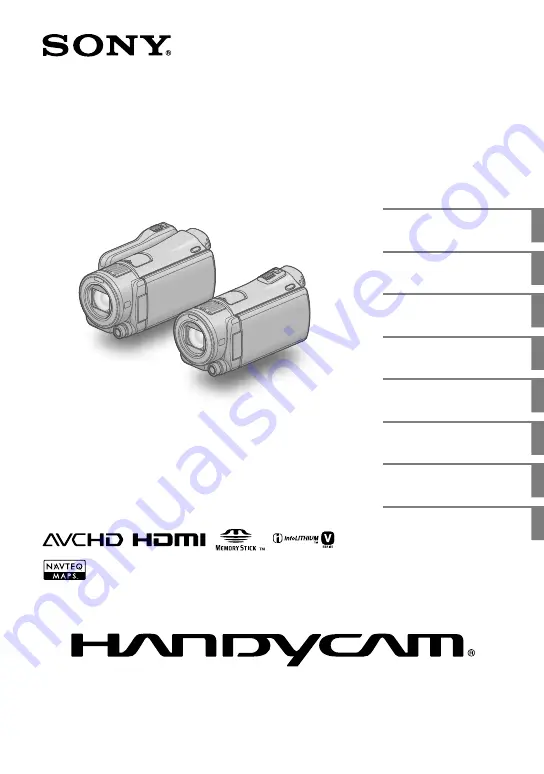
Digital HD Video Camera Recorder

“Handycam” Handbook

 2010 Sony Corporation

HDR-CX550/CX550V/ 

XR550/XR550V

Table of contents

9

Getting started

12

Recording/Playback

21

Making good use of your 

camcorder

44

Saving images with an 

external device

57

Customizing your 

camcorder

66

Additional information

91

Quick reference

119

Summary of Contents for HDR-CX550V

Page 1: ... 2010 Sony Corporation HDR CX550 CX550V XR550 XR550V Table of contents 9 Getting started 12 Recording Playback 21 Making good use of your camcorder 44 Saving images with an external device 57 Customizing your camcorder 66 Additional information 91 Quick reference 119 ...

Page 2: ...ed See About handling of your camcorder p 114 Even if the camcorder is turned off the GPS function is working as long as the GPS switch is set to ON Make sure that the GPS switch is set to OFF during take off and landing of an airplane HDR CX550V XR550V Menu items LCD panel viewfinder and lens A menu item that is grayed out is not available under the current recording or playback conditions The LC...

Page 3: ...r AVCHD format compatible devices which are not compatible with High Profile Devices which are not compatible with the AVCHD format You may not be able to play back normally images recorded on your camcorder with other devices Also you may not be able to play back images recorded on other devices with your camcorder Discs recorded with HD image quality high definition This camcorder captures high ...

Page 4: ...ccessories may not be available in some countries regions About this manual illustrations and on screen displays The example images used in this manual for illustration purposes are captured using a digital still camera and therefore may appear different from images and screen indicators that actually appear on your camcorder And the illustrations of your camcorder and its screen indication are ex...

Page 5: ...ot crash the camcorder against an object Do not use your camcorder in very loud areas HDR XR550 XR550V On the drop sensor HDR XR550 XR550V To protect the internal hard disk from shock by dropping the camcorder has a drop sensor function p 90 When a drop occurs or under a non gravity condition the block noise made when this function is activated by the camcorder may also be recorded If the drop sen...

Page 6: ...ting photos p 24 Playing movies and photos Playback on the camcorder p 33 Playing images on a TV p 41 Saving images Saving movies and photos with a computer Saving movies and photos in external media p 57 Saving images with a DVD writer recorder p 59 Deleting movies and photos p 44 If you delete the image data that has been saved on your computer or a disc you can record new images on the free med...

Page 7: ...que Stabilize yourself move your camcorder horizontally as you turn your upper body slowly Stay still at the end of panning for a while to make the scene look stable Accentuating movies with narration Consider the sound to be recorded with your movies Narrate the subject or talk to the subject during shooting Aim for a balanced volume of voices since the recording person is closer to the microphon...

Page 8: ...on the left side of the screen Prioritizing the subject 28 SPOT FOCUS 73 Capturing photos during movie recording Dual Rec 30 Smile Shutter 29 Recording in a dimly lit room NightShot 30 LOW LUX 77 Capturing fireworks or a sunset in all its splendor FIREWORKS 71 SUNRISE SUNSET 71 Checking your golf swing GOLF SHOT 75 SMTH SLW REC 75 ...

Page 9: ...6 Selecting high definition image quality HD or standard image quality STD 27 Selecting the recording mode 28 Prioritizing the subject 28 Capturing smiles automatically Smile Shutter 29 Recording sound with more presence 5 1ch surround recording 29 Recording high quality photos during movie recording Dual Rec 30 Recording in dark places NightShot 30 Recording in mirror mode 31 Controlling the imag...

Page 10: ... current location information 54 Searching for a desired scene by recording location Map Index 54 Displaying the coordinate information COORDINATES 55 Adjusting the clock and the area automatically AUTO CLOCK ADJ AUTO AREA ADJ 56 Saving images with an external device Saving images in external media DIRECT COPY 57 Creating a disc with a DVD writer recorder 59 Selecting the method for creating a dis...

Page 11: ...shooting 91 Self diagnosis display Warning indicators 98 Recording time of movies number of recordable photos 103 Expected time of recording and playback with each battery pack 103 Expected recording time of movies 104 Expected number of recordable photos 105 Using your camcorder abroad 107 Maintenance and precautions 109 About the AVCHD format 109 About GPS HDR CX550V XR550V 109 About the Memory ...

Page 12: ...550 CX550V HDR XR550 XR550V Battery pack AC Adaptor DC IN jack CHG flash charge lamp DC plug Power cord Mains lead To the wall outlet wall socket Battery pack AC Adaptor CHG flash charge lamp To the wall outlet wall socket Power cord Mains lead DC IN jack DC plug ...

Page 13: ...that on the DC IN jack The CHG flash charge lamp lights up and charging starts The CHG flash charge lamp turns off when the battery pack is fully charged 4 When the battery is charged disconnect the AC Adaptor from the DC IN jack of your camcorder Tips See page 103 on recording and playing time When your camcorder is on you can check the approximate amount of remaining battery power with the remai...

Page 14: ...tly The battery pack is damaged The temperature of the battery pack is low Remove the battery pack from your camcorder and put it in a warm place The temperature of the battery pack is high Remove the battery pack from your camcorder and put it in a cool place When attaching a video light sold separately it is recommended that you use an NP FV70 or NP FV100 battery pack We do not recommend using a...

Page 15: ...n press POWER 2 Select the desired geographical area with then touch NEXT To set the date and time again touch MENU Show others CLOCK LANG under GENERAL SET category CLOCK SET When an item is not on the screen touch until the item appears 3 Set DST SET or SUMMERTIME date and time then touch The clock starts If you set DST SET or SUMMERTIME to ON the clock advances 1 hour Touch the button on the LC...

Page 16: ...selected for your camcorder In this case set AUTO CLOCK ADJ and AUTO AREA ADJ to OFF HDR CX550V XR550V To turn off the power Close the LCD screen The Movie lamp flashes for a few seconds and the power is turned off Tips You can turn off your camcorder also by pressing POWER If the viewfinder is pulled out retract the viewfinder as shown in the illustration below On turning the camcorder on or off ...

Page 17: ...started US Changing the language setting You can change the on screen displays to show messages in a specified language Touch MENU Show others CLOCK LANG under GENERAL SET category LANGUAGE SET a desired language ...

Page 18: ...g playback and editing operations on the selected medium Tips See page 104 for the recordable time of movies See page 105 for the number of recordable photos Selecting the recording media for movies Touch MENU Show others MEDIA SETTINGS under MANAGE MEDIA category MOVIE MEDIA SET The MOVIE MEDIA SET screen appears Touch the desired recording media Touch YES The recording medium is changed Selectin...

Page 19: ...iMediaCard cannot be used with this camcorder In this manual Memory Stick PRO Duo media and Memory Stick PRO HG Duo media are called Memory Stick PRO Duo media Memory cards of up to 32 GB have been verified to operate with your camcorder Types of Memory Stick media you can use with your camcorder For recording movies it is recommended that you use Memory Stick PRO Duo media of 1 GB or larger marke...

Page 20: ... memory card in the wrong direction the memory card memory card slot or image data may be damaged Notes If Failed to create a new Image Database File It may be possible that there is not enough free space is displayed format the memory card by touching MENU Show others MEDIA FORMAT under MANAGE MEDIA category MEMORY CARD YES YES To eject the memory card Open the cover and lightly push the memory c...

Page 21: ...disk Tips To change the recording media see page 18 1 Fasten the grip belt 2 Open the LCD screen of your camcorder Your camcorder is turned on and the lens cover is opened To turn on your camcorder when the LCD screen is already open press POWER p 15 You can switch recording modes by pressing MODE Press MODE to light up the desired recording mode lamp MODE button Movie When recording a movie Photo...

Page 22: ...he recording movie photo playback modes To display the icons and indicators again touch anywhere on the screen except the rec zoom buttons on the LCD Notes If you close the LCD screen while recording movies the camcorder stops recording The maximum continuous recordable time of movies is about 13 hours When a movie file exceeds 2 GB the next movie file is created automatically It will take several...

Page 23: ...er p 29 You can capture photos from recorded movies p 47 You can check the recordable time estimated remaining capacity etc by touching MENU Show others MEDIA INFO under MANAGE MEDIA category The LCD screen of your camcorder can display recording images across the entire screen full pixel display However this may cause slight trimming of the top bottom right and left edges of images when played ba...

Page 24: ...DE a desired setting Shooting photos In the default setting photos are recorded on the following recording media HDR CX550 CX550V Internal memory HDR XR550 XR550V Internal hard disk Tips To change the recording media see page 18 Press MODE to turn on the Photo lamp The LCD screen display switches for photo recording mode and the screen aspect ratio becomes 4 3 Press PHOTO lightly to adjust the foc...

Page 25: ...de You can change how your camcorder flashes by MENU Show others FLASH MODE under PHOTO SETTINGS category a desired setting If you record photos using a flash with a conversion lens sold separately the shadow may be reflected If white circular spots appear on photos This is caused by particles dust pollen etc floating close to the lens When they are accentuated by the camcorder s flash they appear...

Page 26: ...bout 13 32 in for wide angle and about 80 cm about 31 1 2 in for telephoto You can magnify images up to 10 times using optical zooming unless STEADYSHOT is set to ACTIVE Tips You can set DIGITAL ZOOM p 79 if you want to zoom to a greater level Recording better images automatically INTELLIGENT AUTO By pressing you can record images using the INTELLIGENT AUTO function When you turn the camcorder tow...

Page 27: ...WB SHIFT GOLF SHOT SMTH SLW REC SCENE SELECTION WHITE BAL SPOT MTR FCS SPOT METER SPOT FOCUS EXPOSURE FOCUS TELE MACRO STEADYSHOT STEADYSHOT AUTO BACK LIGHT LOW LUX FACE DETECTION SMILE PRIORITY Notes Above settings are reset to the default settings when INTELLIGENT AUTO is set to ON Selecting high definition image quality HD or standard image quality STD You can select the desired image quality f...

Page 28: ...ity HD is selected And when the HQ or LP mode of the high definition image quality HD is selected movies are recorded with AVCHD 1440 1080 60i format Movies are recorded with MPEG 2 format when the standard image quality STD is selected You can select the following high definition image quality HD recording mode 24M of HD FX is the maximum bit rate and the value other than of HD FX such as 17M is ...

Page 29: ...le detection shot Notes Smiles may not be detected depending on recording conditions subject conditions and the setting of your camcorder When REC MODE is set to HD FX you cannot use the Smile Shutter function Tips You can select the subject that has priority for face detection and smile detection with PRIORITY SETTING p 78 When you specify the priority subject by touching the detection frame on t...

Page 30: ... pressing PHOTO Notes You cannot use the flash during Dual Rec may appear when the capacity of the recording media is not enough or when you record photos continuously You cannot record photos while is displayed When REC MODE is set to HD FX you cannot use Dual Rec Tips When the MODE lamp is set to Movie the size of photos becomes 8 3M 16 9 wide or 6 2M 4 3 You can record photos during recording s...

Page 31: ...de Pressing MANUAL switches the setting mode between automatic and manual Rotate the MANUAL dial to adjust the focus Items you can assign to the MANUAL dial FOCUS p 74 EXPOSURE p 73 IRIS Shoots images with the IRIS priority mode If you adjust the IRIS you can sharpen the subject with its background blurred or sharpen the whole image SHUTTER SPEED Shoots images with the SHUTTER SPEED priority mode ...

Page 32: ...e IRIS wider a smaller F stop than F3 4 when you set the zoom lever to the W Wide angle side the IRIS is reset to F3 4 as you move the zoom lever to the T Telephoto side If you adjust the IRIS the in focus range in front of and behind the focused subject is changed When you open the IRIS wider a smaller F stop the in focus range becomes narrower and when you close the IRIS narrower a larger F stop...

Page 33: ...cover is opened To turn on your camcorder when the LCD screen is already open press POWER p 15 2 Press VIEW IMAGES The VISUAL INDEX screen appears after some seconds You can display the VISUAL INDEX screen also by touching VIEW IMAGES on the LCD screen 3 Touch or a desired movie to playback a movie Touch the Photo a desired photo to view a photo Movies are displayed and sorted by recording date Sw...

Page 34: ...ps When playback from the selected movie reaches the last movie the screen returns to the INDEX screen Touch during pause to play back movies slowly As you repeat touching during playback movies are played as fast as about 5 times about 10 times about 30 times about 60 times You can also display the VISUAL INDEX by touching MENU Show others VISUAL INDEX under PLAYBACK category The recording date t...

Page 35: ...st with You can also adjust the sound volume by using in the OPTION MENU Viewing photos Your camcorder displays the selected photo Tips When viewing photos recorded on the memory card playback folder appears on the screen To start stop slide show Next OPTION MENU Previous To the VISUAL INDEX screen ...

Page 36: ... DATE INDEX On the Film Roll Index Face Index screen you can display the Date Index by touching the date in the upper right corner of the screen Searching for desired scene by pinpoint Film Roll Index Movies can be divided by a set time and the first scene of each division is displayed on the INDEX screen You can start playing back a movie from the selected thumbnail Press VIEW IMAGES The VISUAL I...

Page 37: ...wearing glasses or hats or who do not face towards the camera Make sure that you set FACE DETECTION to ON p 77 the default setting prior to recording to search movies on the Face Index Tips You can also display the Face Index by touching MENU Show others VIEW IMAGES under PLAYBACK category FACE Playing back a digest of your movies Highlight Playback Your camcorder selects Highlight Playback scenes...

Page 38: ...andom order select ON Notes The PLAYBACK RANGE setting is cleared when the Highlight Playback stops Tips You can change the settings for Highlight Playback during Highlight Playback by touching OPTION If you change the settings for Highlight Playback Highlight Playback scenes are re selected If you change MUSIC after you select THEME the music will be selected automatically for the theme from next...

Page 39: ...the camcorder if you cannot play the music the music file may be damaged Delete the music file by touching MENU Show others MUSIC TOOL under OTHERS category EMPTY MUSIC then transfer the music file again If you delete music files using EMPTY MUSIC the music data recorded on your camcorder at the factory will be deleted too In this case you can restore them using Music Transfer a software installed...

Page 40: ... playback screen The slide show begins from the selected photo To stop the slide show Touch To restart the slide show Touch again Notes You cannot operate playback zoom during slide show Tips You can set continuous slide show playback by selecting OPTION tab SLIDE SHOW SET while playing photos The default setting is ON continuous playback ...

Page 41: ... the TV Turn on your camcorder and touch MENU Show others TV CONNECT Guide under OTHERS category on the LCD screen Use the supplied AC Adaptor as the power source p 14 Touch High Definition TV Touch to select the input jack of your TV then touch The connection medhod is displayed If you touch HINT you can see tips for the connection or change the settings of your camcorder Connect your camcorder t...

Page 42: ...hannel plug to the audio input jack of your TV or VCR When you connect with component A V cable If you connect only component video plugs audio signals are not output Connect the white and red plugs to output audio signals When you connect with HDMI cable Use an HDMI cable with the HDMI logo Use an HDMI mini connector on one end for the camcorder and a plug suitable for connecting your TV on the o...

Page 43: ... both video audio signals The HDMI OUT jack outputs high quality images and digital audio Using BRAVIA Sync You can operate your camcorder with the remote commander of your TV by connecting your camcorder to a BRAVIA Sync compatible TV launched in 2008 or later with the HDMI cable You can operate the menu of your camcorder by pressing the SYNC MENU button of the remote commander of your TV You can...

Page 44: ...he scenario Tips You can delete an image on the playback screen from OPTION MENU To delete all images recorded in the recording media and recover all the recordable space of the media format the media p 85 Reduced size images which enable you to view many images at the same time on an index screen are called thumbnails 1 Touch MENU Show others DELETE under EDIT category 2 To delete movies touch DE...

Page 45: ... Tips You can protect movies and photos on the playback screen from OPTION MENU 1 Touch MENU Show others PROTECT under EDIT category 2 To protect movies touch PROTECT PROTECT PROTECT To protect photos touch PROTECT PROTECT 3 Touch the movies and photos to be protected is displayed on the selected images Press and hold the image down on the LCD screen to confirm the image Touch to return to the pre...

Page 46: ...photos recorded on the same day at one time In step above select the recording date of the desired movies photos then touch UNPROTECT Dividing a movie 1 Touch MENU Show others DIVIDE under EDIT category 2 Touch the movie to be divided The selected movie starts playback 3 Touch at the point where you want to divide the movie into scenes The movie pauses Play and pause toggles as you press 4 Touch Y...

Page 47: ...vailable on the camcorder Use the supplied software PMB for more advanced editing Tips You can divide a movie on the playback screen from OPTION MENU Capturing a photo from a movie 1 Touch MENU Show others PHOTO CAPTURE under EDIT category The PHOTO CAPTURE screen appears 2 Touch the movie to be captured The selected movie starts playback 3 Touch at the point where you want to capture The movie pa...

Page 48: ...e internal recording media to memory card Dubbing movies You can dub movies recorded on the internal recording media of your camcorder to memory card Insert memory card into your camcorder before the operation Notes When you record a movie on the memory card for the first time create the image database file by touching MENU Show others REPAIR IMG DB F under MANAGE MEDIA category MEMORY CARD Connec...

Page 49: ...ious screen DUB by date Select the recording date of the movie to be dubbed then touch You cannot select multiple dates Touch YES Tips To check the dubbed movies after dubbing is finished select MEMORY CARD on MOVIE MEDIA SET and play them back p 18 Copying photos You can copy photos from the internal recording media of the camcorder to memory card Insert a memory card into your camcorder before t...

Page 50: ...d play them back p 18 Using the Playlist of movies The Playlist is a list showing thumbnails of the movies that you have selected The original movies are not changed even if you edit or erase the movies added to the Playlist Creating the Playlist Notes High definition image quality HD movies and standard definition image quality STD movies are added to an individual Playlist Touch MENU Show others...

Page 51: ...nd standard definition image quality STD movies Tips You can add a maximum of 999 high definition image quality HD movies or 99 standard definition image quality STD movies to the Playlist You can add a movie on the playback screen or the Playlist screen by touching OPTION Playing the Playlist Touch MENU Show others PLAYLIST under PLAYBACK category Movies added to the Playlist appear Touch the mov...

Page 52: ...n on the earth The following function is available if you use the GPS function Your location You can display the current location on a map Map Index You can find a movie or photo on a map by its recording location COORDINATES You can display the coordinate information during playback AUTO CLOCK ADJ AUTO AREA ADJ Your camcorder adjusts the clock and the time difference on each area automatically Wh...

Page 53: ...tion When your camcorder cannot acquire the location information the last acquired location information is recorded If you do not want to record location information set the GPS switch to OFF If the camcorder cannot track a satellite even after waiting for several minutes you are in a difficult place to receive a GPS signal Start recording in the current state or move to a place that is easier rec...

Page 54: ...ation on a map touch the on the screen during triangulation When triangulation is unsuccessful the map shows the default setting location or a location acquired previously If you hold a certain point the map keeps scrolling You can also display the current location by touching MENU Show others YOUR LOCATION under OTHERS category Searching for a desired scene by recording location Map Index Where m...

Page 55: ...movies and photos at the same location the movie or photo recorded most recently will be displayed on the LCD screen Tips You can also display the Map Index by touching MENU Show others VIEW IMAGES under PLAYBACK category MAP You can also search for the thumbnail of the movie or photo you want to play by touching in step 3 The recording location of the movie or photo will be displayed at the cente...

Page 56: ...ven if AUTO CLOCK ADJ is activated The clock is adjusted automatically by AUTO CLOCK ADJ when you turn off your camcorder if the camcorder is receiving a GPS signal while it is being used The clock is not adjusted until the camcorder is turned off Also the clock is not adjusted unless the camcorder is receiving a GPS signal even if the GPS switch is set to ON The AUTO AREA ADJ function automatical...

Page 57: ...before use The format screen appears when the external media is connected to your camcorder Operation is not assured with every device satisfying requirements for operating Connect your camcorder to the wall outlet wall socket using the supplied AC adaptor p 14 Refer to the instruction manual supplied with the external media For details on available external media go to the Sony support website in...

Page 58: ...of the external media such as deleting images Touch MENU Show others on the VISUAL INDEX screen To save desired movies and photos Notes You cannot copy or search photos by date which are recorded on the memory card Touch Play without copying in step 5 above The VISUAL INDEX screen of the external media is displayed Touch MENU Show others MOVIE DUB when selecting movies PHOTO COPY when selecting ph...

Page 59: ...to your camcorder If the external media has the AC power cable connect it to the wall outlet wall socket To finish the external media connection Touch on the VISUAL INDEX screen of the external media Disconnect the USB Adaptor Cable Creating a disc with a DVD writer recorder Selecting the method for creating a disc Several methods for creating an AVCHD disc or a standard definition image quality S...

Page 60: ...ayers recorders may fail to eject the disc You cannot create an AVCHD disc from a movie recorded with HD FX mode of REC MODE Save a movie recorded with HD FX mode onto Blu ray discs or external storage devices p 57 Creating a disc with the dedicated DVD writer DVDirect Express You can create a disc or play back the images on a created disc by using the dedicated DVD writer DVDirect Express sold se...

Page 61: ... in the following cases When dubbing a desired image When creating multiple copies of the same disc When converting high definition HD movies to standard definition STD movies and creating a disc When dubbing images in the memory card Touch DISC BURN OPTION in step 4 Select the recording media containing the movie s you want to save When you select movies with high definition image quality HD the ...

Page 62: ...d The last movie on the disc may be cut off Disc creation time to dub movies to the limit of the disc is about 20 to 60 minutes It may take more time depending on the recording mode or the number of scenes Also if high definition image quality HD is converted to standard definition image quality STD image quality conversion takes longer than the actual recording To play back a disc on the DVD writ...

Page 63: ...et using the supplied AC Adaptor for this operation p 14 Sony DVD writer may not be available in some countries regions Always maintain the firmware of the Sony DVDirect DVD writer to its latest version For details see the following website http sony storagesupport com Connect the AC Adaptor and the power cord mains lead to the DC IN jack of your camcorder and the wall outlet wall socket p 14 Turn...

Page 64: ... with standard definition image quality STD A V connecting cable supplied Connect the A V connecting cable to the input jack of another device A V connecting cable with S VIDEO sold separately When connecting to another device via the S VIDEO jack by using an A V connecting cable with an S VIDEO cable sold separately higher quality images can be produced than with an A V connecting cable Connect t...

Page 65: ...cators such as a counter etc on the screen of the monitor device connected touch MENU Show others OUTPUT SETTINGS under GENERAL SET category DISP OUTPUT LCD PANEL the default setting To record the date time coordinates HDR CX550V XR550V or camera settings data touch MENU Show others PLAYBACK SET under PLAYBACK category DATA CODE a desired setting In addition touch MENU Show others OUTPUT SETTINGS ...

Page 66: ... MANAGE MEDIA Items for recording media p 85 GENERAL SET Other setup items p 86 Operating menus Touch MENU Touch Show others on the MY MENU screen See the next page for details on MY MENU Touch the central part of the left side of screen to change the display Touch the menu item to be changed After changing the setting touch To finish setting the menu touch To return to the previous menu screen to...

Page 67: ... the menu items more easily by registering the menu items you use most often on MY MENU You can register 6 menu items on each MY MENU of the MOVIE PHOTO and PLAYBACK Example deleting SPOT MTR FCS and registering FADER Touch MENU Touch MY MENU SETTING Touch MOVIE Touch SPOT MTR FCS Touch Touch FADER under MANUAL SETTINGS category When MY MENU is displayed touch Repeat the same steps above to regist...

Page 68: ...and the menu items you can change in the context appear Touch OPTION Touch the desired tab the item to change the setting After completing the setting touch Notes Grayed out menu items or settings are not available When the item you want is not on the screen touch another tab There may be no tab The tabs and items that appear on the screen depend on the recording playback status of your camcorder ...

Page 69: ...T IN ZOOM MIC 78 MICREF LEVEL 78 AUDIO MODE 79 OTHER REC SET DIGITAL ZOOM 79 AUTO BACK LIGHT 79 DIAL SETTING 31 NIGHTSHOT LIGHT 79 X V COLOR 79 WIDE SELECT 80 PHOTO SETTINGS category SELF TIMER 80 IMAGE SIZE 80 STEADYSHOT 81 FLASH MODE 81 FLASH LEVEL 81 REDEYE REDUC 81 FILE NO 82 PLAYBACK category VISUAL INDEX 33 VIEW IMAGES DATE INDEX 36 MAP 1 54 FILM ROLL 36 FACE 37 PLAYLIST 51 HIGHLIGHT 37 SCEN...

Page 70: ...8 MEDIA INFO 85 MEDIA FORMAT INT MEMORY 2 85 HDD 3 85 MEMORY CARD 85 REPAIR IMG DB F INT MEMORY 2 96 101 HDD 3 96 101 MEMORY CARD 96 101 GENERAL SET category SOUND DISP SET VOLUME 35 86 BEEP 86 LCD BRIGHT 86 LCD BL LEVEL 86 LCD COLOR 87 DISPLAY SET 87 OUTPUT SETTINGS TV TYPE 87 COMPONENT 88 HDMI RESOLUTION 88 DISP OUTPUT 88 CLOCK LANG CLOCK SET 15 AREA SET 88 AUTO CLOCK ADJ 1 56 AUTO AREA ADJ 1 56...

Page 71: ...o prevents your camcorder from focusing on glass or metal mesh in windows between the camcorder and the subject PORTRAIT Soft portrait Brings out the subject such as people or flowers while creating a soft background SPOTLIGHT Prevents people s faces from appearing excessively white when subjects are lit by strong light BEACH Takes the vivid blue of the ocean or a lake SNOW Takes bright pictures o...

Page 72: ...r incandescent like color lamps ONE PUSH The white balance will be adjusted according to the ambient light Touch ONE PUSH Frame a white object such as a piece of paper to fill the screen under the same lighting conditions as you will shoot the subject Touch flashes quickly When the white balance has been adjusted and stored in the memory the indicator stops flashing Notes Set WHITE BAL to AUTO or ...

Page 73: ...uitable brightness even when there is strong contrast between the subject and the background such as subjects in the spotlight on stage Touch the subject in the frame of which you want to adjust the exposure To return the setting to automatic exposure touch AUTO Notes EXPOSURE is automatically set to MANUAL SPOT FOCUS You can select and adjust the focal point to aim it at a subject not located at ...

Page 74: ...cult appears for a few seconds in the following cases This information will not display correctly if a conversion lens sold separately is being used When the focus mode is switched from automatic to manual When you set focus manually You can also adjust manually by using the MANUAL dial p 31 TELE MACRO This is useful to shoot small subjects such as flowers or insects You can blur out backgrounds a...

Page 75: ...ed according to that moment Notes The size of photos becomes 1 920 1 080 You cannot record sound Image quality is not as good as that of normal recording You cannot use GOLF SHOT when you set the image quality to standard definition image quality STD Tips You can set the self timer by touching OPTION With SELF TIMER set to ON press START STOP to start countdown of the timer The point when countdow...

Page 76: ...d with SET See page 27 REC MODE Recording mode See page 28 GUIDEFRAME You can display the frame and check that the subject is horizontal or vertical The frame is not recorded OFF Does not display the guide frame ON Displays the guide frame Tips Positioning the subject at the cross point of the guide frame makes a balanced composition The outer frame of GUIDEFRAME shows the display area of a TV whi...

Page 77: ...n lens Note The built in flash is not flashed when CONVERSION LENS is set to other than OFF you cannot also set FLASH MODE p 81 LOW LUX You can record bright color images even in dim light OFF The LOW LUX function is not used ON The LOW LUX function is used FACE DETECTION Detects the faces of your subjects and adjusts the focus color exposure automatically Also it adjusts the image quality of face...

Page 78: ...d when the camcorder detects a smile whenever the camcorder is in recording mode OFF Smiles are not detected so photos are not recorded automatically Notes Smiles may not be detected depending on recording conditions subject conditions and the setting of your camcorder When DUAL CAPTURE is selected appears on the screen in movie recording standby and changes into when movie recording starts SMILE ...

Page 79: ...ts automatically ON Adjusts the exposure for backlit subjects automatically OFF Does not adjust the exposure for backlit subjects DIAL SETTING You can select an item you want to set to the MANUAL dial For details see page 31 NIGHTSHOT LIGHT When using the NightShot p 30 function you can record clearer images by activating NIGHTSHOT LIGHT which emits infrared light invisible ON Emits infrared light...

Page 80: ...correctly according to the TV connected for playback p 87 PHOTO SETTINGS Items for recording photos See Using menus p 66 on the operation The default settings are marked with SELF TIMER Press PHOTO to start the count down A photo is recorded after about 10 seconds OFF Cancels the self timer ON Starts the self timer recording To cancel the recording touch RESET Tips You can also operate by pressing...

Page 81: ...hen the battery charge is complete If you use the flash in bright places such as when shooting a backlit subject the flash may not be effective The built in flash is not flashed when CONVERSION LENS p 77 is set to other than OFF you cannot also set FLASH MODE The built in flash is not flashed in movie recording mode FLASH LEVEL You can set this function when you record photos using the built in fl...

Page 82: ...ng on the recording medium When the memory card is replaced with another one the file number is assigned for each memory card PLAYBACK Items for playback See Using menus p 66 on the operation VISUAL INDEX See page 33 VIEW IMAGES DATE INDEX See page 36 MAP HDR CX550V XR550V See page 52 FILM ROLL See page 36 FACE See page 37 PLAYLIST See page 50 HIGHLIGHT See page 37 SCENARIO See page 38 PLAYBACK SE...

Page 83: ...htness White balance Gain Shutter speed Aperture value Exposure Flash COORDINATES HDR CX550V XR550V See page 55 Tips The data code is displayed on the TV screen if you connect your camcorder to a TV The indicator toggles through the following sequences as you press DATA CODE on the Wireless Remote Commander DATE TIME CAMERA DATA COORDINATES HDR CX550V XR550V OFF no indication Depending on the reco...

Page 84: ...48 PHOTO COPY See page 49 PLAYLIST EDIT See page 50 OTHERS Items for other settings See Using menus p 66 on the operation The default settings are marked with YOUR LOCATION HDR CX550V XR550V See page 52 USB CONNECT See page 63 TV CONNECT Guide See page 41 MUSIC TOOL See page 39 BATTERY INFO You can check the estimated remaining capacity of the battery To close the battery information screen Touch ...

Page 85: ...he camcorder disconnect the AC Adaptor or eject the memory card from your camcorder The access lamp is lit or flashing while formatting memory card To prevent data on the internal recording media from being recovered EMPTY allows you to write unintelligible data onto the internal recording media of the camcorder In this way it may become more difficult to recover any original data When you dispose...

Page 86: ...ess of the LCD screen by touching Tips This adjustment does not affect the recorded images in any way LCD BL LEVEL LCD backlight level You can select the brightness of the LCD screen s backlight NORMAL Standard brightness BRIGHT Brightens the LCD screen Notes When you connect your camcorder to the wall outlet wall socket using the supplied AC Adaptor BRIGHT is automatically selected for the settin...

Page 87: ...en you switch your camcorder to the movie recording photo recording or playback modes OUTPUT SETTINGS TV TYPE You need to convert the signal depending on the TV connected when playing back movies and photos The recorded movies and photos are played back as following illustrations 16 9 Select this to view your movies on a 16 9 wide TV The recorded movies and photos are played back as shown below Mo...

Page 88: ... Outputs the 1080i signal 720p Outputs the 720p signal 480p Outputs the 480p signal STD CONTENTS Set the output image resolution recorded with standard definition image quality STD AUTO Normal setting outputs the signal according to the TV automatically 480p Outputs the 480p signal 480i Outputs the 480i signal DISP OUTPUT Display output You can set where the screen displays are to be output LCD PA...

Page 89: ...GS DEMO MODE When your camcorder is connected to a wall outlet wall socket a demonstration movie appear about 10 minutes after you turn on the Movie lamp by pressing MODE ON The demonstration appears OFF The demonstration does not appear Notes In the default setting the demonstration movie is in the VISUAL INDEX If you delete the demonstration movie you cannot recover it A movie you have recorded ...

Page 90: ... activate the drop sensor CTRL FOR HDMI Control for HDMI When connecting your camcorder to a BRAVIA Sync compatible TV with the HDMI cable sold separately you can play back movies on your camcorder by aiming the TV s Remote Commander at the TV p 43 ON Operates your camcorder using the TV s Remote Commander OFF Does not operate your camcorder using the TV s Remote Commander REC LAMP Recording lamp ...

Page 91: ...ewfinder p 93 Memory card p 93 Recording p 93 Playback p 95 Playing back images stored on memory card on other devices p 96 Editing movies photos on your camcorder p 96 Playback on the TV p 97 Dubbing Connecting to other devices p 97 GPS HDR CX550V XR550V p 97 Connecting to a Computer p 98 Examples of functions that cannot be used simultaneously p 98 Overall operations Wireless Remote Commander Th...

Page 92: ...mander may not function properly Another DVD device malfunctions when you use the supplied Wireless Remote Commander Select a commander mode other than DVD 2 for your DVD device or cover the sensor of your DVD device with black paper Batteries power sources The power abruptly turns off Use the AC Adaptor In the default setting when about 5 minutes have elapsed while you do not operate your camcord...

Page 93: ... panel do not work correctly or do not work at all Adjust the touch panel CALIBRATION p 115 The buttons on the touch panel quickly disappear Set DISPLAY SET to ON p 87 The image in the viewfinder is not clear Move the viewfinder lens adjustment lever until the image appears clearly p 23 The image in the viewfinder has disappeared Close the LCD panel Even if the viewfinder is pulled out no image is...

Page 94: ...built in flash while the movie lamp is on CONVERSION LENS is set to other than OFF Even if auto flash or Auto redeye reduction is selected you cannot use the flash with NightShot IRIS or SHUTTER SPEED that is assigned to the MANUAL dial SPOT MTR FCS SPOT METER MANUAL in EXPOSURE TWILIGHT SUNRISE SUNSET FIREWORKS LANDSCAPE SPOTLIGHT BEACH or SNOW in SCENE SELECTION The actual recording time for mov...

Page 95: ...screen image is bright and the subject does not appear on the screen Press NIGHTSHOT to cancel the NightShot function p 30 Horizontal stripes appear on the images This occurs when recording images under a fluorescent lamp sodium lamp or mercury lamp This is not a malfunction Black bands appear when you record a TV screen or computer screen Set STEADYSHOT to an option except for ACTIVE p 77 LCD BL ...

Page 96: ... unbalanced when playing back movies on computers or other devices Change the sound conversion type downmix type when playing back on 2ch stereo devices Refer to the instruction manual supplied with your playback device for details Change the sound to 2ch when creating a disc using the supplied software PMB This happens when sound recorded in 5 1ch surround is converted to 2ch normal stereo sound ...

Page 97: ...es of images when played back on a TV which is not compatible with full pixel display It is recommended you record images using the outer frame of GUIDEFRAME p 76 as a guide The image appears distorted on the 4 3 TV This happens when viewing an image recorded in the 16 9 wide mode on a 4 3 TV Set TV TYPE correctly p 87 and play back the image Black bands appear at the top and bottom of the screen ...

Page 98: ...INTELLIGENT AUTO GOLF SHOT SMTH SLW REC Cannot use Because of following settings FACE DETECTION NightShot GOLF SHOT SMTH SLW REC DIGITAL ZOOM SPOT MTR FCS SPOT METER SPOT FOCUS EXPOSURE FOCUS TWILIGHT SUNRISE SUNSET FIREWORKS LANDSCAPE SPOTLIGHT BEACH SNOW WHITE BAL FADER SELF TIMER PRIORITY SETTING SMILE DETECTION SMILE SENSITIVITY NightShot GOLF SHOT SMTH SLW REC DIGITAL ZOOM SPOT MTR FCS SPOT M...

Page 99: ...e the battery pack or place it in a cool place High temperature warning Slow flashing The temperature of your camcorder is getting higher Turn off your camcorder and leave it for a while in a cool place Fast flashing The temperature of your camcorder is extremely high Turn off your camcorder and leave it for a while in a cool place Low temperature warning Fast flashing The temperature of your camc...

Page 100: ...ll possible situations Use the camcorder under stable conditions Warning indicator pertaining to photo recording The recording media is full Photos cannot be recorded during processing Wait for a while then record When REC MODE is set to HD FX you cannot record photos while recording movies Warning indicator pertaining to smile shutter The smile shutter cannot be used with the current setting of t...

Page 101: ...play HD movies Do you want to repair the Image Database File The management file is damaged and you cannot record movies or photos Touch YES to repair You can record photos on a memory card Buffer overflow You cannot record because the drop sensor senses a drop of the camcorder repeatedly If you are at risk of dropping the camcorder constantly set DROP SENSOR to OFF and you may be able to record t...

Page 102: ... the memory card and follow the instructions on the LCD screen Other No further selection is possible You can select only 100 images at one time for Deleting movies photos Protecting movies photos or releasing the protection Dubbing movies Copying photos Editing the Playlist of high definition image quality HD movies Data protected You tried to delete protected data Release the protection of the d...

Page 103: ...opened Bottom When recording with the viewfinder without opening the LCD screen Each recording time is measured when the REC MODE is set to HQ Typical recording time shows the time when you repeat recording start stop switching the MODE lamp and zooming Times measured when using the camcorder at 25 C 77 F 10 C to 30 C 50 F to 86 F is recommended The recording and playback time will be shorter when...

Page 104: ...h 101 h 20 m 101 h Standard definition image quality STD in h hour and m minute Recording mode Recording time HDR XR550 HDR XR550V STD HQ 5 1ch 59 h 40 m 59 h 20 m STD HQ 2ch 61 h 20 m 61 h 10 m You can change the recording sound format with AUDIO MODE p 79 Tips You can record movies of a maximum of 3 999 scenes with high definition image quality HD and 9 999 scenes with standard definition image ...

Page 105: ... recordable photos Internal recording media You can record the maximum 9 999 photos Memory card 12 0M 1GB 165 2GB 335 4GB 670 8GB 1350 16GB 2750 32GB 5500 The selected image size is effective when the Photo lamp is lit The number of recordable photos of memory card shown is for the maximum image size of your camcorder The actual number of recordable photos is displayed on the LCD screen during rec...

Page 106: ...els 16 9 4 3 The photo recording pixels and the aspect ratio Photo recording mode 4 000 3 000 dots 4 3 4 000 2 250 dots 16 9 2 880 2 160 dots 4 3 1 600 1 200 dots 4 3 640 480 dots 4 3 Dual recording 3 840 2 160 dots 16 9 2 880 2 160 dots 4 3 Capturing a photo from a movie 1 920 1 080 dots 16 9 640 360 dots 16 9 640 480 dots 4 3 ...

Page 107: ...view standard definition image quality STD movies you need a NTSC system based TV with AUDIO VIDEO input jacks An A V connecting cable must be connected On TV color systems Your camcorder is a NTSC system based camcorder If you want to view the playback image on a TV it must be a NTSC system based TV with an AUDIO VIDEO input jack System Used in NTSC Bahama Islands Bolivia Canada Central America C...

Page 108: ...ndon 01 00 Berlin Paris 02 00 Helsinki Cairo Istanbul 03 00 Moscow Nairobi 03 30 Tehran 04 00 Abu Dhabi Baku 04 30 Kabul 05 00 Karachi Islamabad 05 30 Calcutta New Delhi 06 00 Almaty Dhaka 06 30 Yangon 07 00 Bangkok Jakarta 08 00 Hong Kong Singapore Beijing 09 00 Seoul Tokyo 09 30 Adelaide Darwin Time zone differences Area setting 10 00 Melbourne Sydney 11 00 Solomon Is 12 00 Fiji Wellington Eniwe...

Page 109: ...igh definition specification which utilizes 1 080 effective scanning lines and the interlace system 2 720p specification A high definition specification which utilizes 720 effective scanning lines and the progressive system 3 Data recorded in AVCHD format other than the above mentioned cannot be played on your camcorder About GPS HDR CX550V XR550V The GPS Global Positioning System is a system that...

Page 110: ...ocation information every 10 seconds during triangulating There is a slight time difference between when the location information is acquired and when the location information is recorded on an image therefore the actual recording location may not match exactly the location on the map based on the GPS information On the restriction of use of GPS on an airplane During take off and landing of an air...

Page 111: ... media with your camcorder However we do not guarantee the operation of all types of Memory Stick Duo media on your camcorder Types of Memory Stick media Recording Playback Memory Stick Duo media with MagicGate Memory Stick PRO Duo media Memory Stick PRO HG Duo media This product does not support 8 bit parallel data transfer but it supports 4 bit parallel data transfer the same as with Memory Stic...

Page 112: ...tion When using Memory Stick PRO Duo media inserted into Memory Stick Duo media adaptor on Memory Stick media compliant device make sure the Memory Stick PRO Duo media adaptor is inserted into the device in the correct direction If inserted in the wrong direction the device may be damaged Do not insert Memory Stick Duo media adaptor without Memory Stick PRO Duo media attached into Memory Stick med...

Page 113: ...er The battery pack is also consumed when your camcorder is in recording standby or playback pause Have spare battery packs ready for 2 or 3 times the expected recording time and make trial recordings before making the actual recording Do not expose the battery pack to water The battery pack is not water resistant About the remaining battery time indicator When the power goes off even though the r...

Page 114: ...e the casing unplug your camcorder and have it checked by a Sony dealer before operating it any further Avoid rough handling disassembling modifying physical shock or impact such as hammering dropping or stepping on the product Be particularly careful of the lens Keep the LCD screen closed when you are not using your camcorder Do not wrap your camcorder with a towel for example and operate it Doin...

Page 115: ...e procedure below It is recommended that you connect your camcorder to the wall outlet wall socket using the supplied AC Adaptor during the operation MENU Show others OTHER SETTINGS under GENERAL SET category CALIBRATION Touch displayed on the screen with the corner of memory card or the like 3 times Touch CANCEL to cancel calibration Notes If you did not press the right spot try the calibration a...

Page 116: ...body it is recommended that you delete date completely using data deletion software on a computer Also when you dispose of the memory card it is recommended that you destroy the actual body of the memory card On trademarks Handycam and are registered trademarks of Sony Corporation AVCHD and AVCHD logotype are trademarks of Panasonic Corporation and Sony Corporation Memory Stick Memory Stick Duo Me...

Page 117: ...FOLIO LICENSE FOR THE PERSONAL AND NON COMMERCIAL USE OF A CONSUMER TO i ENCODE VIDEO IN COMPLIANCE WITH THE AVC STANDARD AVC VIDEO AND OR ii DECODE AVC VIDEO THAT WAS ENCODED BY A CONSUMER ENGAGED IN A PERSONAL AND NON COMMERCIAL ACTIVITY AND OR WAS OBTAINED FROM A VIDEO PROVIDER LICENSED TO PROVIDE AVC VIDEO NO LICENSE IS GRANTED OR SHALL BE IMPLIED FOR ANY OTHER USE ADDITIONAL INFORMATION MAY B...

Page 118: ... under the conditions of the supplied GPL LGPL Source code is provided on the web Use the following URL to download it When downloading the source code select DCR SX43 as the model for your camcorder http www sony net Products Linux We would prefer you do not contact us about the contents of source code Read license2 pdf in the License folder on the CD ROM You will find licenses in English of GPL ...

Page 119: ...icator Meaning Recording image quality HD STD and recording mode FX FH HQ LP 28 Recording playback editing media 18 0 00 00 Counter hour minute second 34 00min Estimated recording remaining time 22 FADER 71 9999 9999 9999 Approximate number of recordable photos and recording media 24 Playback folder 35 100 112 Current playing movie or photo Number of total recorded movies or photos 34 Bottom Indic...

Page 120: ...s are approximate and may differ from what you actually see Some indicators may not appear depending on your camcorder model Parts and controls Figures in are reference pages HDR CX550 CX550V HDR XR550 XR550V Active Interface Shoe The Active Interface Shoe supplies power to accessories such as a video light a flash or a microphone sold separately The accessory can be turned on or off as you open o...

Page 121: ...parately and the built in flash at the same time When an external microphone sold separately is connected it takes precedence over the built in microphone p 29 Built in microphone 29 Flash Lens G lens MIC PLUG IN POWER jack headphones jack Remote sensor Infrared port Point the Wireless Remote Commander p 123 towards the remote sensor to operate your camcorder Camera recording lamp 90 The camera re...

Page 122: ...Viewfinder lens adjustment lever 23 Battery pack 12 A V Remote Connector 41 DC IN jack 12 PHOTO button 24 Power zoom lever 26 39 CHG flash charge lamp 12 START STOP button 22 Grip belt 21 Hook for a shoulder belt Tripod receptacle Attach a tripod sold separately to the tripod receptacle using a tripod screw sold separately the length of the screw must be less than 5 5 mm 7 32 in Memory card slot 2...

Page 123: ...X button 34 Displays a VISUAL INDEX screen during playback ENTER buttons When you press any of these buttons the orange frame appears on the LCD screen Select a desired button or an item with then press ENTER to enter Notes Remove the insulation sheet before using the Wireless Remote Commander Point the Wireless Remote Commander towards the remote sensor to operate your camcorder p 121 When no com...

Page 124: ...e Wireless Remote Commander until it clicks WARNING Battery may explode if mistreated Do not recharge disassemble or dispose of in fire When the lithium battery becomes weak the operating distance of the Wireless Remote Commander may shorten or the Wireless Remote Commander may not function properly In this case replace the battery with a Sony CR2025 lithium battery Use of another battery may pres...

Page 125: ...ANDSCAPE 71 LANGUAGE SET 17 89 LCD BL LEVEL 86 LCD BRIGHT 86 LCD COLOR 87 LOW LUX 77 LP 28 M Maintenance 109 MANAGE MEDIA 18 85 MANUAL dial 31 MANUAL SETTINGS 71 Map Index 54 MY MENU 67 MEDIA FORMAT 85 MEDIA INFO 85 MEDIA SETTINGS 18 Memory card 19 Memory Stick media 19 111 Memory Stick PRO HG Duo media 19 111 Memory Stick PRO Duo media 19 111 Symbols 1080i 480i 88 16 9 87 4 3 87 480i 88 5 1ch sur...

Page 126: ...REMOTE CTRL 90 Repair 91 REPAIR IMG DB F 96 101 RESET 122 S Saving images in external media 57 SCENARIO 38 SCENARIO ERASE 38 SCENE SELECTION 71 98 Screen indicators 119 Self diagnosis display Warning indicators 98 SELF TIMER 80 Setting the date and time 15 SHOOTING SET 76 Slide show 40 SLIDE SHOW SET 40 SMILE DETECTION 78 98 SMILE SENSITIVITY 78 98 Smile Shutter 29 SMTH SLW REC 75 SNOW 71 SOUND DI...

Page 127: ...Additional information on this product and answers to frequently asked questions can be found at our Customer Support Website http www sony net ...

Reviews: