Sony HANDYCAM 4-209-887-11(1), Handbook
The Sony HANDYCAM 4-209-887-11(1) product is an exceptional camcorder that captures life's memorable moments with incredible clarity. To help you make the most of this powerful device, we offer a free downloadable user manual, or handbook, on our website. Discover the full potential of your Sony HANDYCAM by downloading this manual from manualshive.com.
Share
Download


Reviews:
No comments
Related manuals for HANDYCAM 4-209-887-11(1)

H16 SB
Brand: BOLEX Pages: 52

F150
Brand: HP Pages: 11

ac200w
Brand: HP Pages: 19

F150
Brand: HP Pages: 2

f505g
Brand: HP Pages: 50

ac150
Brand: HP Pages: 21

f800x
Brand: HP Pages: 66

Hard Drive Camcorder
Brand: HP Pages: 4

F1816A - Jornada 720 - Win
Brand: HP Pages: 204

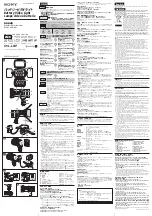
SELP18200
Brand: Sony Pages: 2

RM-AV2
Brand: Sony Pages: 2

PHU-60K Series
Brand: Sony Pages: 2

PHU-60K Series
Brand: Sony Pages: 4

HVL-S3D
Brand: Sony Pages: 2

HVL-LBPA
Brand: Sony Pages: 2
HVL-LBP
Brand: Sony Pages: 2

HVR-DR60 - 60GB Hard Disk Recorder
Brand: Sony Pages: 6

SAL1855 - 18-55mm f/3.5-5.6 SAM DT Standard Zoom Lens
Brand: Sony Pages: 15


