


SERVICE MANUAL
Link
SERVICE NOTE
DISASSEMBLY
BLOCK DIAGRAMS
FRAME SCHEMATIC DIAGRAMS
SCHEMATIC DIAGRAMS
PRINTED WIRING BOARDS
REPAIR PARTS LIST
SPECIFICATIONS
SERVICE NOTE
DISASSEMBLY
BLOCK DIAGRAMS
FRAME SCHEMATIC DIAGRAMS
SCHEMATIC DIAGRAMS
PRINTED WIRING BOARDS
REPAIR PARTS LIST
SPECIFICATIONS
Link
Revision History
Revision History
M2100/M2101 MECHANISM
How to use
Acrobat Reader
How to use
Acrobat Reader
CCD-TRV138/TRV238E/TRV338/TRV438E
Sony EMCS Co.
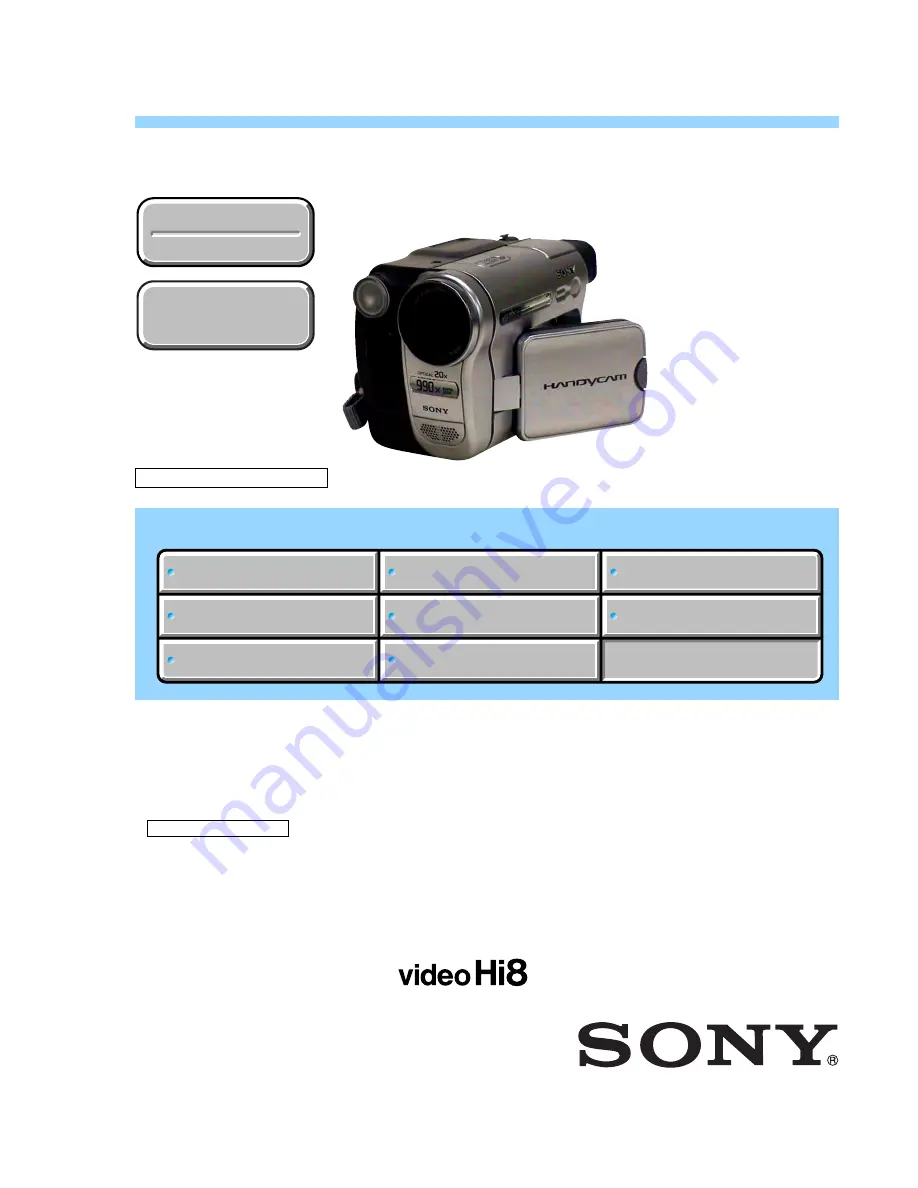
Photo: CCD-TRV438E
CCD-TRV138/TRV238E/TRV338/TRV438E
RMT-833
VIDEO CAMERA RECORDER
CCD-TRV138/TRV338
US Model
CCD-TRV-138
Canadian Model
Argentine Model
Brazilian Model
CCD-TRV238E
AEP Model
UK Model
East European Model
CCD-TRV238E/TRV438E
North European Model
CCD-TRV138/TRV238E/
TRV338/TRV438E
E Model
CCD-TRV438E
Australian Model
Tourist Model
Ver 1.0 2004. 11
• For ADJUSTMENTS (SECTION 6), refer to SERVICE MANUAL, ADJ (9-876-779-51).
• INSTRUCTION MANUAL is shown at the end of this document.
• For MECHANISM ADJUSTMENTS, refer to the “8mm Video MECHANICAL ADJUSTMENT MANUAL
IX
M2000 MECHANISM ” (9-929-861-11).
• Reference No. search on printed wiring boards is available.
• Table for differences of function of each model.
• TO TAKE OUT A CASSETTE WHEN NOT EJECT (FORCE EJECT)
• HELP: Sheet attachment positions and procedures of processing the flexible boards/harnesses are shown.
NTSC MODEL: CCD-TRV138/TRV338
PAL MODEL: CCD-TRV238E/TRV438E
2004K0500-1
©2004.11
Published by DI Technical Support Section
9-876-779-11
Summary of Contents for CCD-TRV138 - Handycam Camcorder - 320 KP
Page 86: ...7 ...
Page 192: ......
Page 193: ......
Page 194: ......
Page 195: ...Printed in Japan ...


