Summary of Contents for Smart Energy Relay
Page 1: ...Installation Guide Smart Energy Relay Version 1 3...
Page 23: ......
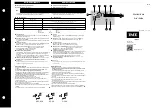
The SolarEdge Smart Energy Relay is a cutting-edge product that efficiently manages energy flow in your solar system. Ensure seamless installation by downloading the free Installation Manual from manualshive.com. This comprehensive manual provides step-by-step instructions for easy setup and configuration, making energy management hassle-free for users.
Page 1: ...Installation Guide Smart Energy Relay Version 1 3...
Page 23: ......