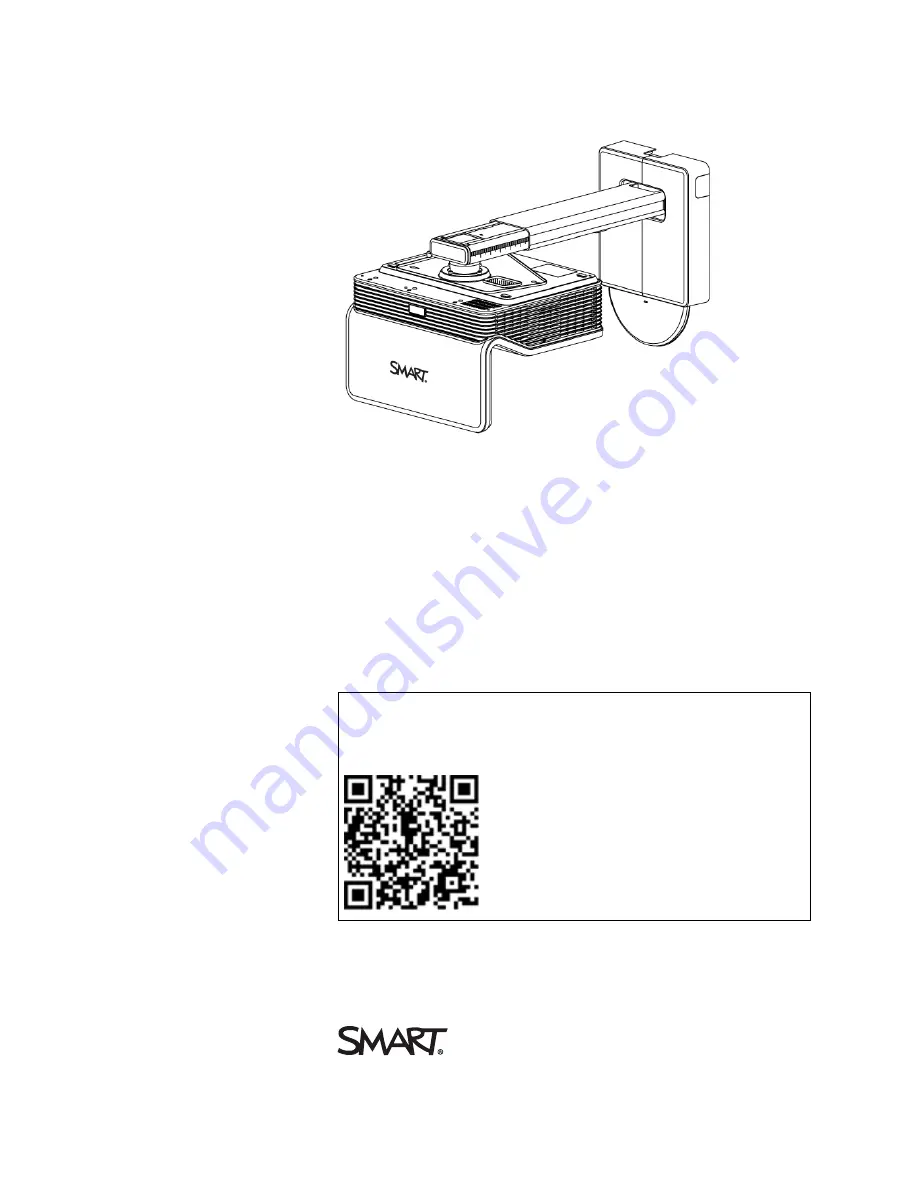
background image

LightRaise™ 60wi

interactive projector

User’s guide

Scan the following QR code to read this guide on your smart phone or

other mobile device or go to:

onlinehelp.smarttech.com/english/mobile/projectors/60wi/index.htm

Summary of Contents for LightRaise 60wi

Page 1: ...aise 60wi interactive projector User s guide Scan the following QR code to read this guide on your smart phone or other mobile device or go to onlinehelp smarttech com english mobile projectors 60wi index htm ...

Page 2: ...e FDA statement Complies with FDA performance standards for laser products except for deviations pursuant to Laser Notice No 50 dated June 24 2007 Trademark notice LightRaise SMART Notebook SMART Ink SMART Board smarttech the SMART logo and all SMART taglines are trademarks or registered trademarks of SMART Technologies ULC in the U S and or other countries Texas Instruments BrilliantColor and DLP...

Page 3: ...g on the wall is properly secured l Do not stare directly into the projector s beam of light l Do not puncture crush heat or disassemble the pen battery expose it to fire or any liquid short its terminals or abuse the battery in any other way as this may cause the battery to explode or ignite and could cause a fire or personal injury l Do not disassemble the touch detection module It has been desi...

Page 4: ...e of controls or adjustments or performance of procedures other than those specified herein may result in hazardous radiation exposure l Keep the interactive pen and pen holder out of reach of small children as there are small parts that may pose a potential choking hazard ...

Page 5: ...jector works 17 Interacting with your computer 18 Using the remote control 18 Adjusting projector settings 19 Focusing the image 30 Adjusting the image 30 Using your interactive pen 31 Chapter 4 Using the XCP 35 Connecting the XCP to the projector 36 XCP input connections 37 Using the XCPprojector controls 38 Chapter 5 Integrating other devices 41 Native video format 41 Video format compatibility ...

Page 6: ...69 Locating the serial number 70 Accessing the service menu 70 Chapter 8 Remotely managing your interactive projector 73 Accessing web page management 73 Home 74 Control panel 74 Network settings 75 E mail alerts 77 Password settings 77 Simple Network Management Protocol SNMP 78 Chapter 9 Connecting your room control system to your interactive projector 79 Serial interface settings 79 Command inve...

Page 7: ...C O N T E N T S v smarttech com kb 170295 More information 95 Index 97 ...

Page 8: ......

Page 9: ...P 5 XCP adapters 5 Wall mounting kit 5 The LightRaise 60wi interactive projector is a wall mounted short throw projector that transforms any wall or dry erase whiteboard into an interactive surface It s the only interactive projector that provides touch and pen enabled input enabling two users to simultaneously write draw and manipulate content in SMART Notebook collaborative learning software usi...

Page 10: ...en and then manipulate content with your finger without changing tools l Dual touch interaction that enables two people to draw and manipulate content on the surface at the same time The interactive surface can be touched simultaneously by two fingers by two pens or by one finger and one pen l HD ready wide screen 2500 lumens maximum resolution supported 1080p l NTSC NTSC 4 43 PAL PAL N PAL M and ...

Page 11: ...h Detection Module TDM The TDM is mounts on the wall by attaching to the wall plate and enables your system to differentiate between finger touch and pen touch When it s installed and aligned you can write with a pen and move objects with a finger at the same time on the interactive surface The TDM provides a range of adjustments to accommodate varying projection surface thicknesses It also includ...

Page 12: ... l Pen automatically turns off when not in use to prolong battery life l One tri colored status light green operational amber battery charging required red fault l SoftTouch texture for improved finger grip l USB mini B connection for battery charging Pen holder Store the interactive pens in the pen holder when you re not using them and when you re charging them The holder is also a convenient pla...

Page 13: ...ly you can individually connect your video audio and touch cables directly to the XCP See Using the XCP on page 35 for more information on the XCP functionality and cabling XCP adapters You can connect a single USB cable to the SMART Connect port for an all in one audio video and data connection to your computer If you want to use a VGA or an HDMI cable you can also purchase the appropriate adapte...

Page 14: ......

Page 15: ...h your LightRaise 60wi interactive projector for information on installing your projector You can access these documents by visiting the LightRaise support page at smarttech com Support This chapter provides additional details to help you install your interactive projector Choosing a surface Consider what your projection surface is when you re selecting a location for your interactive projector Yo...

Page 16: ...duce glare from the projector to achieve optimal touch quality and to reduce wear on the pen nib l Attach a dry erase board to the wall if you re projecting on a textured surface such as a concrete block wall A dry erase board is a flat surface that works well with your interactive projector and allows you to write smoothly in digital ink C A U T I O N Writing on the wall with the interactive pen ...

Page 17: ...T Do not install map rails on any surface you select to project your image on You must also remove any existing map rails on the wall or dry erase board before you use your interactive projector l Select a dry erase board that is flat See the following procedure for more information To measure the flatness of a dry erase board 1 Place a six foot carpenter s level horizontally across the dry erase ...

Page 18: ...te finger touch performance will likely be achieved o If the distance is between 10 mm and 15 mm in any direction it is possible to achieve adequate finger touch performance However there could be issues completing the installation A flatter board surface is recommended o If the distance is greater than 15 mm in any direction select a flatter surface Surface obstructions There should be no objects...

Page 19: ...e Choosing a location SMART includes a mounting template with your interactive projector smarttech com kb 170271 Using this template ensures that you can do the following l Determine where to install the projector in relation to the studs in the wall and the size of the projection surface l Mount the projector at a safe height for head space clearance while maintaining enough space for airflow and...

Page 20: ...able wall space Consider the general height of your user community and ensure they ll be able to touch all areas of the projected surface When determining the size of the projected image ensure there is room to route the cables around the image and space to install the pen holder To determine the height of the projector mounting bracket 1 Measure the width of the available surface space N O T E o ...

Page 21: ...ion height of the projector mounting bracket from the top of the projected image I M P O R T A N T You need at least 2 5 cm clearance space above the top mounting holes See the LightRaise 60wi interactive projector mounting template smarttech com kb 170271 for more information about ceiling clearances Routing the cables Follow these instructions to route and secure the cables to the wall To connec...

Page 22: ...age falls 5 Align the image and make other image adjustments necessary before you route the cables around the projected image 6 Route and secure the cables to the wall ensuring they don t protrude past the image surface between the bottom of the projector mount and the projected image Objects in this area should be moved or removed before you use your interactive projector because they can cause p...

Page 23: ... You can connect a variety of peripheral input devices to your projector including DVD Blu ray players VCRs computers document cameras digital cameras and high definition sources as well as peripheral device outputs such as a secondary projector or powered speakers l You might need to purchase third party adapters to connect certain peripheral devices l Peripheral devices aren t included ...

Page 24: ...st be completed before you can use the interactive projector To align the interactive projector 1 Click the SMART Board icon in the Windows notification area or the Mac Menu bar and then select SMART Settings The SMART Settings window appears o If your interactive projector is connected to your computer and working the following text appears The SMART Board interactive whiteboard is working proper...

Page 25: ...n A specially filtered infra red camera and signal processor embedded in your interactive projector can track up to two fingers or two pens simultaneously The Touch Detection Module TDM located immediately under the projector boom generates a tightly controlled infra red light beam very close to the surface The infra red camera detects the reflection from your finger or the glow from the active pe...

Page 26: ...us and change projector settings Use the Power button on the remote control to put the projector into Standby mode or to turn it on You can also use the Input button on the remote control to switch sources on the projector Number Function Description 1 Input Select a video and audio input source 2 Menu Show or hide the projector menus 3 Left Right Up and Down arrows Change the menu selections and ...

Page 27: ...on volume Adjusting projector settings The remote control s Menu button enables you to access the on screen display OSD menu to adjust the projector settings I M P O R T A N T There are no projector menu options on the XCP Keep your remote control in a safe place such as the pen holder because the XCP is not a substitute for the remote control N O T E Some projector settings aren t available for a...

Page 28: ...ten the vertical lines of the image Brightness Adjusts projector brightness from 0 to 100 The default is 50 Contrast Adjusts the difference between the lightest and darkest parts of the image from 0 to 100 The default is 50 Saturation Adjusts the image from black and white to saturated color from 0 to 100 The default is 50 Sharpness Adjusts projected image sharpness from 0 to 31 The default is 16 ...

Page 29: ...GA inputs only and is useful in situations where the source video is cut off I M P O R T A N T l Do not adjust this setting unless advised to by SMART Support l Adjust this setting only after you make all physical image adjustments White Peaking Adjusts the image color brightness while providing more vibrant colors in increments from 0 to 10 The default is 10 A value closer to 0 creates a natural ...

Page 30: ...ojector s audio output and then increase or decrease the volume the volume is restored automatically You can prevent this from happening by disabling the Line Out above Advanced Opens the Advanced Audio sub menu where you can enable and disable the microphone input and the speaker output for each display mode Further details in the following rows Advanced Audio sub menu VGA1 Mic Enables or disable...

Page 31: ... On Select On to have the projector continuously switch inputs until it finds an active video source Select Off to manually select the input source Lamp Reminder Turns the lamp replacement reminder On or Off The default is On This reminder appears 100 hours before the recommended lamp replacement Lamp Mode Adjusts lamp brightness to Standard or Economy The default is Standard which displays a high...

Page 32: ...es The timer begins to count down when the projector no longer receives a video signal When the timer finishes the projector enters Standby mode Select 0 to turn off the timer Zoom Adjusts the zoom to the center of the image in or out from 0 to 30 The default is 0 Zooming in cuts off the outer edges of the source video I M P O R T A N T SMART recommends you leave Zoom at the default setting of 0 A...

Page 33: ...t ratio Match Input scales to fill the space at the native aspect ratio As a result unused space could appear along the top and bottom edges of the screen letterbox format or along the left and right edges of the screen pillarbox format 16 9 displays the source video in 16 9 aspect ratio As a result unused space appears along the top and bottom edges of the screen This is recommended for use with ...

Page 34: ...next time the Startup Screen displays The capture can take up to one minute depending on the complexity of the background graphic Preview Startup Screen enables you to preview the default or captured startup screen Test Screen Opens the Test Screen sub menu where you can select the type of screen test Display Grid Display Multi Square Pattern Display Checkerboard 1 Display Checkerboard 2 or Displa...

Page 35: ...ected or Off DHCP Displays the status of the network s Dynamic Host Control Protocol DHCP as On or Off The default is Off Password Reminder E mails the network password to the e mail recipient See Remotely managing your interactive projector on page 73 to set up a destination e mail address IP Address Displays the projector s current IP address in values between 0 0 0 0 and 255 255 255 255 To chan...

Page 36: ...motely managing your interactive projector on page 73 Location Displays the projector s location as set by an administrator maximum 16 characters You can set the projector s location using the remote management features see Remotely managing your interactive projector on page 73 Contact Displays the contact e mail address for projector support as set by an administrator maximum 32 characters You c...

Page 37: ...t source VGA 1 HDMI or VIDEO Resolution Displays the projector s most recently detected video source signal resolution and refresh rate If there is no current video input source signal this setting displays the last known source signal resolution and refresh rate Firmware Version Displays the projector s digital display processor DDP firmware version in x x x x format Network Version Displays the ...

Page 38: ...hen use the projector s default background or the test image from the test menu so that you can see the full projected image clearly Don t use other images which might be cropped or scaled by the projector and could result in a misleading projected image size shape and location l Use the projector s ball joint lever keystone screws and boom length mechanical adjustments to make all physical image ...

Page 39: ...image you might need to repeat all steps described in the installation document in smaller increments Using your interactive pen The interactive projector includes two interactive pens that can be used to draw or write in digital ink at the same time You can also use one interactive pen while you re using your finger to touch the surface and interact with your computer Each pen has a charging port...

Page 40: ...l You can also charge the interactive pen by connecting it to your computer with a USB cable l You can store the interactive pen in the pen holder during charging l The interactive pen doesn t write while it s charging Writing or drawing with SMART Ink When you connect your computer to your SMART interactive product you can use SMART Ink to write and draw in digital ink over open applications file...

Page 41: ... with an interactive pen 1 Press SMART Ink on the toolbar with an interactive pen The SMART Ink tools appear 2 Use the interactive pen to select a pen color or tool 3 Write over an open file folder or website with the interactive pen N O T E S l SMART Ink remembers the last ink color or tool you selected When you change the ink color with the interactive pen it doesn t change the ink color you set...

Page 42: ......

Page 43: ...nection to your computer The XCP features built in composite connectors as well as a multi pin recessed connector used to connect VGA or HDMI adapters see XCP adapters on page 5 N O T E If you experience poor video quality when using the single USB cable to connect the XCP to your computer you might need to switch to a VGA or HDMI cable I M P O R T A N T l You must enable the Control Panel setting...

Page 44: ...C H A P T E R 4 Using the XCP 36 smarttech com kb 170295 Connecting the XCP to the projector The following diagram describes the connectors of the XCP harness cable ...

Page 45: ...ptacle door up See the SLR XCP projector control quick connect guide smarttech com kb 170431 for more information on how to connect the XCP adapters 2 SMART Connect port for connecting audio video and data to your computer with a single USB B cable 3 RCA composite video input jack and RCA composite audio input and output jacks 4 4 pin receptacle for third party room control system 5 Reset button c...

Page 46: ...tor status on page 56 2 Volume slider Tap tap and hold or swipe the Volume slider to increase and decrease the volume The slider brightens as you increase the volume 3 Volume mute Tap the Volume mute button to mute the audio from the built in projector speakers The button turns amber when activated 4 A V mute Tap the A V mute button to freeze the current image and mute the audio presented by the p...

Page 47: ... which adapter is connected to the XCP some of the supported input modes vary as follows l If no adapter is connected the SMART Connect or composite input modes are available l If the optional VGA USB adapter is connected the VGA and composite input modes are available l If the optional HDMI USB adapter is connected the HDMI and composite input modes are available ...

Page 48: ......

Page 49: ... the top and bottom edges of the screen The Match Input OSD setting might deliver video modes with black bands along the top and bottom or the left and right edges of the screen depending on the input resolution Native video format The following table lists the native VESA RGB video format for the projector Resolution Aspect ratio Refresh rate Hz 1280 800 16 10 60 Video format compatibility The fo...

Page 50: ...3 59 94 Pillarbox 640 480 VGA 72 4 3 72 809 Pillarbox 640 480 VGA 75 4 3 75 Pillarbox 640 480 VGA 85 4 3 85 008 Pillarbox 800 600 SVGA 56 4 3 56 25 Pillarbox 800 600 SVGA 60 4 3 60 317 Pillarbox 800 600 SVGA 72 4 3 72 188 Pillarbox 800 600 SVGA 75 4 3 75 Pillarbox 800 600 SVGA 85 4 3 85 061 Pillarbox 832 624 MAC 16 4 3 74 55 Pillarbox 1024 768 XGA 60 4 3 60 004 Pillarbox 1024 768 XGA 70 4 3 70 069...

Page 51: ...00 UXGA 4 3 60 Pillarbox 1680 X 1050 1680 x 1050 50 16 10 49 974 Full screen 1680 X 1050 1680 x 1050 60 16 10 59 954 Full screen 1920 x 1080 HD 1080 16 9 60 Letterbox HD and SD signal format compatibility Signal format Aspect ratio Match Input appearance NTSC 4 3 PAL 4 3 SECAM 4 3 480i 4 3 Pillarbox 576i 4 3 Pillarbox 720p 16 9 Letterbox 720p 16 9 Letterbox 1080i 16 9 Letterbox 1080i 16 9 Letterbo...

Page 52: ...or and the peripheral device you want to connect Make sure each cable is long enough has plenty of slack and can be placed safely in your room without presenting a trip hazard To connect a peripheral source or output to your projector 1 Connect your peripheral device s input cables to the projector see Projector connections on page 15 or the XCP see XCP input connections on page 37 2 Switch input ...

Page 53: ...ive projector and also how to replace parts Replacing the remote control battery Follow this procedure to replace the remote control battery W A R N I N G l Reduce the risk associated with a leaking battery in the projector s remote control by following these practices o Use only the specified type of coin cell battery o Orient the battery s positive and negative terminals according to the marking...

Page 54: ...nd negative signs on the battery terminals with the correct signs on the battery holder 3 Insert the battery holder into the remote control 4 Recycle or dispose of the old battery properly Replacing the CAT battery Follow this procedure to replace the curtain alignment tool CAT battery To replace the CAT battery 1 Press down on the battery door by the handle of the CAT and slide it away from the t...

Page 55: ...esulting in damage and poor image quality l Do not allow liquids or commercial solvents of any kind to flow into the projector base or head When cleaning the projector s exterior l Wipe the exterior of the projector with a lint free cloth l If necessary use a soft cloth moistened with a mild detergent to clean the projector housing I M P O R T A N T l Do not use these methods to clean the projecto...

Page 56: ...hout the projector l If the lamp shatters or bursts leave the room Ventilate the area by opening windows and doors Next do the following o Avoid touching the glass fragments because they can cause injury o Wash your hands thoroughly if you have come into contact with lamp debris o Thoroughly clean the area around the projector and discard any edible items placed in that area because they could be ...

Page 57: ...re to do so can cause injuries including loss of eyesight if the lamp shatters or bursts o Use only replacement lamp modules approved by SMART Technologies Contact your authorized SMART reseller for replacement parts o Never replace the lamp module with a previously used lamp module o Always handle the fragile lamp assembly with care to prevent premature lamp failure or exposure to mercury Use glo...

Page 58: ... put the projector into Standby mode 2 Wait at least 30 minutes for the projector to cool down 3 Disconnect the power cable from the projector 4 Use the Phillips screwdriver to loosen the captive screw on the side of the projector and then remove the lamp cover N O T E Don t try to remove this screw Captive screws can t be removed but they must be loosened 5 Remove protection film from the project...

Page 59: ...e or dispose of it I M P O R T A N T Recycle or dispose of the lamp module according to your local waste authority To put the new lamp module into the projector 1 Remove the new lamp module from its packaging 2 Carefully place the lamp module into the projector using the handle on the top of the module and then tighten the captive screw with the Phillips screwdriver C A U T I O N Do not over tight...

Page 60: ...rnings if they ve been deactivated see E mail alerts on page 77 and Control panel on page 74 Resetting the lamp hours After you replace the lamp module you need to access the projector service menu and reset the lamp hours To prevent accidental errors only a system administrator should perform this procedure N O T E Always reset the lamp hours after you replace the lamp because lamp service remind...

Page 61: ...t reset the lamp hours unless you have just replaced the lamp module Resetting the lamp hours on an old lamp can damage your projector as a result of lamp failure N O T E You re unable to reset the Display Hour value because it s the running total of hours the projector has been in use 3 Press the Menu button on the remote control The Settings menu appears 4 Select to confirm that Lamp Hour is res...

Page 62: ......

Page 63: ...issues 64 Troubleshooting image issues 64 Loss of signal 65 Partial scrolling or incorrectly displayed image 65 Unstable or flickering image 66 Unaligned projected image 66 Troubleshooting projector errors 67 Your projector stops responding 67 The Projector Overheated Fan Failure or Color Wheel Failure message appears 67 The Lamp Failure message appears 68 The projector Power and Service lights ar...

Page 64: ...ections of this chapter for troubleshooting information Flashing amber Off None The projector is entering Standby mode Solid amber Off None The projector is in Standby mode Error states Solid green Off Incorrect The video input from the computer is not connected to the projector Select the correct video input OR The A V mute is activated Try pressing the Hide button on the remote control If you pu...

Page 65: ... OR There s an issue with the mains power supply for example the circuit breaker is off Determining touch status The TDM has one tri colored status light Use the table below to determine the status of the TDM TDM status light Touch interaction Status and related troubleshooting Normal operating states Solid green Full control The Touch USB is connected and SMART Product Drivers is running Flashing...

Page 66: ... Touch setting in the OSD menu This is to avoid false touches on your computer when you touch a DVD or other source image Solid red No touch Connect the Touch USB cable Flashing red amber No touch Hardware fault Turn the projector off and then on again Contact smarttech com contactsupport if the issue continues Determining interactive pen status The interactive pens each have one tri colored statu...

Page 67: ...ssue continues Off None The pen battery is fully discharged Charge the pen with the USB charger see Charging the interactive pen on page 32 Determining curtain alignment tool CAT status The CAT has one status light If you re experiencing issues with the CAT press the front side of the CAT against the surface and ensure that the status light is green See the SLR 60wi installation guide smarttech co...

Page 68: ...lluminated next to the active input Troubleshooting your SMART product with the Connection Wizard SMART Product Drivers enables you to view information about your interactive projector and can help you troubleshoot your interactive projector To troubleshoot your SMART product with the Connection Wizard 1 Click the SMART Board icon in the Windows notification area or the Mac Menu bar and then selec...

Page 69: ...Connection Wizard N O T E If the SMART Settings window indicates your projector is working properly see Troubleshooting pen and finger touch issues on the next page for more information 3 Select LightRaise 60wi interactive projector from the SMART products found drop down list and then click Next ...

Page 70: ...d and the switch on the base of the pen is turned on see Interactive pen components on page 31 for the location of the On Off switch l Ensure that the Touch USB cable is properly connected to your computer l Ensure that the TDM is properly connected and operational and that its status light is solid green or flashing green see Determining touch status on page 57 l If something is blocking the proj...

Page 71: ...d that the TDM is connected and has a solid green or flashing green status light see Determining touch status on page 57 l Use the Connection Wizard to ensure the Pen only setting isn t selected This setting is selected by default until the alignment process is complete during installation l Ensure that no objects protrude into the keep out area between the bottom of the projector mount and the pr...

Page 72: ... Connection Wizard to check the status of your projector connection and to troubleshoot your projector see Troubleshooting your SMART product with the Connection Wizard on page 60 l Click the SMART Board icon and then select Orient to perform an orientation l Ensure the surface is flat smooth and has no obstructions in the keep out area around the projected image See Choosing a surface on page 7 o...

Page 73: ...en or it displays the user captured splash screen To resolve signal loss issues 1 Wait approximately 45 seconds for the image to synchronize Some video signals require a longer synchronization period 2 If the image doesn t synchronize check the cable connections to the projector and the XCP 3 Ensure that the image signal is compatible with the projector see Video format compatibility on page 41 4 ...

Page 74: ...ojector s compatible signal formats see Video format compatibility on page 41 Refer to your computer s manual for more information 2 Configure the display mode of your computer s graphics card to make it compatible with the projector Refer to your computer s manual for more information 3 Optionally reset the projector as described in Accessing the service menu on page 70 to adjust the frequency an...

Page 75: ... the time of a support call Your projector stops responding If your projector stops responding perform the following procedure To restart an unresponsive projector 1 Put the projector into Standby mode and then wait 30 minutes for it to cool down 2 Disconnect the power cable from the power outlet and then wait at least 60 seconds 3 Connect the power cable and then turn on the projector The Project...

Page 76: ...responding on the previous page 2 Check the Lamp Hours setting in the OSD menu see Adjusting projector settings on page 19 If the lamp has more than 2000 hours of use it might be near the end of its life 3 Replace your lamp module as described in Replacing the projector lamp module on page 48 4 If replacing the lamp module doesn t resolve the issue put the projector into Standby mode disconnect th...

Page 77: ...he volume of your microphone Turn the Microphone Boost setting On Speaker static You might experience static noise from your speakers if the microphone cable is routed too close to the other cables Static noise can be caused by other video and audio source devices and their connection cables Isolate these devices and test to see if they are the cause of static noise Troubleshooting XCP issues If y...

Page 78: ...al number The serial number identifies your projector and helps SMART support troubleshoot issues The serial number is on top of the projector in the location shown below Accessing the service menu C A U T I O N l To prevent tampering or unintentional changes only system administrators should access the service menu Do not share the service menu access code with casual users of your interactive pr...

Page 79: ...ft Up 2 Scroll to Password Get and then press Enter on the remote control The password appears on the screen 3 Write down the password 4 Scroll to Exit and then press Enter on the remote control to exit the projector service menu Resetting the projector At some point during troubleshooting you might need to reset all projector settings I M P O R T A N T This action is irreversible To reset all pro...

Page 80: ......

Page 81: ...jector and enable the network functions in the on screen display OSD menu see Adjusting projector settings on page 19 N O T E You can view the projector s IP address by accessing the projector s Network Settings menu see Network settings on page 75 To use the management web page 1 Start your Internet browser 2 Type the projector s network IP address in the address bar and then press ENTER The Ligh...

Page 82: ...ore All Projector Defaults Returns projector settings to default values or refreshes the current settings Select Submit or Refresh I M P O R T A N T The Submit option is irreversible resets all values and turns off network communication features Closed Captioning Turns off the closed captioning feature or sets the closed captioning language to CC1 or CC2 Typically CC1 displays U S English subtitle...

Page 83: ...hen you select the HDMI input Composite Assigns an alternative name to your Composite video input which appears when you select the Composite video input Emergency Alert Turns the on screen alert broadcast message on or off When enabled this message displays over the current projected image Alarm Message Displays an on screen emergency notification message maximum 60 characters Network settings Th...

Page 84: ...ys or allows you to set the contact name or number for projector support maximum 16 characters SNMP Turns the Simple Network Management Protocol SNMP agent on or off Read Only Community Sets a password that is required for each SNMP get request to the device N O T E The default password for Read Only Community is Public Read Write Community Sets a password that is required for each SNMP set reques...

Page 85: ...rver user name Password Displays or allows you to set the SMTP server password Alert Condition Sends e mail alerts whenever Lamp Warning Low Lamp Life Temperature Warning and Fan Lock conditions occur Select the settings you want and then click Submit N O T E The projector sends an alert e mail SMART Alert to your e mail address Click E mail Alert Test to confirm that your e mail address and SMTP ...

Page 86: ...menu on page 70 to set the projector setting to factory defaults Simple Network Management Protocol SNMP Your interactive projector supports a list of SNMP commands as described in the management information base MIB file You can download this file by browsing to smarttech com software and clicking the MIB files link in the Hardware section for the LightRaise interactive projector The SNMP agent s...

Page 87: ...A source controls 86 Audio controls 87 Network controls 88 System controls 89 By connecting a computer or room control system to the DB9 room control serial interface of your interactive projector you can select video inputs start or shut down your interactive projector and request information such as projector lamp use current settings and network addresses This chapter documents the projector pr...

Page 88: ...h the following values Setting Value Baud rate 19200 Data length 8 Parity bit None Stop bit 1 N O T E S l Asynchronous mode is disabled by default in the projector l Remote echo is not enabled on the serial connection l All commands should be in ASCII format Terminate all commands with a carriage return l All responses from the projector are terminated with a command prompt Wait until you receive ...

Page 89: ... turn on your program s local echo setting to see characters as you type them Command inventory Your projector responds to the commands in the tables on the following pages To see a list of valid commands in the projector s current power state type and press ENTER I M P O R T A N T l When entering commands ensure there is a 10 millisecond delay between characters for reliable operation l Type comm...

Page 90: ...ge and all adjustment values must equal a number within the command target range See the following examples for adjusting projector brightness of the current source get brightness brightness 55 set brightness 65 brightness 65 set brightness 5 brightness 70 set brightness 15 brightness 55 Video source specification values You can use the source input field described in Source selection controls on ...

Page 91: ...tor is in Standby mode Command Response on powerstate field off powerstate field off now powerstate field get powerstate powerstate field The following table describes the power state commands Command Description on Turns on the projector off Starts the shutdown process A dialog box appears on the projected image with the message Press Power Button to Turn off Projector You must send a second Off ...

Page 92: ...selection settings Command Response Available in Standby mode get input input current selected projector source input Yes get videoinputs videoinputs list of available projector source inputs Yes The following command controls the source selection settings Command Command target range Response set input target vga1 Composite HDMI Next None input target The following table describes the source sele...

Page 93: ...tepeaking setting get degamma degamma current degamma setting get red red current red color setting get green green current green color setting get blue blue current blue color setting get cyan cyan current cyan color setting get magenta magenta current magenta color setting get yellow yellow current yellow color setting get videofreeze videofreeze current video freeze setting get videomute videom...

Page 94: ...ue 0 to 100 blue value set cyan value 0 to 100 cyan value set magenta value 0 to 100 magenta value set yellow value 0 to 100 yellow value set videofreeze target on off videofreeze target set videomute target on off videomute target set displayhide target normal frozen muted next displayhide target Additional VGA source controls Your VGA source supports all the general source controls described in ...

Page 95: ...ugh the projector to your external audio system not included Audio output controls aren t defined by the video source These settings are unavailable when the projector is in Standby mode These commands inform you of the current audio output settings Command Response get volume volume current volume setting get micvolume micvolume current microphone volume setting get mute mute current mute setting...

Page 96: ...ys U S English subtitles while cc2 displays other regional languages such as French or Spanish depending on television channel or media setup Network controls These commands control your projector s network status and settings These settings are located in the OSD menu and are available even when the projector is in Standby mode You must locally set the network commands to on for the network abili...

Page 97: ...rent System controls These commands enable you to switch system settings and access system information These commands inform you of the current system settings These commands are unavailable when the projector is in Standby mode Command Response get cppower cppower current XCP power setting get autosignal autosignal current auto signal detection setting get lampreminder lampreminder current lamp r...

Page 98: ...setting These commands inform you of the current system settings These commands are available even when the projector is in Standby mode Command Response get lamphrs lamphrs current lamp hours of operation get syshrs syshrs current projector hours of operation get fwvertouch fwvertouch current touch detection module firmware get fwverddp fwverddp current projector firmware version get fwvernet fwv...

Page 99: ...off value 0 to 240 autopoweroff value set zoom value 0 to 30 zoom value set projectorid value 0 to 99 projectorid value set hposition value 0 to 100 hposition value set vposition value 5 to 5 vposition value set aspectratio target fill match 16 9 aspectratio target set projectionmode target front ceiling rear rear ceiling projectionmode target set startupscreen target smart usercapture preview sta...

Page 100: ...language target set groupname description Enter a descriptor no more than 12 characters long groupname description set projectorname description Enter a descriptor no more than 12 characters long projectorname description set locationinfo description Enter a descriptor no more than 16 characters long locationinfo description set contactinfo description Enter a descriptor no more than 16 characters...

Page 101: ...the current system settings These commands are available when the projector is in Standby mode and when it is on Command Command target range Response set restoredefaults none restoredefaults done set lamphrs target 0 lamphrs 0 N O T E The Network and VGA Out setting s features are off by default Select On to activate these features ...

Page 102: ......

Page 103: ... out wheeled bin symbol indicates that products should be disposed of in the appropriate recycling stream and not as regular waste Batteries The pen contains a lithium ion battery The remote and the CAT contains a lithium CR2025 coin cell battery The CAT contains a lithium CR2032 coin cell battery Recycle or dispose of batteries properly Perchlorate material Contains perchlorate material Special h...

Page 104: ......

Page 105: ...6 89 E e mail alerts 77 emergency alerts 75 F fans 67 75 Features 2 H HDMI connections 75 84 height 12 I image resolving issues with 64 input selection 84 installation choosing a height 12 choosing a location 11 choosing a surface 7 routing the cables 13 Installing 7 Interactive projector 2 IP address 75 88 L lamp module resolving issues with 68 light sources 11 LightRaise projector control XCP 5 ...

Page 106: ...laying the name of 76 Projector boom 3 projector controls 38 R refresh rates 41 Remote control 4 S SMTP 77 subnet mask 75 88 surface 7 Surface obstructions 10 T Touch Detection Module TDM 3 trap destination address 76 U USB charger 4 V VGA connections 75 84 86 volume control 87 W Wall mounting kit 5 Wall protrusions 11 WEEE and Battery Directives 95 X XCP 23 37 XCP adapters 5 XCP power 23 ...

Page 107: ......

Page 108: ...SMART Technologies smarttech com support smarttech com contactsupport smarttech com kb 170295 ...

Reviews: