background image

Help us make this document better

smarttech.com/docfeedback/170910

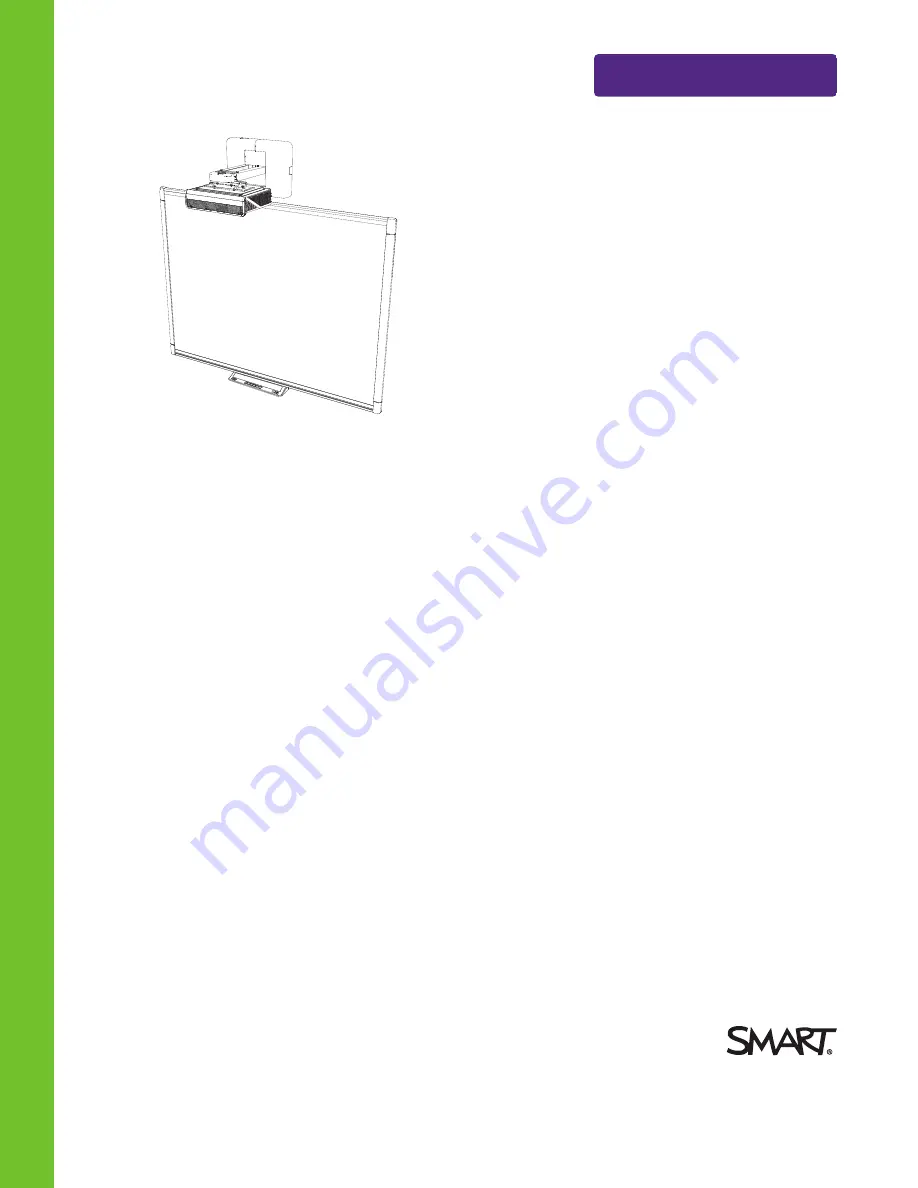
SMART Board® M600ix3

interactive whiteboard systems

CONFIGURATION AND USER’S GUIDE

FOR MODELS M680ix3 AND M685ix3

Summary of Contents for M600ix3

Page 1: ...Help us make this document better smarttech com docfeedback 170910 SMART Board M600ix3 interactive whiteboard systems CONFIGURATION AND USER S GUIDE FOR MODELS M680ix3 AND M685ix3...

Page 2: ...ebook SMART Meeting Pro DViT smarttech the SMART logo and all SMART taglines are trademarks or registered trademarks of SMART Technologies ULC in the U S and or other countries Microsoft Windows and I...

Page 3: ...projector l Accessories and optional equipment The projector included with the system is designed to work only with certain SMART Board interactive whiteboard models Contact your authorized SMART rese...

Page 4: ...unit in hot locations such as near heating equipment Doing so could cause a malfunction and shorten the life of the projector l Avoid setting up and using the SMART product in an area with excessive l...

Page 5: ...ector s beam of light l Do not touch or allow children to touch your projector because it can become extremely hot during normal operation l Do not stand or allow children to stand on a chair to touch...

Page 6: ...rating relative humidity non condensing Water and fluid resistance l Intended for indoor use only Doesn t meet any salt spray or water ingress requirements l Don t pour or spray liquids directly onto...

Page 7: ...ive whiteboard 25 Chapter 4 Maintaining the interactive whiteboard system 27 Maintaining the interactive whiteboard 27 Cleaning the projector 28 Focusing and adjusting the projector image 29 Replacing...

Page 8: ...ing commands 63 Appendix C Integrating other devices 89 Video format 89 Connecting peripheral sources and outputs 95 Appendix D Remote control code definitions 97 Appendix E Hardware environmental com...

Page 9: ...ded accessories 4 Remote control 4 Pens 4 Optional accessories 4 The SMART Board interactive whiteboard system combines the following components l SMART Board M600 series interactive whiteboard l Wall...

Page 10: ...a variety of devices including DVD Blu ray players VCRs document cameras and digital cameras and can project media from these sources onto the interactive screen When you use SMART software with your...

Page 11: ...projector The SMART U100 or SMART U100w projector system includes a short throw projector for use with SMART Board interactive whiteboards and a sturdy support system suitable for many different envi...

Page 12: ...tioning the system safely Included accessories The following accessories are included with the interactive whiteboard system Remote control The remote control enables you to control the system and set...

Page 13: ...considerations and details for installing the interactive whiteboard system Choosing a location Choose a location for the interactive whiteboard system that s far from bright light sources such as win...

Page 14: ...template ensures that you can do the following l Mount the projector at a safe height for head space clearance while maintaining enough space for airflow and installation access above the unit l Posi...

Page 15: ...ide full support for the interactive whiteboard s weight IMPORTANT Do not connect the power cable to a power outlet until you have connected all the cables to the projector and interactive whiteboard...

Page 16: ......

Page 17: ...r connection diagram 23 Using the interactive whiteboard 25 This chapter describes the basic operation of the interactive whiteboard system and explains how to set up the remote control retrieve syste...

Page 18: ...or recharge the battery or expose it to fire or high temperatures o Avoid eye and skin contact with the battery if it has a leak l Dispose of the exhausted battery and product components in accordanc...

Page 19: ...the associated USB input source on the ECP if present 2 Menu Show or hide the projector menus 3 Left Right Up and Down arrows Change the menu selections and adjustments 4 Hide Freeze hide or display t...

Page 20: ...GB and User The default is SMART Presentation Brightness Adjusts projector brightness from 0 to 100 The default is 50 Contrast Adjusts the difference between the lightest and darkest parts of the imag...

Page 21: ...b menu for adjusting the Red Green Blue Cyan Magenta and Yellow colors on the projector from 0 to 100 providing custom color and luminance output Each color has a default value of 100 Adjustments to t...

Page 22: ...test and darkest parts of the image from 0 to 100 The default is 50 Saturation Adjusts the intensity of the video signal s color from 0 to 100 The default is 50 Sharpness Adjusts the video signal s sh...

Page 23: ...hone s volume gain from 0 to 40 The default is 20 Disable Main Volume Control Disabling the main volume control maintains the current volume setting even if a user tries to change the volume with the...

Page 24: ...g the Composite input The default is on Composite Speaker Enables or disables the speaker output while using the Composite input The default is on Microphone Boost Boosts the microphone gain by 20dB T...

Page 25: ...to Power Off Sets the length of the auto power off countdown timer between 1 and 240 minutes The default is 15 minutes The timer begins to count down when the projector no longer receives a video sign...

Page 26: ...s recommended for use with HDTV and DVD Blu ray discs enhanced for wide screen televisions See Video format on page 89 for descriptions of each mode Startup Screen Opens the Startup Screen sub menu in...

Page 27: ...iguration Protocol DHCP as On or Off The default is off On enables a DHCP server on the network to assign an IP address to the projector automatically Off enables an administrator to assign an IP addr...

Page 28: ...characters You can set the projector s name using the remote management features see Remotely managing the system through a network interface on page 51 and Remotely managing the system through an RS...

Page 29: ...vice reminders are based on the current hours of use See Resetting the lamp hours on page 36 for details on the lamp hours reset procedure Input Displays the currently active video input source VGA1 C...

Page 30: ...Notes Model Number Displays the projector s model number SMART U100 or SMART U100w Serial Number Displays the projector s serial number Focusing the image Use the projector s focus slider to focus the...

Page 31: ...the entire projected image increases or decreases in size especially at the bottom of the projected image l When adjusting keystone tilt ensure that the top and bottom edges of the image are horizonta...

Page 32: ...input Audio sources associated with primary and secondary computers 7 Right RCA audio input Audio source for composite video not included 8 Left RCA audio input Audio source for composite video not in...

Page 33: ...ART Board M600 series interactive whiteboard user s guide smarttech com kb 170410 for in depth information on using the interactive whiteboard and its features When you connect the SMART Board interac...

Page 34: ......

Page 35: ...ation on maintaining the interactive whiteboard see the SMART Board M600 interactive whiteboard installation guide smarttech com kb 170555 With proper care the SMART Board interactive whiteboard will...

Page 36: ...ORTANT Turn off the interactive whiteboard system before you clean it so that you do not scramble the desktop icons or inadvertently activate applications when you wipe the interactive surface TIP To...

Page 37: ...to the edge using the cleaning cloth as you would a feather duster Don t apply pressure to the mirror cover IMPORTANT l When cleaning the interactive whiteboard system o Wipe the exterior of the proj...

Page 38: ...y can cause injury o Wash your hands thoroughly if you have come into contact with lamp debris o Thoroughly clean the area around the projector and discard any edible items placed in that area because...

Page 39: ...RT Technologies Contact your authorized SMART reseller for replacement parts o Never replace the lamp module with a previously used lamp module o Always handle the fragile lamp assembly with care to p...

Page 40: ...arttech com kb 170910 4 Open the lamp cover 5 Use a Phillips screwdriver to loosen the two captive screws from the bottom of the lamp module NOTE Don t try to remove these screws Captive screws can t...

Page 41: ...CHAPTER4 MAINTAINING THE INTERACTIVE WHITEBOARD SYSTEM 33 smarttech com kb 170910 7 Remove the lamp module...

Page 42: ...new lamp module from its packaging 2 Carefully place the lamp module into the projector and gently press the power end of the lamp module against the projector to ensure the power plug makes contact...

Page 43: ...operating and that the lamp module is correctly installed 7 Put the old lamp module in a secure container and handle it gently until you recycle it To finish the projector lamp module installation 1 T...

Page 44: ...rvice menu Down Up Up Left Up CAUTION Do not adjust any settings in the service menu other than those listed in this guide Changing other settings can damage or affect the operation of the projector a...

Page 45: ...ponding 42 The Lamp Failure message appears 43 The projector Power and Service lights are off 43 Resolving image issues 43 Loss of signal 44 Partial scrolling or incorrectly displayed image 44 Unstabl...

Page 46: ...the interactive whiteboard system or contact SMART Support or your authorized SMART reseller for assistance you need to do the following l Locate the interactive whiteboard system s status lights l Lo...

Page 47: ...For the locations of serial numbers on other components and accessories see smarttech com support Determining the interactive whiteboard system s status Use the following table to determine the statu...

Page 48: ...roduct Drivers isn t installed or isn t running correctly on the connected computer Solid green Off Off N A None There s an issue with the connections between the interactive whiteboard and the other...

Page 49: ...and shut down automatically The system can be restarted to resume normal operation The projector may require cleaning or the operating environment is too hot It may be possible to resume normal operat...

Page 50: ...uide smarttech com kb 170410 l Reset the interactive whiteboard system by disconnecting the power cable from the wall outlet and then connecting it l If necessary complete additional troubleshooting w...

Page 51: ...wing issues is occurring l There was a power outage or a power surge l A circuit breaker or a safety switch was tripped l The projector isn t connected to the power source l The projector has an inter...

Page 52: ...video signals require more time to synchronize Cycling through the inputs can also help image synchronization 2 If the image doesn t synchronize check the cable connections to the projector 3 Ensure t...

Page 53: ...U100 or 1280 800 SMART U100w in 16 10 aspect ratio mode 4 Verify that the screen refresh rate is 60 Hz Unstable or flickering image If the projector s image is unstable or flickering the frequency or...

Page 54: ...wer outlet and then wait at least 60 seconds 6 Connect the power cable and then turn on the projector 7 If the previous steps don t resolve the issue contact your authorized SMART reseller The image d...

Page 55: ...ehind the projector s wall mounting bracket and that the bracket is firmly secured to the wall according to the installation instructions l Adjust the projected image See the SMART Board M600ix3 inter...

Page 56: ...able on RS 232 command see Projector programming commands on page 63 or enable the Network and VGA Out setting see Adjusting projector settings on page 12 The network features on the projector don t w...

Page 57: ...service menu Resetting the projector At some point during troubleshooting you might need to reset all projector settings IMPORTANT This action is irreversible To reset all projector settings 1 Using t...

Page 58: ......

Page 59: ...tructions on how to remotely manage the SMART Board interactive whiteboard system settings through a network interface Web page management You can access advanced setup features via the projector s we...

Page 60: ...ngs on each page 4 Modify settings using your computer s mouse and keyboard and then click Submit or another action button next to each setting you change Home The Home menu page displays basic projec...

Page 61: ...to apply your own settings Brightness Adjusts projector brightness from 0 to 100 Contrast Adjusts the difference between the lightest and darkest parts of the image from 0 to 100 Frequency Adjusts the...

Page 62: ...ative to the projected image NOTE This is useful in situations where the source video is cut off V position RGB input Moves the vertical position of the source video up or down from 5 to 5 relative to...

Page 63: ...input which appears when you select the HDMI2 input VGA1 Assigns an alternative name up to 15 characters long to the VGA1 input which appears when you select the VGA1 input Composite Assigns an altern...

Page 64: ...maximum 12 characters Location Displays or allows you to set the projector s location maximum 16 characters Contact Displays or allows you to set the contact name number or email address for projector...

Page 65: ...you to set the email address of the email alert recipient CC Displays or allows you to set the email address of the email alert copy to recipient From Displays or allows you to set the email address...

Page 66: ...rt email SMART Alert to your email address Click Email Alert Test to confirm that your email address and SMTP server settings are correct by sending a test email SMART Alert Test Mail If the settings...

Page 67: ...rvice menu on page 48 to set the projector setting to factory defaults Simple Network Management Protocol SNMP The projector supports a list of SNMP commands as described in the management information...

Page 68: ......

Page 69: ...itions 65 Video control 66 Command response definitions 66 Field definitions 68 Audio control 71 Command response definitions 71 Field definitions 72 Network information 74 Command response definition...

Page 70: ...configured You must configure your computer s serial communication program or the room control system s serial communication settings with the following values Setting Value Data Rate 19 2 kbps Data B...

Page 71: ...ds to configure the settings NOTES o To see a list of commands available in the current operating mode type and then press ENTER o If you re using a terminal emulation program turn on your program s l...

Page 72: ...command is accepted when the projector has turned off but it does nothing other than return the power state powerstate l powering l on l cooling l confirm off l idle The projector s current power sta...

Page 73: ...oinputs VGA1 Composite HDMI1 HDMI2 A comma separated list of available projector inputs The strings returned in this command must match the strings used for the input selection from the on screen disp...

Page 74: ...on screen display OSD The firmware must handle videofreeze and videomute states correctly A change should be made to ensure that videofreeze and videomute are mutually exclusive Command response defin...

Page 75: ...current no set whitepeaking target whitepeaking current no get whitepeaking whitepeaking current no set degamma target degamma current no get degamma degamma current no set red target red current no g...

Page 76: ...0 to 100 Use or to change the brightness incrementally Enter a number within the range to set the brightness to a specific level current brightness Range 0 to 100 The device s current brightness targe...

Page 77: ...OSD ranges target hposition l val l val l 0 to 100 The ranges must match the OSD ranges current hposition Range 0 to 100 The ranges must match the OSD ranges target vposition l val l val l 5 to 5 The...

Page 78: ...current cyan Range 0 to 100 The ranges must match the OSD ranges target magenta l val l val l 0 to 100 The ranges must match the OSD ranges current magenta Range 0 to 100 The ranges must match the OS...

Page 79: ...cific source use the following command EXAMPLE set brightness 65 brightness 65 set brightness vga1 65 brightness vga1 65 This sets the brightness of the VGA1 source whether the projector is on this so...

Page 80: ...ng the RS 232 the OSD s volume slider matches the slider that appears when you use another control Note that 20 should map to 0 and 20 should map to 40 current volume Range 20 to 20 The device s curre...

Page 81: ...abled target cc l cc1 l cc2 l off Closed captioning states current cc l cc1 l cc2 l off Closed captioning states target sysoutputsw l line spkr l line l spkr l none Specifies the system output switch...

Page 82: ...addr current yes get ipaddr ipaddr current yes set subnetmask target subnetmask current yes get subnetmask subnetmask current yes set gateway target gateway current yes get gateway gateway current yes...

Page 83: ...arget subnetmask Range 0 0 0 0 to 255 255 255 255 Target subnet Mask current gateway Range 0 0 0 0 to 255 255 255 255 Current gateway target gateway Range 0 0 0 0 to 255 255 255 255 Target gateway cur...

Page 84: ...projectorid current no get projectorid projectorid current no set aspectratio target aspectratio current no get aspectratio aspectratio current no set projectionmode target projectionmode current no...

Page 85: ...t locationinfo locationinfo current no set contactinfo target contactinfo current no get contactinfo contactinfo current no get modelnum modelnum U100 or modelnum U100w no Returns the actual model of...

Page 86: ...mpmode l standard l ECO The ranges must match the OSD settings current lampmode l standard l ECO The ranges must match the OSD settings target ImageCare l on l off The ranges must match the OSD settin...

Page 87: ...or Match The signal is scaled so that the input aspect ratio is maintained For example a 4 3 image appears as a 4 3 image on screen 16 9 The signal is scaled and stretched to produce a 16 9 image curr...

Page 88: ...ution l 800x600 l 1024x768 l l no signal Current resolution of the input If no signal is detected resolution no signal appears native aspect ratio 4 3 for SMART U100 16 10 for SMART U100w Native aspec...

Page 89: ...l Danish l Finnish l Italian l Norwegian l Russian l Spanish l Swedish l Portugese l Chinese Simplified l Chinese Traditional l Czech l Hungarian l Japanese l Malayasian l Polish l Romanian l Arabic...

Page 90: ...atch the OSD setting current vgaoutnetenable l on l off Status of VGA Out Enable and Network Enable target vgaoutnetenable l on l off Value for VGA Out and Network Enable current emergencyalertmsg Use...

Page 91: ...colorwheelidx current no get failurelog failurelog current yes get error error current yes set factoryreset target factoryreset current yes set highspeedfan target highspeedfan current no get highspe...

Page 92: ...Possible Values Description current testpattern l 1 19 25 Grid l 2 Red l 3 Green l 4 Blue l 5 Grey l 6 White l 7 Black Test pattern being displayed The built in test pattern can be changed target col...

Page 93: ...l Lamp Driver Overheat dH l System Overheat OH Projector s error state The modes are projector dependent When get failurelog is used the abbreviated version of the error state in parenthesis is retri...

Page 94: ...atereporting l on l off Target state reporting value current poweroverride l on l off A power override forces the projector to remain on when the command is received This command isn t persistent and...

Page 95: ...itions Field Possible Values Description target dbmsg l on l off Turn on off debug message current vgacalibration l To get the status of ADC calibration while power on current waveformid l To get wave...

Page 96: ...Execute command Behaviour set input VGA1 set input VGA1 switch to VGA1 port set input Composite set input NEXT switch to next physical port set input HDMI1 set input NEXT switch to next physical port...

Page 97: ...rces and outputs 95 This appendix provides information on integrating the SMART Board interactive whiteboard system with peripheral devices Video format The projector has a native video format and var...

Page 98: ...480 VGA 85 4 3 85 008 Full screen 800 600 SVGA 56 4 3 56 25 Full screen 800 600 SVGA 60 4 3 60 317 Full screen 800 600 SVGA 72 4 3 72 188 Full screen 800 600 SVGA 75 4 3 75 Full screen 800 600 SVGA 85...

Page 99: ...spect ratio mode 720 400 720 400_85 9 5 85 039 Letterbox Letterbox 640 480 VGA 60 4 3 59 94 Pillarbox Pillarbox 800 600 VGA 72 4 3 72 809 Pillarbox Pillarbox 800 600 VGA 75 4 3 75 Pillarbox Pillarbox...

Page 100: ...ratio mode 1152 864 SXGA 75 4 3 75 Pillarbox Pillarbox 1280 768 WXGA 60 1 67 1 60 Letterbox Pillarbox 1280 960 Quad VGA 60 4 3 60 Pillarbox Pillarbox 1280 960 Quad VGA 85 4 3 85 002 Pillarbox Pillarbo...

Page 101: ...p 16 9 44 96 59 94 Letterbox 720p 16 9 35 50 Letterbox 1080i 16 9 33 7 59 94 Letterbox 1080i 16 9 28 1 50 Letterbox SMART U100w projector Signal format Aspect ratio Horizontal frequency kHz Vertical f...

Page 102: ...ed in Adjusting projector settings on page 12 NOTE The 16 9 command delivers all video modes with black bands along the top and bottom edges of the screen The Match Input command might deliver video m...

Page 103: ...OTE Measure the distance between the projector and the peripheral device you want to connect Make sure each cable is long enough has plenty of slack and can be placed safely in your room without prese...

Page 104: ......

Page 105: ...code Key code Byte 1 Byte 2 Byte 3 Byte 4 Input F1 8B CA 14 EB Power F1 8B CA 12 ED Menu F1 8B CA 1B E4 Up F1 8B CA 40 BF Left F1 8B CA 42 BD Enter F1 8B CA 13 EC Right F1 8B CA 43 BC Down F1 8B CA 4...

Page 106: ......

Page 107: ...be harmful to the environment and to human health The crossed out wheeled bin symbol indicates that products should be disposed of in the appropriate recycling stream and not as regular waste Batteri...

Page 108: ......

Page 109: ...ctions 55 connection diagrams projector 23 contact person 56 D DHCP 19 55 diagnostic indicator projector 40 display modes 11 14 53 DNS 56 document cameras 95 dust iv DVD players 95 E electrostatic dis...

Page 110: ...s 4 original packaging 49 P passwords 19 49 57 58 pens 4 Perchlorate material 99 peripheral sources 95 pillarboxing 90 91 93 power 24 52 63 projector about 3 adjusting settings for 12 adjusting the im...

Page 111: ...ee audio startup screen 54 status lights projector 40 subnet mask 19 56 SVGA support 90 91 SXGA support 90 91 T temperatures operating and storage iv transportation 49 TRAP destination address 56 trou...

Page 112: ......

Page 113: ......

Page 114: ...SMART TECHNOLOGIES smarttech com support smarttech com contactsupport smarttech com kb 170910...

Reviews: