sky rider DRW358F60, Manual Instruction
Get the sky rider DRW358F60 Manual Instruction for free download at manualshive.com. This comprehensive manual provides step-by-step instructions on operating and maximizing the potential of your sky rider DRW358F60. Access the detailed manual effortlessly and enhance your user experience with this exceptional product.
Share
Download


Reviews:
No comments
Related manuals for DRW358F60

Vampire
Brand: Scarab Pages: 23

NEBULA CRUISER
Brand: Fast Lane Pages: 5
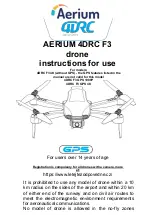
F3
Brand: 4DRC Pages: 19

Maker Lab Drone
Brand: SP ROBOTICS Pages: 14

Tello
Brand: Ryze Pages: 125

ALTA
Brand: Freefly Pages: 36

DASH
Brand: sky viper Pages: 2

Wolfhoo
Brand: Bad Ass Drones Pages: 4

Armor 65 Lite
Brand: Makerfire Pages: 9

NH330
Brand: Neheme Pages: 12

SONIC 26-XLI BOAT
Brand: RC-PRO Pages: 8

PRO20-GPS
Brand: RC-PRO Pages: 15

NovaX 350
Brand: RC Logger Pages: 52

EYE OneCam 5.8 GHz RX
Brand: RC Logger Pages: 188

H1GPS
Brand: SHRC Pages: 16

QUADRONE MAX NH90084
Brand: NINCOAIR Pages: 20

X-Bee Drone 7.2 FPV
Brand: Overmax Pages: 52

TURIBNE MAX
Brand: TRENDTRADING Pages: 39


