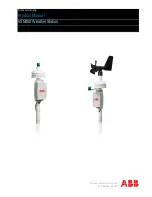
background image

Hard Drive Docking Station 

SATA 2.5”/3.5”

Installation guide

MD-394 V1 001 QIG.indd   1-2

01-12-15   11:18

Summary of Contents for MD-394

Page 1: ...Hard Drive Docking Station SATA 2 5 3 5 Installation guide MD 394 V1 001 QIG indd 1 2 01 12 15 11 18 ...

Page 2: ...ot B target Target hard disk need to be the same size or larger than source hard disk 4 Connect the power adapter to the docking station and the power outlet 5 Press the power button to turn the docking station on 6 Wait for 10 seconds for the docking station to boot up 7 Press the clone button for 3 seconds 8 Check the status LEDs indicators to see the progress 1 LED solid 25 done 2 LEDs solid 50...

Page 3: ...oter zijn dan de harde schijf die je als bron gebruikt 4 Sluit de voedingsadapter aan op het dockingstation en het stopcontact 5 Druk op de aan uit knop om het dockingstation in te schakelen 6 Wacht 10 seconden totdat het dockingstation is opgestart 7 Houd de kloonknop 3 seconden ingedrukt 8 De ledlampjes voor de status geven de voortgang aan 1 ledlampje brandt continu 25 gereed 2 ledlampjes brand...

Page 4: ...Quell Festplatte sein 4 Schließen Sie das Netzteil an die Dockingstation und an eine Netzsteckdose an 5 Betätigen Sie die Ein Aus Taste um die Dockingstation einzuschalten 6 Warten Sie zehn Sekunden während die Dockingstation hochgefahren wird 7 Halte die Klon Taste drei Sekunden lang gedrückt 8 Der Fortschritt wird durch die Status LED Leuchten angezeigt Eine leuchtende LED 25 abgeschlossen Zwei ...

Page 5: ...e dimensioni uguali o maggiori rispetto al disco rigido di origine 4 Collegare l alimentatore alla docking station e alla presa di corrente 5 Premere il pulsante di accensione per accendere la docking station 6 Attendere l avvio della docking station per 10 secondi 7 Premi il tasto Clona per 3 secondi 8 Controllare le spie LED di stato per verificare l avanzamento 1 LED fisso 25 completato 2 LED f...

Page 6: ... del mismo tamaño o más grande que el disco duro de origen 4 Conecte el adaptador de corriente a la base de acoplamiento y a la toma de alimentación 5 Pulse el botón de alimentación para encender la base de acoplamiento 6 Espere 10 segundos a que se inicie la base de acoplamiento 7 Pulse el botón de duplicación durante 3 segundos 8 Compruebe el estado de los indicadores LED para ver el progreso 1 ...

Page 7: ...upérieure au disque dur source 4 Connectez l adaptateur d alimentation à la station d accueil et à la prise de courant 5 Appuyez sur le bouton d alimentation pour activer la station d accueil 6 Attendez 10 secondes que la station d accueil s initie 7 Appuyez sur le bouton cloner pendant 3 secondes 8 Surveillez la progression à l aide des voyants état des DEL 1 DEL fixe 25 effectués 2 DEL fixes 50 ...

Page 8: ... ou supérieure au disque dur source 4 Ligue o transformador à estação de clonagem e à tomada elétrica 5 Prima o botão ligar desligar para ligar a estação de clonagem 6 Aguarde cerca de 10 segundos para a estação de clonagem arrancar 7 Prima o botão de clonagem durante 3 segundos 8 Verifique os indicadores LEDs de estado para ver o progresso 1 LED constante 25 concluído 2 LEDs constantes 50 concluí...

Page 9: ...1 o EN 60950 1 2006 A11 2009 o EN 60950 1 2006 A12 2011 o EN 60950 1 2006 A1 2010 o EN 60950 1 2006 A2 2013 EN 62368 1 2014 LVD Electro Magnetic Compatibility EMC Directive 2004 108 EC EN 55022 2010 o EN 55022 2010 AC 2011 EN 55024 2010 EN 55032 2012 o EN 55032 2012 AC 2013 EN 61000 3 2 2006 o EN 61000 3 2 2006 A1 2009 o EN 61000 3 2 2006 A2 2009 EN 61000 3 2 2014 EN 61000 3 3 2008 EN 61000 3 3 20...

Page 10: ...MD 394 V1 001 QIG indd 19 20 01 12 15 11 18 ...

Reviews: