background image

Summary of Contents for 1694161

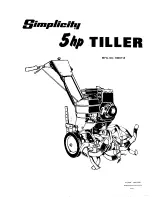
Page 1: ... Tine Tiller 1694908 6016RT 6HP Rear Tine Tiller 7800052 6016RT 6HP Rear Tine Tiller 7HP Rear Tine Tiller Mfg No Description 1694162 7016RT 7HP Rear Tine Tiller 1694909 7016RT 7HP Rear Tine Tiller 7800053 7016RT 7HP Rear Tine Tiller 1722732 Revision 02 Rev Date 12 2005 TP 100 2627 02 RT SMA OM7016 RT OM6016RT ...

Page 2: ...ference The model and manufacturer numbers can be found on the unit I D plate located on the unit s left engine mount Refer to the Engine Owner s Manual for location of engine serial number If you have a service problem requiring special assistance contact a local dealer for help Model Description Number M N Manufacturer s Number Dealer Name Engine Make Model D_aNte Serial Number Engine ID Serial ...

Page 3: ... FOLLOW ALL INSTRUCTIONS Be familiar with all controls before operating the tiller Your tiller is equipped with a safety device that enables you to stop the wheels and tines quickly in an emergency Learn how the drive safety control levers work and how to control the tiller at all times Never allow children to operate the tiller Keep small children away from the area being tilled Do not allow adul...

Page 4: ...hould start to vibrate abnormally stop the engine and check immediately for the cause Vibration is generally a warning of trouble Do not run the engine indoors exhaust fumes are dangerous Do not overload the machine capacity by attempting to till too deep at too fast a rate Never operate the machine at high transport speeds on slippery surfaces Look behind and use care when backing Never allow bys...

Page 5: ... become unreadable because of being worn faded or otherwise damaged during the use of your tiller please use the part number information provided to order a replacement label from your local authorized dealer These labels are easily applied and will act as a constant visual reminder to you and others who may use the equipment to follow the safety instructions necessary for safe effective operation...

Page 6: ...23523 6016 RT Decal Reverse Engine Controls Reverse Belt Tension Adjustment Console Forward Belt Tension Adjustment Drag Stake Detent Pin Belt Cover Wheel Lockouts Standard on Model 7016RT Bumper Guard Standard on Model 7016RT Serial No Plate Hiller Furrower Attachment is standard on Model 7016RT Page 5 ...

Page 7: ...STARTTHE ENGINE ATTHIS TIME Starting and operating instructions are given on page 11 Please read this section and all operating and safety instructions before starting your tiller _ WARNING ENGINE SHOULD BE OFF BEFORE ADJUSTING ANY CONTROLS WARNING Extreme caution should be used when operating rototiller in the reverse direction DANGER _lL CAUTION 4 As a safety precaution the drive safety control ...

Page 8: ... allows you to conserve fuel when idling or to run the unit at maximum speed for optimal tilling performance Choke Put choke control in choke position if engine is cold A warm engine requires less choking than a cold engine Refer to your engine manual for further information Model 7016RT 6016RT 1 Spark plug wire 2 Air cleaner 3 Choke 4 Carburetor 5 Fuel shut off valve if equipped 6 Rope handle 7 F...

Page 9: ...hould turn freely on axle WHEEL LOCKPINS 6016RT Place wheels in tilling position 1 Remove Iockpin Align hole in axle with hole in wheel hub Insert Iockpin through holes fold Iockpin ring to secure pin to axle Wheel and axle should be firmly locked together before tilling 4 Repeat for other wheel Model 6016RT 6 hp Wheel lockpin in free wheel position axle hole only NOTE Always have both wheel locko...

Page 10: ...lebar height adjuster 2 Align handlebar to desired hole on the height adjuster 3 Install bolt and retighten Swivel Adjustment Handlebar swivels 20 left or right for operator comfort To swivel handlebar 1 Pull detent pin out of hole in pivot lock bar 2 Rotate handlebar 20 left or right 3 Insert detent pin in hole Adjustments Pull Detent Pin for Swivel Adjustment pivot handlebar height adjuster pivo...

Page 11: ...ING Always set the depth regulator lever in the transport position before starting engine that is place the detent pin in the highest hole of the depth regulator lever BELT TENSION ADJUSTMENT Proper belt tension is critical to good performance After 1 2 hour of operation all cables may have to be adjusted due to initial stretch Thereafter check tension after every 2 hours of operation To increase ...

Page 12: ...gulator lever in the transport position before starting engine Tines should clear the ground ENGINE IS SHIPPED FROM FACTORY WITHOUT OIL YOU MUST ADD ENGINE OIL BEFORE STARTING ENGINE START UP The controls required to start and run the rototiller are located on the engine and are marked Choke and Throttle A more detailed description of engine operation and all related precautions and procedures can...

Page 13: ... result in loss of control of tiller 2 Move the throttle control to fast 3 Place the tiller in forward by pushing down on the drive safety control levers this will engage the wheels and tines NOTE You can slow the tiller s forward advance at any time by putting slight downward pressure on the handlebars or you can stop the tiller by releasing the drive safety control levers to the neutral position...

Page 14: ...sses vines or other materials clog or jam the tines reverse the tiller to unwind vegetation Immediately release the drive control levers ff the tines jam or you strike a foreign object With drive control levers in neutral push throttle control to stop position to stop the engine Disengage the spark plug wire When tines have stopped remove foreign objects and check for damage CULTIVATING TIPS If yo...

Page 15: ... the life of your unit Check forward reverse belt tension 15 X Change forward reverse belt 16 X Engine maintenance 17 X X Check or fill oil sump 17 EM X Check tiller transmission grease 18 X Check tire pressure 18 X Lubrication 18 X Clean tine axle shaft 18 X Lubricate wheel axle shaft 19 X Check throttle control adjustment EM 1 EM See engine manual 1 2 Adjust throttle control after first 3 hours ...

Page 16: ...n will cause premature belt failure To check and adjust the forward belt tension 1 Turn off engine Engine must be cool 2 Remove and secure spark plug wire from spark plug 3 With drive safety control levers in neutral position measure length of spring when compressed 4 Pull down on drive safety control levers and remeasure length of spring when stretched out Ideal length would be 1 4 longer _lb WAR...

Page 17: ...oil rope to rotate the pulley with the pulley turning force the reverse belt out of the V groove slide the belt free of engine pulleys and reverse belt guides pull belt down and away from transmission pulley _ install new reverse belt thread belt up from bottom place belt around transmission pulley in groove place belt under reverse belt guides gently pull engine recoil rope while forcing the belt...

Page 18: ...ine Engine Maintenance Refer to the engine manual included in your parts packet for information on engine maintenance Your engine manual provides detailed information and a maintenance schedule for performing the following tasks 1 Check oil level before each use or after every 8 hours of operation 2 Change oil after first 5 8 hours of operation Change oil while engine is warm Refill with new oil o...

Page 19: ...r both gear units Check Tire Pressure Recommended tire pressure is 20 PSI If tires do not have equal pressure tiller will pull to one side Lubrication Proper lubrication of moving mechanical parts of your rototiller is a very important part of care and maintenance You should oil the moving parts shown at 10 hour intervals using a 30 weight oil Clean Tine Axle Shaft 1 Turn off engine Engine must be...

Page 20: ...SAE 30 oil into spark plug hole Plug hole and pull starter cord slowly to distribute oil evenly in cylinder head area Reinstall spark plug Transport unit to a suitable storage location If you have chosen to use a fuel stabilizer and have not drained the fuel system follow all safety instructions and storage precautions in this manual to prevent the possibility of fire from the ignition of gasoline...

Page 21: ...se gas stabilizer at end of season Make sure spark plug wire is securely attached to spark plug Drive safety control levers must be released to neutral to start the engine Raise the tines for shallower tilling by lowering the depth regulator lever see page 10 Remove and clean fuel tank Clean or replace air cleaner Improper carburetor adjustment take to authorized Briggs Stratton service center Rep...

Page 22: ...place belt guard and spark plug wire Adjust tabs on the reverse belt guide turn engine off and allow muffler to cool disconnect spark plug wire and secure from spark plug release drive safety control levers to neutral remove belt guard adjust tabs of reverse belt guide while drive safety control levers are released bend metal tabs on reverse belt guide to 1 64 inch or less clearance from reverse b...

Page 23: ...parts manuals for your unit are also available The parts manuals show all of the assemblies and individual parts as exploded views which show the relationship of the parts and how they go together Important assembly notes and special torque values are included in the illustrations Standard hardware and torque specification charts are also included To order copies of the manuals applicable to your ...

Page 24: ...C 500 N Spring Street PO Box 997 Port Washington Wl 53074 0997 www SimplicityMfg com Snapper Inc 535 Macon Street McDonough GA 30253 www snapper com Copyright 2005 Simplicity Manufacturing Inc All Rights Reserved Printed in USA ...

Reviews: