Simmons SD 100, Owner'S Manual
The Simmons SD 100 Owner's Manual is a comprehensive guide that helps you unleash the full potential of your Simmons SD 100 drum kit. This essential manual is available for free download at manualshive.com, offering step-by-step instructions and valuable insights to enhance your drumming experience.
Share
Download


Reviews:
No comments
Related manuals for SD 100
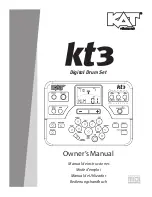
KT3
Brand: KAT Pages: 40

DTX700K
Brand: Yamaha Pages: 2

DTX6
Brand: Yamaha Pages: 14

DTX Drums TP70S
Brand: Yamaha Pages: 11

DTX500
Brand: Yamaha Pages: 52

DTX Drums DTX502
Brand: Yamaha Pages: 92

DTP900
Brand: Yamaha Pages: 91

AIL 660 series
Brand: Spectrum Pages: 4

842957119967
Brand: BCP Pages: 16

DTX900M
Brand: Yamaha Pages: 5

G3
Brand: Gewa Pages: 144

Millenium MPS-500
Brand: thomann Pages: 16

Millenium HD-120
Brand: thomann Pages: 16


