Silvercrest SDR 1.5 A1, Operating Instructions And Safety Instructions
The Silvercrest SDR 1.5 A1 product is a cutting-edge device that guarantees smooth functionality. For comprehensive knowledge of its features and safe operation, download the free manual, including Operating Instructions and Safety Instructions, from our website. Unlock the full potential of your product with this downloadable manual.
Share
Download


Reviews:
No comments
Related manuals for SDR 1.5 A1

JMS4
Brand: Jensen Pages: 14
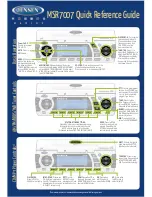
MSR7007
Brand: Jensen Pages: 2

DAB112
Brand: SOUNDMASTER Pages: 72

PBRA 20-Li B2
Brand: Parkside Pages: 210

RCD-230
Brand: auna Pages: 18

BTW-41-B-N
Brand: Brigmton Pages: 10

DAB-60
Brand: Denver Pages: 8

WFT-2D
Brand: Sangean Pages: 80

TCP-120K-N
Brand: Tokai Pages: 34

SPTT-2510
Brand: SenHaiX Pages: 7

CR45329B
Brand: Craig Pages: 9

Voyager V2
Brand: Kaito Pages: 6

ADL
Brand: Pacific Crest Pages: 30

VX-2100E Series
Brand: Vertex Standard Pages: 20

VZ-88
Brand: Vertex Standard Pages: 35

VX-410 Series
Brand: Vertex Standard Pages: 63

AWAKE
Brand: Well Pages: 6

UH089sx
Brand: Uniden Pages: 16


