background image

KH 6507 DVD Player

Operating Manual

IB_DVD_KH6507_GB.qxd  19.10.2004  9:53 Uhr  Seite 1

Summary of Contents for KH 6507

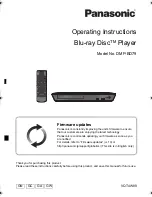
Page 1: ...KH 6507 DVD Player Operating Manual ...

Page 2: ...VISION CORPORATION REVERSE ENGINEERING AND DISASSEMBLING ARE EXPRESSLY PROHIBITED MANUFACTURED UNDER LICENSE FROM DOLBY LABORATORIES INC DOLBY AND THE DOUBLE D SYMBOL ARE REGISTERED TRADEMARKS OF DOLBY LABORATORIES INC CONFIDENTIAL UNPUBLISHED WORKS 1992 1997 DOLBY LABORATORIES INC ALL RIGHTS RESERVED THE DEVICE IS PROTECTED BY US PATENTS 4 631 603 4 577 216 4 819 098 4 907 093 AND 6 516 132 THE L...

Page 3: ...nent Signal YCbCr Progressive Scan and YUV 12 7 5 Connecting the DVD Player to a Video Projector 13 8 Connecting Audio Components to the DVD Player 13 8 1 Connecting a HiFi System to the DVD Player 13 8 2 Connecting Digital Audio Components to the DVD Player 13 8 2 1 Connecting via Digital Cable 13 8 2 1 1 Connecting via Coaxial Cable 13 8 2 1 2 Connecting via Optical Cable 14 8 2 2 Connecting via...

Page 4: ...1 1 2 with Resume Function 24 11 1 2 2 without Resume Function 24 11 2 Skip 24 11 3 Fast Forward Rewind 25 11 4 Activating Various Playback Modes 25 11 4 1 Repeat Playback 25 11 4 2 Repeating Sequences A B 26 11 4 3 Random Playback 26 11 4 4 Using the Bookmark Function 26 11 4 5 Using the Program Function 27 11 5 Title Chapter Selection with the Number Buttons 28 12 Special Functions for DVD VCD S...

Page 5: ... Video Functions of the DVD Player 32 15 1 Adjusting the Image Quality 32 16 Other Functions of the DVD Player 33 16 1 Preferences 33 16 2 Using the Sleep Timer Function 33 16 3 Adjusting the Display Brightness 34 16 4 Activating Deactivating the Password Check 34 16 5 Selecting Your Own Password 34 16 6 Using the Kid Safe Function 34 16 7 Resetting the DVD Player to the Factory Settings 35 16 8 S...

Page 6: ...e g televi sions on the DVD player This could lead to malfunc tions and or permenant damage to the DVD player Never place the DVD player in locations that are subject to heavy shocks or constant vibrations This could lead to mal functions and or permenant damage to the DVD player The DVD player and the remote control do not contain any parts that can be serviced by the user If the housing of the D...

Page 7: ...r NTSC and the image formats 4 3 LB 4 3 Pan Scan 16 9 widescreen Ú Video projectors provided they offer the corre sponding connection options and the connection of a DVD player is intended permitted by the manu facturer of the video projector For audio playback the following may be used and connected to the Silvercrest KH 6507 DVD player Ú Speakers of a television connected to the DVD player Ú Ext...

Page 8: ...Display Angel Camera Symbol y Display MP3 u Display title chapter file i Display Pause o Display Repeat a Display Repeat All s Display Play d Playback symbol Rear of the Device d RCA socket Center f RCA socket SL g RCA socket FL h Socket Optical j Socket Euro Scart k Power cord with plug l Socket Pr Cr Socket Pb Cb 2 Socket Y 2 Socket Coaxial 2 RCA socket FR 2 RCA socket SR 2 RCA socket Subwoofer ...

Page 9: ...ackward 4 Skip button skip forward 4 Play button playback 4 Shuffle button random playback 4 Video Out button set video output TV mode 4 Card button Switch card and DVD inbetween 4 3D button adjust spatializer setting 4 Stop button stop playback 5 Pause Step button pause playback step forward 5 F RWD button fast rewind 5 F FWD button fast forward 5 Vol button lower volume 5 A B button repeat seque...

Page 10: ... tion openings of other electronic devices Otherwise the DVD player may be irreparably damaged The risk of fire exists Ú in damp environments Otherwise moisture may enter the DVD player This creates the risk of an electrical shock and a fire Ú in the immediate vicinity of water such as bath tubs or swimming pools Never place containers filled with water e g flower vases on the DVD player If water ...

Page 11: ...io video RCA cable into the RCA socket for the left channel on the television 5 Insert the red plug of the audio video RCA cable into the RCA socket FR on the DVD player 6 Insert the second red plug of the audio video RCA cable into the RCA socket for the right channel on the television Fig 4 Connecting a television via S video 7 Set the television to the AV channel that displays the S video signa...

Page 12: ...r both variants YCbCr YPbPr andYUV you require Ú the included audio video RCA cables and Ú two additional audio video RCA cables These are available in audio video stores To connect the DVD player to a television via component video 1 On the rear side of the DVD player you will find three coloured component out sockets Y Pb Cb and Pr Cr Insert the red plug of the included audio video RCA cable int...

Page 13: ... Insert the white RCA cable plug into the RCA sok ket FL on the DVD player 2 Insert the second white RCA cable plug into the RCA socket for the left channel on the HiFi system 3 Insert the red RCA cable plug into the RCA socket FR on the DVD player 4 InsertthesecondredRCAcableplugintotheRCAsocket fortherightchannelontheHiFisystem Fig 7 Connecting a HiFi system via RCA cables 5 Check in the operati...

Page 14: ...the FR socket Ú the SL socket Ú the SR socket Ú the Center socket and Ú the Subwoofer socket on the rear side of the DVD player Fig 10 Connecting a HiFi system via analog cables 2 Insert the RCA cables into the corresponding RCA sockets of the digital audio component 9 Required Settings on the DVD Player Before Use All settings on the DVD player can be configured with the remote control in the On ...

Page 15: ...additional settings in other submenus Press the left control button until you can once again switch between the main menu items with the left right control buttons b To hide the OSD menu Press the Setup button again or select the main menu item Exit Setup Menu 9 2 Language Settings 1 Select the main menu item General Setup Page and the submenu item OSD Language 2 Select the language in which the O...

Page 16: ...DVD player is connected to an RGB capable television via the 21 pin Scart cable 3 Select the submenu itemTV Mode If the DVD player is connected to the television via theYCbCr progressive scan connection option In this case select the option P SCAN If the DVD player is not connected to the televi sion via theYCbCr connection option Select the option Interlace ô Note If you have selected an incorrec...

Page 17: ...se between the sampling frequencies 48 kHz and 96 kHz 9 6 3 Configuring Prologic 1 Select the main menu item Audio Setup Page then the submenu item SURROUND 2 In the 3D Processing Page select the submenu item ProLogic II 3 Choose between the options On At the condition of DOWNMIX is setup to OFF could setup the PRO LOGIC II When you select ON it means that 2ch audio could be dummy as 5 1ch multisp...

Page 18: ...back volume of background noises music etc is lowered This makes the dialogue remain clearly audible even at a low playback volume 1 In the Audio Setup Page select the submenu item SPEAKER SETUP 2 In the Analog Setup submenu select the submenu item POST DRC Here you can configure the Night time Mode for playing DVDs This mode can be use ful if you wish to watch a DVD at night 3 Select one of the o...

Page 19: ...he distances from all speakers to the listening position 2 In theAudio Setup Page select the submenu item Chan nel Delay The following screen is displayed SPEAKER SETUP SPDIF SETUP DOLBY DIGITAL SETUP CHANNEL DELAY CHANNEL TRIM EQUALIZER SURROUND HDCD CENTER Fig 12 Audio setup menü Enter the distance values for all speakers here The distance values to be entered are calculated according to the fol...

Page 20: ...the audio channels in the order Ú Left front left speaker Ú Center center speaker Ú Right front right speaker Ú Right Surr rear right speaker Ú Left Surr rear left speaker The audio channel that should currently be playing the test sound is indicated at the bottom of the OSD menu 4 To deactivate the test sound select the option Off 9 7 Activating the Screen Saver ô Note The screen saver prevents i...

Page 21: ...take a few seconds Loading is displayed on the television screen during this process 10 2 Inserting Memory Cards with MP3 WMA JPEG Files To insert memory cards of types CF I CF II SD MS MSPro MMC and SM into the DVD player 1 Switch on the television connected to the DVD player 2 Make certain that the DVD player is ready for op eration and switched on If the television the DVD player and any additi...

Page 22: ...ttom memory card slot Insert MMC SD memory cards with the contacts first and slide them straight into the bottom memory card slot It is essential that Ú the side of the memory card that contains the con tacts must face up and Ú the angled corner of the memory card points to the left 10 2 4 MemoryStick Memory Cards MS Memory Stick memory cards must be inserted into the bottom memory card slot Inser...

Page 23: ...Rs CD RWs memory cards with and without folder structures Due to the bandwidth limit could not playback JPEG file WMA and MP3 at the same time in the memory card The playing of DVD CD Rs CD RWs memory cards with MP3 WMA JPEG files is controlled via a separate menu This CD R menu is displayed on the screen once a DVD CD R CD RW memory card with MP3 WMA JPEG files is inserted 7 As soon as the conten...

Page 24: ...function is called the resume function Press Play to continue is displayed on the tele vision screen As soon as you press the Play button again the playback is continued from the saved point 11 1 2 2 without Resume Function If you have stopped playback by pressing the Stop but ton once If you press the Stop button a second time the saved point at which you stopped playback is clear ed As soon as y...

Page 25: ...es fast rewind speed 16x is displayed on the screen Ú five times for thirty two times fast rewind speed 32x is displayed on the screen ô Note For audio CDs the sound is played back at higher speed during fast forward rewind For DVDs VCDs S VCDs no sound is played during fast forward rewind 3 To continue playback of the disc at normal speed from the selected point press the Play button once while f...

Page 26: ...on you can repeat playback of a specific sequence within the current chapter To do this 1 During playback press the A B button on the remote control as soon as the start of the desired sequence is reached A is displayed on the screen 2 Press the A B button again as soon as the end of the desired sequence is reached The repeating of the selected sequence starts immediately it is not necessary to pr...

Page 27: ...5 If you would like to skip to the passages at which you have set bookmarks at a later time Press the Mark button again The bookmark menu is display ed on the screen 6 Select the desired bookmark with the control buttons Then press the Play button Playback starts immediately at the location at which you set the selected bookmark 11 4 5 Using the Program Function With the program function you can c...

Page 28: ...put fields Then press the OK button Playback of the programmed title chapter sequence starts immediately Program is displayed on the screen 5 To clear the program press the Program button again during playback In the program menu first select the Stop option and press the OK button Then select the EXIT option and press the OK but ton again Program is no longer displayed on the screen The program f...

Page 29: ...or slow playback press the Slow button Ú once for half playback speed forward in comparison with the normal playback speed 1 2 is displayed on the screen Ú twice for one fourth playback speed forward 1 4 is displayed on the screen Ú three times for one eighth playback speed forward 1 8 is displayed on the screen Ú four times for one sixteenth playback speed for ward 1 16 is displayed on the screen...

Page 30: ...s of the Audio button switches to the first available playback language Each additional press of the Audio button switches to the next available play back language The currently selected playback langua ge and its number are briefly displayed on the screen 12 9 Displaying Disc Information To display all available information about a DVD on the screen 1 Press the Display button once during playback...

Page 31: ...g buttons Ú 0 and 1 for 1 minute Ú 0 and 0 for 0 seconds 13 4 Scan Function If you activate the scan function the titles on the insert ed audio CD will be played for a few seconds each in the order in which they are found on the disc The play back ends with the last track on the audio CD To activate the scan function 1 Press the Digest button during playback of an audio CD Scan is displayed on the...

Page 32: ...function is available for Audio CDs VCDs S VCDs WMA MP3 14 6 Activating the Bass Boost The DVD player has a double bass boost function When the bass boost function is activated the bass tones sound fuller and richer To activate the bass boost function 1 Press the Setup button to display the OSD menu 2 Select the main menu item Audio Setup Page then the submenu item Equalizer 3 Select the submenu i...

Page 33: ...he Setup button to display the OSD menu 2 Select the main menu item Preferences Page ô Note The main menu item Preference Page cannot be selected while a disc memory card is being played For this rea son first stop the playback by pressing the Stop button twice 3 In the Preference Page select the submenu item Audio Select your preferred playback language here 4 Then select the submenu item Subtitl...

Page 34: ...ix digits You can use the numbers 0 to 9 To change the factory set password 1 Press the Setup button to display the OSD menu 2 Select the main menu item Password Setup Page and then the submenu item Password 3 Select the option Change A window with three input fields is displayed Fig 24 Setting the password The input field Old Password is automatically selected first Enter the factory set password...

Page 35: ...owing All of your previous settings in the OSD menu will be lost after the reset 3 Select the option Reset The DVD player is now reset to the factory settings 16 8 Switching the DVD Player Off To switch the DVD player off 1 If a disc or memory card is being played First stop the playback To do this press the Stop button twice 2 Open the disc tray to remove any inserted disc from the DVD player To ...

Page 36: ... determine whether any set tings must be configured on the television or video projector in order to use the DVD player with television No sound A Check whether the television and or DVD player have been muted B Check whether all connector cables between the DVD player and any audio components connected are firmly plugged into the appropriate sockets C Check whether the settings in the OSD menu ma...

Page 37: ...our service partners can be found in the warranty booklet This is enclosed with the DVD player ô Note For damage from Ú opening of the housing of the DVD player and or remote control Ú repair attempts by unqualified persons no liability is accepted or warranty offered 19 Glossary Key Word Index What are DVDs VCDs and S VCDs DVDs DVD is the abbreviation for Digital Versatile Disc DVDs are used to s...

Page 38: ...als the YUV consists of three separate video signals Ú the brightness signal Y and Ú the two colour differential signals Pb Cb and Pr Cr Half images interlacing full images progressive scanning A standard television image consists of 576 visible lines first the odd then the even image lines are displayed in alternation In other words one half image is shown at a time In this way only 30 full image...

Page 39: ...nly audio data they are also avai lable in the sizes 8 cm and 12 cm diameter The playback time for the audio data stored on CDs is 20 minutes 8 cm size or 74 minutes 12 cm size Audio data is stored on audio CDs in the CDA format MP3 MP3 refers to a method or format for compression of audio files developed by the Fraunhofer Institute Works of music compressed in MP3 format are only a fraction of th...

Page 40: ......

Reviews: