Shimano Ultegra 6770 Series, Manuals
Access free Shimano Ultegra 6770 Series manuals for your electronic shifting needs. Download the user manual from manualshive.com to learn how to optimize your bike's performance with this top-of-the-line product. Get the most out of your cycling experience with easy-to-follow instructions at your fingertips.
Share
Download


Reviews:
No comments
Related manuals for Ultegra 6770 Series

RideAlong Lite 100109
Brand: Thule Pages: 12

Amsterdam Series
Brand: Electra Pages: 31

WILD HT 2020
Brand: Orbea Pages: 15

airik MT-CNC
Brand: Rose electronics Pages: 2
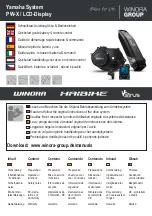
PW-X
Brand: Yamaha Pages: 13

PW series
Brand: Yamaha Pages: 10

PW-SE
Brand: Yamaha Pages: 96

PW45
Brand: Yamaha Pages: 160

58825
Brand: Betzold Pages: 4

MG8710
Brand: DWMEIGI Pages: 17

headset Adjuster BearTrap
Brand: Easton Sports Pages: 1

ThinBike
Brand: Schindelhauer Bikes Pages: 31

D-Fork
Brand: Factor Pages: 2

Wild One
Brand: Steintrikes Pages: 38

SHARK 300
Brand: Cycle Torch Pages: 9

TEMPO CADENCE BN-T11C
Brand: Nashbar Pages: 2

DIVINE SL
Brand: BikeYoke Pages: 24

Phantom
Brand: Lightning Pages: 23


