

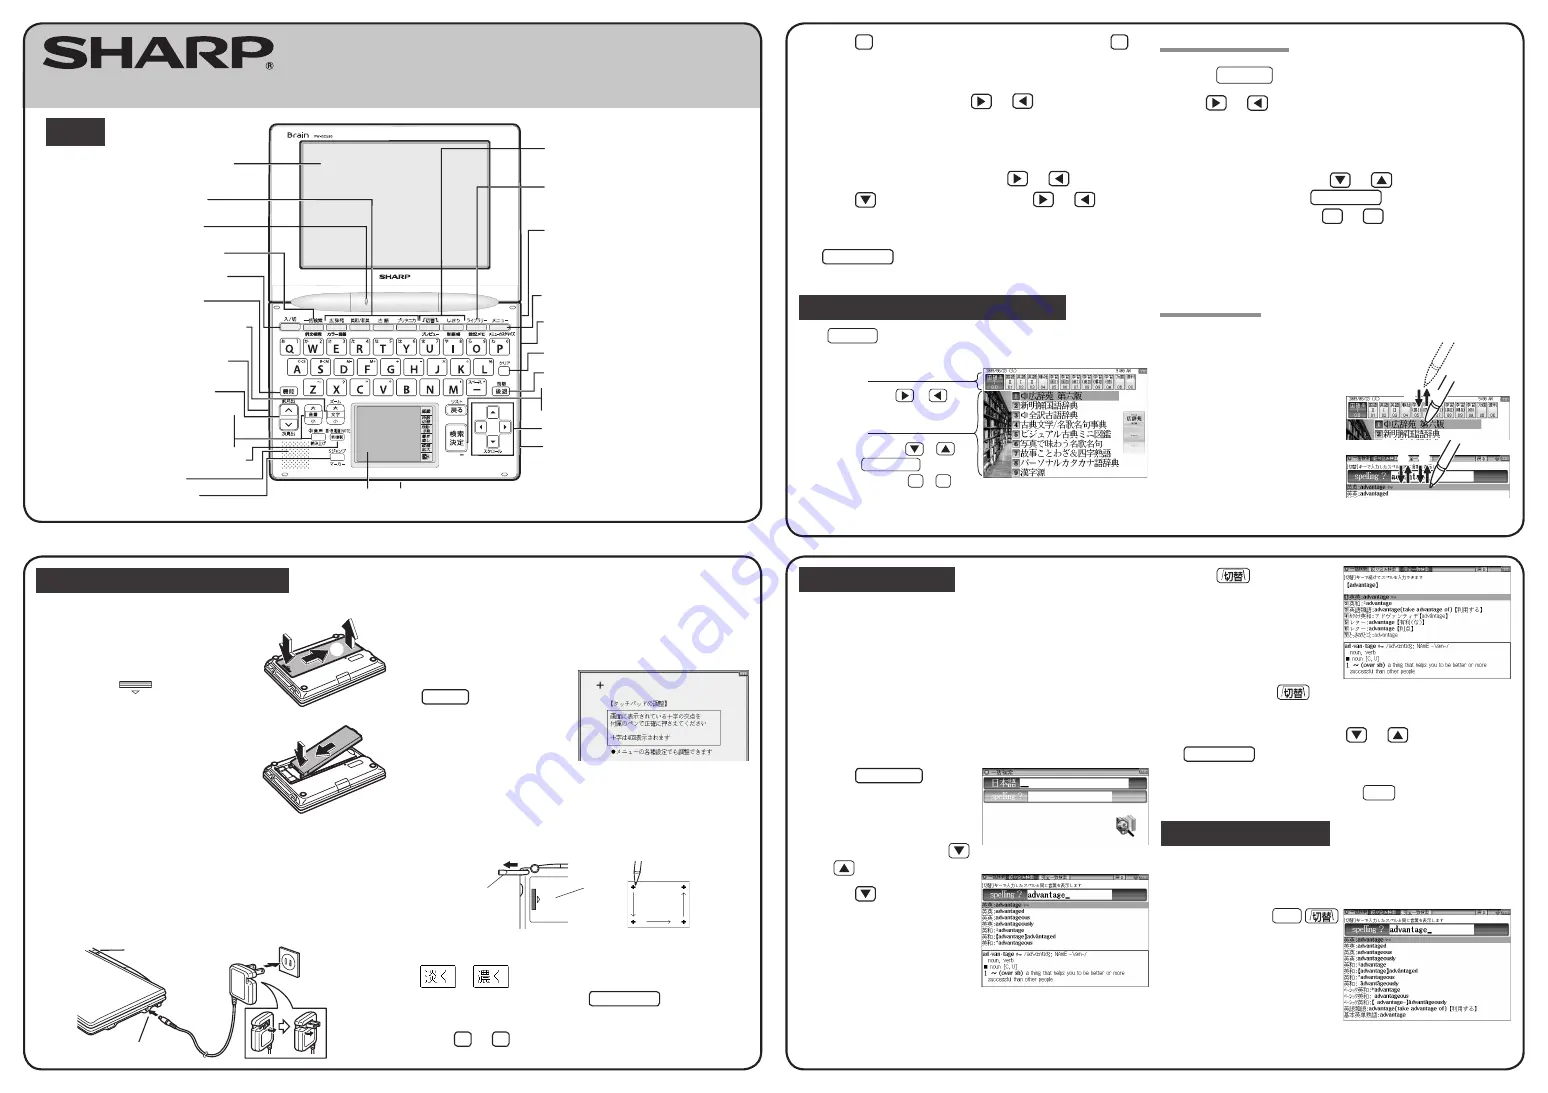
Layout
QUICK REFERENCE
PW-GC590
Display(Main display)
/ touch pad
Selection keys
for contents / functions
Charge lamp
Example/explanation key
Global search keys
Power ON/OFF key
Function key
Earphone jack(side)
Page scroll keys
Speaker
Handwriting pad
Escape key
Back space key
Clear key
Menu key
AC adapter connector (side)
USB connector (side)
Stylus holder(side)
Library key
Utility keys for
dictionaries / functions
Search/enter key
Cursor keys
Card slot(Front)
S-jump key
Volume control keys
(volume up/down)
Audio key
Character size (large/small)
change keys
Using the PW-GC590 for the first time
First, please insert the rechargeable batteries, and
then charge them before use.
①
②
1
Remove the battery cover on the
reverse side of the unit.
To remove the battery cover, slide it in the
direction indicated by the arrow
①
while
pressing the
symbol on the battery
cover, and then pull it up in the direction
indicated by the arrow
②
.
2
Insert the supplied rechargeable
battery (EA-BL14).
Insert the rechargeable battery into the battery
housing at an angle, and then slightly press
the terminal end of the battery and completely
press down the opposite side.
• Do not touch the terminals of the rechargeable battery or the unit.
• Do not insert the rechargeable battery reversely. Confirm orientation. Do
not force the battery. This can cause problems such as breakage.
3
Replace the battery cover.
4
Connect the (EA-80A) AC adapter in the order of
①
and then
②
.
When the charge lamp lights red, the charging has started.
Ĭ
ĭ
AC adapter connector
Charge lamp
Power outlet
(AC)
5
When charging is complete, the charge LED will turn off.
• A complete charge will normally take approximately 5.5 hours (the
charging time can change depending on operating temperature and
conditions).
6
Remove the AC adapter from the connector and the outlet.
7
Open the unit and press
入/切
to turn on the
power.
After a while, the calibration screen
for the touch pad appears on the
display (main display).
8
Pull out the stylus and use it to accurately touch each center
of the four “+” characters displayed on the touch pad on
the display (main display). Then do the same to the four “+”
characters displayed on the handwriting pad.
Stylus
Pull out the
stylus to use.
Back of
the unit
• When calibration is finished the LCD contrast adjustment screen is displayed.
9
Adjust the LCD contrast of the handwriting pad by touching
or
on the pad.
10
After these adjustments, press
検索/決定
.
The key sound (beep) on/off screen appears.
11
Press
Y
or
N
to turn the key sound on/off.
The kana entry screen appears.
ELECTRONIC DICTIONARY
PRINTED IN JAPAN
08MSP-61EC
Global search function
You can search for a word in several target dictionaries.
Enter a word in any of the “
日本語
” (Japanese) and “spelling?” (English spelling)
fields to search within the target dictionary.
As you type, the candidates for matching narrow (filter search). If there are still
many candidates after entering the whole word, you can switch to “exact search”
to browse only the exact word you wish to have defined.
• Japanese kanji characters have to be entered by hand.
Example: Global search for the word “advantage.”
1
Press
一括検索
.
The global search entry screen
appears.
Select the text field according the
entry character type by using
or
.
2
Press
and
enter
“advantage” in the “spelling?”
field.
As you type, the candidates for
matching narrow.
3
Press
to search by
“exact search”.
The list of words corresponding to
your entry appears.
To change the entry, press
to return to the filter search screen and enter
again.
4
Select the desired word using
or
and press
検索/決定
.
The details screen of the word appears along with its definitions.
• To return to the previous screen, press
戻る
.
Preview display function
If many candidates are listed for a word and it is difficult to decide which word is
the correct one, the preview display will help you by providing a brief note about
each word.
Each time you press
機能
“
プレビュー
”(preview) while
candidates are listed, the preview
display will be shown on the right,
shown on the bottom, or turned off in
this order.
(The preview display is turned on in
this screen example.)
12
Press
Y
to select alphabet character input or press
N
to
select Japanese input.
The date/time settings screen is displayed.
13
Select the date items using
or
, and then enter “
年
”
(year), “
月
” (month) and “
日
” (day) (e.g.
June 23th, 2009
→
09
06 23) using the number buttons on the handwriting pad.
Confirm that the cursor is on “AM
(午前)
” or “PM
(午後)
”,
and then select one of them using
or
.
Press
, select the time items using
or
and then
enter “
時
” (hour) and “
分
” (minute) (e.g.
9:00
→
09 00).
14
Confirm that the information entered is correct and press
検索/決定
.
The menu display appears.
Selecting a content in the menu display
Press
メニュー
.
The following menu display appears.
Select an item by pressing
or
.
Select an item by pressing
or
and then press
検索/決定
.
Or, select an item by typing
1
to
9
.
Category menu
Individual menu
Menu display
(contents/functions selection display)
Selecting a menu item
1
Press
メニュー
.
2
Use
or
to select a category menu item.
Or, use the numeric keys to enter the category number to
select the item.
The individual menu for the selected category menu item is displayed
.
3
In the individual menu, use
or
to select the content/
function and then press
検索/決定
.
Or, use the numeric keys (
1
to
9
) to enter the number
in front of the content/function ( 1 to 9 ).
The selected content/function screen is displayed.
●
The selected content/function screen can also be selected by touching the
relevant item on the category menu or the individual menu.
Touch operations
The PW-GC590 can be operated by touching the main screen with the stylus.
The following touch operations are
supported.
①
②
Single touch:
This is the operation of lightly touching or
pressing an item or button on the screen
and releasing it.
① ②
Double touch:
This is the operation of touching the same
place twice on the screen.
On the dictionary list screen, for example, a candidate is selected by the first touch
and the screen is switched by the second touch.


