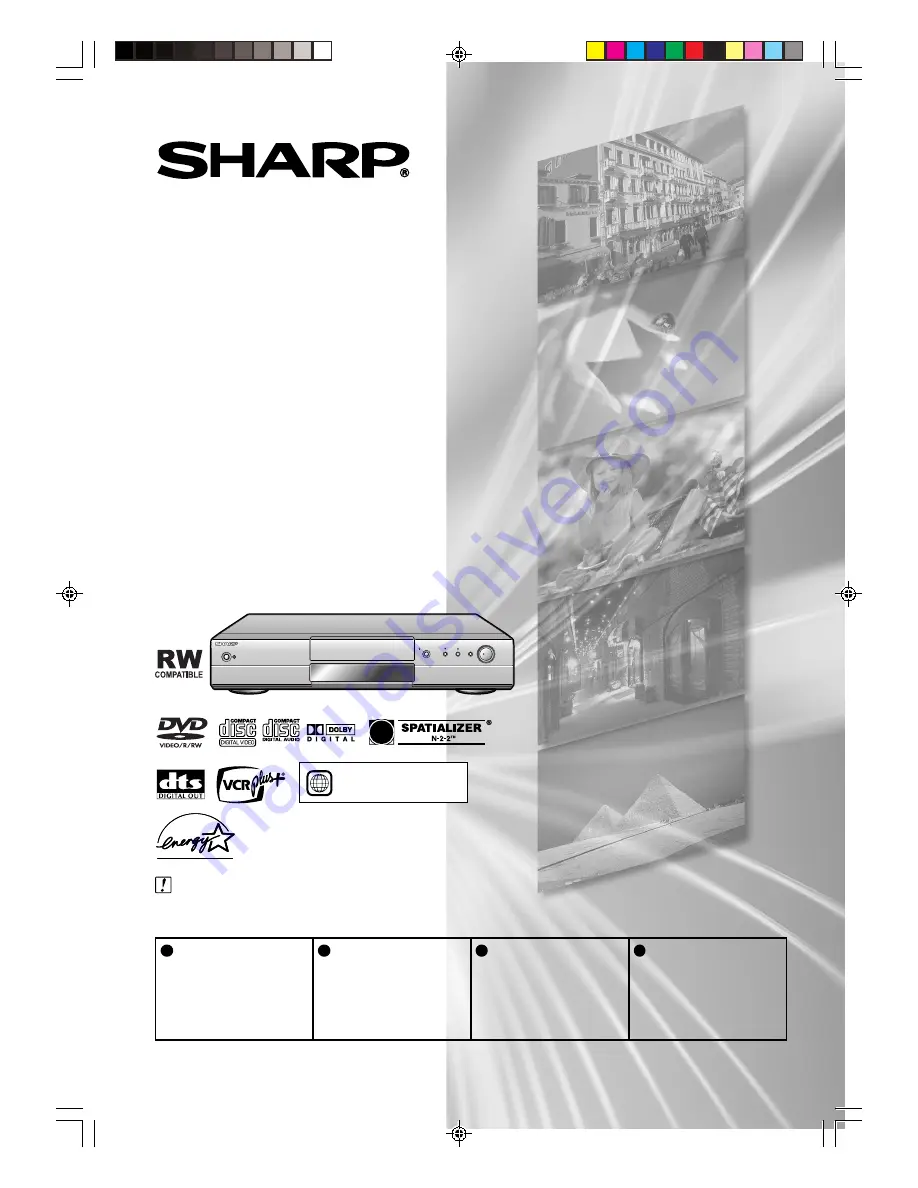
background image

DVD RECORDER
MODEL

DV-RW2U

OPERATION MANUAL

• Please read this Operation Manual carefully before using your recorder.
• Instrucciones importantes de seguridad y guía de operación rápida en español

Página 105

 IMPORTANT / 

IMPORTANTE

EZ SET UP 

(AUTO CHANNEL /CLOCK SET UP)

EZ SET UP


(PROGRAMACIÓN AUTOMÁTICA DE CANAL/PUESTA EN HORA DEL RELOJ)

Detail: Please see page 23
Detalle: véase la página 23

1

•  

The region number

   for this recorder is 

1

POWER

OPEN/CLOSE

CHANNEL

TIMER ON/OFF

REC

DISC

TIMER

AV

AUTO REC

STANDBY

TIMER

DISC IN

1

Connect Antenna/Cable
to recorder first.

En primer lugar conecte
la antena/el cable a el
producto.

2

Then, plug into AC Power
Outlet.

A continuación,
enchúfelos al
tomacorriente de CA.

3

Do not press the

POWER

 button until

completion of EZ Set Up.

No pulse el botón de

ALIMENTACIÓN
(POWER)

 hasta haber

terminado la EZ SET UP.

4

EZ SET UP complete.

EZ SET UP completo.

DV_RW2U#Hyo1-4.p65

03.1.15, 9:45 AM

2

Summary of Contents for DV-RW2U

Page 1: ...3 Detalle véase la página 23 1 The region number for this recorder is 1 POWER OPEN CLOSE CHANNEL TIMER ON OFF REC DISC TIMER AV AUTO REC STANDBY TIMER DISC IN 1 Connect Antenna Cable to recorder first En primer lugar conecte la antena el cable a el producto 2 Then plug into AC Power Outlet A continuación enchúfelos al tomacorriente de CA 3 Do not press the POWER button until completion of EZ Set U...

Page 2: ... rear of the product in the space provided INFORMATION This equipment has been tested and found to comply with the limits for a Class B digital device pursuant to Part 15 of the FCC Rules These limits are designed to provide reasonable protection against harmful interference in a residential installation This equipment generates uses and can radiate radio frequency energy and if not installed and ...

Page 3: ... and the point where they exit from the product 14 Outdoor Antenna Grounding If an outside antenna or cable system is connected to the product be sure the antenna or cable system is grounded so as to provide some protection against voltage surges and built up static charges Article 810 of the National Electrical Code ANSI NFPA 70 provides information with regard to proper grounding of the mast and...

Page 4: ...28 Change the Display on the TV Screen 28 Change the Display on the Front Panel Display 28 Playback 29 DVD Playback 29 Playback the playback only discs 29 Selected Title Playback 30 Recorded DVD Disc Playback 30 Playback After Confirming Contents with DiscNavi 30 Playback by Selecting a Title 31 Video CD Audio CD CD R CD RW Playback 31 Selected Track Playback 31 Fast Forward Fast Reverse 32 Fast F...

Page 5: ...asing Chapter Marker in a Playlist 78 Renaming the Title 78 Navimark 78 Tamper Proof 79 Tamper Proof Setting 79 Disengaging Tamper Proof 79 Operating during Tamper Proof 79 Playback Setup Screen 80 TV MODE 80 PROGRESSIVE 80 PARENTAL 81 DISC LANG 81 DD LEVEL Dolby Digital Output Level 81 Digital OUT 81 Basic Settings of the Playback Setup Screen 82 PARENTAL Level Setting 82 DISC LANGUAGE Setting 84...

Page 6: ... of titles Playlist without actually altering the recorded titles originals Chapter Marker You can put a chapter marker anywhere in your desired point This function is useful when you search the scene you want to watch with chapter skip function Erase Move Add Scenes You can make your desired Playlists to erase the scene add the scene and move the scene Compatibility Video mode recording that will...

Page 7: ...some functions may not be available on some discs Be sure to read the instructions provided with the disc The Prohibited indicator displayed on the TV screen during this product operation indicates that such manufacturer imposed restrictions apply If a menu screen or operating instructions are displayed during playback of a disc follow the displayed operating procedure Discs that Cannot be Played ...

Page 8: ...mended to record data at a lower speed as data recorded at fast speed can produce noise and may not be able to be played The more folders there are the longer the reading time Depending on the folder tree reading MP3 files can take time Folder or track file names are limited to 8 characters Folder or track file names that go over 8 characters will be abbreviated Certain letters or symbols in folde...

Page 9: ... player manufacturer Consequently there are some models of DVD players and DVD ROM drives that are unable to play back DVD R RW discs Copy once programs cannot be recorded About Recording Discs and Recording Formats DVD RW and DVD R discs can be recorded with this recorder The recording format that can be selected may vary according to the disc version and types of disc Make sure to use a disc tha...

Page 10: ... recording mode When you want to record for a long period of time with slightly lower image quality When you want to place priority on recording time Recording format Video Mode Additional recordings can be made with this recorder provided there is available space on the disc until the disc is finalized Additional recordings and erasure cannot be performed once the disc has been finalized The rema...

Page 11: ...o forth Objective When you want to play back a recorded disc with a DVD player or DVD video compatible PC When not re recording a recorded disc when making a permanent recording or when you do not want the recording to be erased When you want to play back a recorded disc with a DVD player or DVD Video compatible PC When you want to repeatedly record and erase a recorded disc When you want to edit ...

Page 12: ... in the Video mode and finalized all previously recorded contents are erased Finalizing is required if a disc recorded in the VR mode cannot be played back with a DVD RW compatible player Discs can be recorded and edited even after finalizing in the case of the VR mode Finalizing takes from several minutes to about an hour Processing takes longer time if there is considerable available space on th...

Page 13: ... at 44 1 kHz with 16 bits On DVD discs sound is recorded at between 48 kHz with 16 bits and 96 kHz with 24 bits 2 Subtitle languages This indicates the kind of subtitles 3 Screen aspect ratio Movies are shot in a variety of screen modes 4 Camera Angle Recorded onto some DVD discs are scenes which have been simultaneously shot from a number of different angles the same scene is shot from the front ...

Page 14: ... incorporates copyright protection technology that is protected by method claims of certain U S patents and other intellectual property right owned by Macrovision Corporation and other rights owners Use of this copyright protectinon technology must be authorized by Macrovision Corporation and is intended for home and other limited viewing uses only unless otherwise authorized by Macrovision Corpor...

Page 15: ... w TIMER indicator P 53 e AV AUTO REC indicator P 61 r DISC TIMER indicator P 56 t SKIP P 32 y STILL PAUSE P 33 u PLAY P 29 i STOP P 29 7 8 9 0 q wer t y u i 1 2 3 4 5 6 Loading Stopped Playing Recording Restore Still Pause Tray open Tray closed Recording Pause Fast forward Fast reverse Slow Finalize Initialize Writitng disc management information Erasing 1 Recording Mode indicator P 48 2 Tamper P...

Page 16: ... R AUDIO L VIDEO S VIDEO COMPONENT OUT 480I 480P Y LINE 1 LINE IN 1 AUTO REC AUDIO input jacks VIDEO input jack S VIDEO input jack 2 COMPONENT VIDEO output jacks P 20 3 ANTENNA IN antenna or cable iput P 19 4 DIGITAL OUT OPTICAL terminal P 93 5 LINE IN 3 AUDIO input jacks VIDEO input jack S VIDEO input jack 6 Output jacks AUDIO output jacks VIDEO output jack S VIDEO output jack 7 ANTENNA OUT P 19 ...

Page 17: ... About 30 About 30 Front 22 96ft OPEN CLOSE POWER AUDIO TIMER ON OFF ANGLE SETUP DNR DISC TIMER CH ZOOM INPUT 1 TIMER ON OFF P 52 2 POWER P 29 3 AUDIO P 36 4 ANGLE P 35 5 SETUP FUNCTION P 24 6 DNR P 36 7 TITLE P 30 8 CURSOR P 24 9 RETURN P 27 0 Number buttons P 24 q 100 AM PM P 26 w PLAY P 29 e REV P 32 r REC P 48 t SKIP SEARCH P 33 y DISPLAY P 28 u ON SCREEN P 28 i TV Function Control P 18 Power ...

Page 18: ...one of the two signals RC1 or RC2 will let you operate only the recorder Make sure to set the recorder and remote control to the same remote control code You will not be able to operate the recorder with the remote control if different remote control codes are used Important If the remote control codes of the recorder and remote control are different the remote control code will flash on the displ...

Page 19: ...e VIDEO AUDIO output jacks on this recorder to the VIDEO AUDIO input jacks on your TV using a Video Audio cable Be sure that the colors of the jacks and plugs match up when connecting the cable NOTE To connect using S Video or component cables see Using other types of video output on the next page 5 Connect the VIDEO AUDIO output jacks on your VCR to the VIDEO AUDIO input jacks on your TV using a ...

Page 20: ...this recorder to the COMPONENT input jacks on your TV using a Component Video cable Commercially available Important If your TV is compatible with progressive scan component video set PROGRESSIVE in PLAYBACK SETUP to ON If your TV is not compatible with progressive scan video set to OFF After the Connection Plug in the power cords of the TV Then go to EZ Set Up see page 23 TV The Recorder To COMPO...

Page 21: ...eceiver using a Video Audio cable You can record scrambled CATV channels when using a cable box or satellite receiver for decoding NOTE This is a standard video connec tions You can use S Video or component connections if they are available Important Connect this recorder directly to your TV and not via the VCR cable box or satellite receiver When using this connection set PROGRESSIVE in PLAYBACK ...

Page 22: ...dio cable You can record scrambled CATV channels NOTE This is a standard video connections You can use S Video or component connections if they are available Important Connect this recorder directly to your TV and not via the VCR cable box or satellite receiver When using this connection set PROGRESSIVE in PLAYBACK SETUP to OFF When the setting is ON the disc playback picture cannot be viewed Afte...

Page 23: ...o Clock Setting or Manual Clock Setting NOTE If power is supplied to the recorder before the cable is connected EZ Set Up will not be able to preset the channels into memory If this occurs press RESET in the front of the recorder See page 101 EZ Set Up function will work again If the power is turned on during EZ Set Up the Auto Channel setting will be interrupted and the turner channels will not b...

Page 24: ...e the screen will return to normal If the power is interrupted for more than 1 hour AIR CATV selection must be set again Automatic tuning will be interrupted if SETUP FUNCTION is pressed before the screen returns to normal Channel Setting 100 EDIT OPEN CLOSE POWER SKIP SEARCH AUDIO TIMER ON OFF TITLE MENU ANGLE DNR RETURN REV FWD SET ENTER VCR PLUS TIMER PROG REC MODE PROGRAM AM PM ERASE STILL PAU...

Page 25: ...unction will automatically set the clock NOTE If the EDS CH SET mode is set to MANUAL mode in Step 3 and a channel that does not carry EDS signal is selected in Step 4 the Auto Clock Setting function will not operate In Step 4 the number of channels that can be selected depends on the mode setting on the CHANNEL PRESET screen See the table below In Step 1 if you press SETUP FUNCTION when operating...

Page 26: ...AM AM PM ERASE STILL PAUSE REC PLAY STOP SLOW SKIP F ADV ORIGINAL PLAY LIST DISC TIMER CH DISPLAY ON SCREEN POWER INPUT VOL CH TV CONTROL SET ENTER SETUP FUNCTION ZOOM INPUT Clock Setting Automatic Daylight Saving Time D S T Adjustment This recorder is equipped with an internal Automatic Daylight Saving Time Adjustment function In spring first Sunday in April and autumn last Sunday in October the ...

Page 27: ...ISH OSD LANGUAGE SETUP ENGLISH FRANÇAIS ESPAÑOL SELECT RETURN ENTER ENTER 4 Press SET ENTER to enter and then press RETURN to return to the SETUP screen NOTE If you press RETURN or SETUP FUNCTION to exit the OSD LANGUAGE SETUP screen in Step 3 the data will not be stored EDIT 100 OPEN CLOSE POWER SKIP SEARCH AUDIO TIMER ON OFF TITLE MENU ANGLE DNR RETURN REV FWD VCR PLUS TIMER PROG REC MODE PROGRA...

Page 28: ...SKIP SEARCH AUDIO TIMER ON OFF TITLE MENU ANGLE SETUP FUNCTION DNR RETURN REV FWD SET ENTER VCR PLUS TIMER PROG REC MODE PROGRAM AM PM ERASE STILL PAUSE REC PLAY STOP SLOW SKIP F ADV ORIGINAL PLAY LIST DISC TIMER CH POWER INPUT VOL CH TV CONTROL ON SCREEN DISPLAY ZOOM INPUT Change the Display on the TV Screen Each time ON SCREEN on the remote control unit is pressed the display on the TV screen ch...

Page 29: ...PLAY after pressing STOP in the step 7 Play resumes from a point slightly before the point where it was stopped Resume information will not be canceled if the power is turned off Resume function may not work on some discs RES DVD NOTE The resume function is canceled in the following cases When you press STOP during auto playback When you open the disc tray When you display the DiscNavi screen When...

Page 30: ...2 1 2 3 4 5 6 1 02 3 42AM CH 2 SP SELECT ENTER RETURN ENTER Title number Title name Title screen If a DVD RW disc VR mode has the PLAYLIST you can switch the screens between PLAYLIST and ORIGINAL by pressing ORIGINAL PLAYLIST 3 Press to select the title screen you want to watch DISCNAVI ORG PAGE 1 2 1 2 3 4 5 6 1 02 3 42AM CH 2 SP SELECT ENTER RETURN ENTER Press to go to next page Press to go to p...

Page 31: ...me 4 Press SET ENTER Selected title is played back EDIT 100 OPEN CLOSE POWER SKIP SEARCH AUDIO TIMER ON OFF TITLE MENU ANGLE SETUP FUNCTION DNR RETURN REV FWD SET ENTER VCR PLUS TIMER PROG REC MODE PROGRAM AM PM ERASE STILL PAUSE REC PLAY STOP SLOW SKIP F ADV ORIGINAL PLAY LIST DISC TIMER CH DISPLAY ON SCREEN POWER INPUT VOL CH TV CONTROL ZOOM INPUT Video CD Audio CD CD R CD RW Playback VIDEO CD A...

Page 32: ...ODE PROGRAM AM PM ERASE STILL PAUSE REC PLAY STOP SLOW F ADV ORIGINAL PLAY LIST DISC TIMER CH DISPLAY ON SCREEN POWER INPUT VOL CH TV CONTROL SKIP ZOOM INPUT Scanning speed selection Fast scan image appears here No image is shown for Audio CDs SKIP Forward Reverse DVD VIDEO VR MODE DVD RW VIDEO MODE DVD RW DVD R VIDEO CD AUDIO CD While you are playing a disc this function jumps to the beginning of...

Page 33: ...er seach will be started 3 Press PLAY to return to the normal playback NOTE On some discs still pause and frame advance functions are disabled The frame advance playback functions are disabled for Audio CDs The frame reverse playback function is disabled for Video CDs Picture quality may diminish during frame advance and frame reverse with a disc other than a DVD RW disc in VR mode such as a DVD v...

Page 34: ...8 MP3 FOLDER1 1 TITLE01 2 TITLE02 3 TITLE03 4 TITLE04 5 TITLE05 6 TITLE06 7 TITLE07 8 TITLE08 9 TITLE09 1 0 TITLE 1 0 5 Press STOP to stop play EDIT 100 OPEN CLOSE POWER SKIP SEARCH AUDIO TIMER ON OFF TITLE MENU ANGLE SETUP FUNCTION DNR RETURN REV FWD SET ENTER VCR PLUS TIMER PROG REC MODE PROGRAM AM PM ERASE STILL PAUSE REC PLAY STOP SLOW F ADV ORIGINAL PLAY LIST DISC TIMER CH DISPLAY ON SCREEN P...

Page 35: ...t be zoomed Changing Image Audio During Playback Angle Function DVD VIDEO You can change the angle of view when playing a DVD video disc that contains scenes recorded from multiple angles 1 Press ANGLE during playback mark lights when different angles are recorded for the title currently playing Show the number of the current angle 1 If no angles are recorded on the disc xx is displayed 2 Press or...

Page 36: ...nd change the audio output mode to MONO EDIT 100 OPEN CLOSE POWER SKIP SEARCH AUDIO TIMER ON OFF TITLE MENU ANGLE SETUP FUNCTION DNR RETURN REV FWD SET ENTER VCR PLUS TIMER PROG REC MODE PROGRAM AM PM ERASE STILL PAUSE REC PLAY STOP SLOW SKIP F ADV ORIGINAL PLAY LIST DISC TIMER CH DISPLAY ON SCREEN POWER INPUT VOL CH TV CONTROL ZOOM INPUT DNR Digital Noise Reduction DVD VIDEO VR MODE DVD RW VIDEO ...

Page 37: ...ET PLAY C Repeat step 2 to program other titles EDIT 100 OPEN CLOSE POWER SKIP SEARCH AUDIO TIMER ON OFF TITLE MENU ANGLE SETUP FUNCTION DNR RETURN REV FWD SET ENTER VCR PLUS TIMER PROG REC MODE PROGRAM AM PM ERASE STILL PAUSE REC PLAY STOP SLOW SKIP F ADV ORIGINAL PLAY LIST DISC TIMER CH DISPLAY ON SCREEN POWER INPUT VOL CH TV CONTROL ZOOM INPUT Programmed Playback NOTE Up to 20 titles can be pro...

Page 38: ...d Playback NOTE Up to 20 chapters can be programmed When you input the chapter number which has not been recorded on the disc the number is not set Input correct chapter number Press ERASE to cancel the program Press and hold ERASE for about 2 seconds all programmed chapter is canceled Press RETURN to cancel the setting 4 Press PLAY The chapter will be played in the order they were entered 1 2 PRO...

Page 39: ...OM INPUT A B Repeat Playback DVD VIDEO VR MODE DVD RW VIDEO MODE DVD RW DVD R VIDEO CD AUDIO CD A B repeat allows you to repeat specified section on the disc 1 Press REPEAT three times while a disc is playing 2 While you are playing a disc press SET ENTER or PLAY when you reach the start of the section to be repeated 3 While the disc is playing the same chapter track press SET ENTER or PLAY again ...

Page 40: ...nguage if the disc has a number of different subtitle languages The subtitle number and language currently selected are displayed When a disc with no subtitle is played back xx is displayed 5 5 5 5 5 Angle setting P 42 You can select the desired angle if the disc has a number of different angles The current angle is displayed When a disc with only one angle is played back XX is displayed 6 6 6 6 6...

Page 41: ...ayback Direct Time Skip DVD VIDEO VR MODE DVD RW VIDEO MODE DVD RW DVD R VIDEO CD AUDIO CD You can play back from an intermediate location of a title or chapter by specifying the time 1 Press SETUP FUNCTION during playback The Function control screen appears 2 Press to select and then press SET ENTER 3 Press to set hour and then press Set minutes and seconds in the same way If you enter the wrong ...

Page 42: ...CTION or RETURN to return to the normal playback screen EDIT 100 OPEN CLOSE POWER SKIP SEARCH AUDIO TIMER ON OFF TITLE MENU ANGLE DNR RETURN REV FWD SET ENTER VCR PLUS TIMER PROG REC MODE PROGRAM AM PM ERASE STILL PAUSE REC PLAY STOP SLOW SKIP F ADV ORIGINAL PLAY LIST DISC TIMER CH DISPLAY ON SCREEN POWER INPUT VOL CH TV CONTROL SETUP FUNCTION ZOOM INPUT Function Control NOTE About the subtitle se...

Page 43: ... the following cases When the Dolby Digital output level is set to OFF During TV broadcasts and external input When playing back a Video CD or Audio CD When playing back discs or audio recordings for which the Dolby Virtual Surround features does not function the Dolby Virtual Surround feature is automatically switched to OFF There is no Auto setting There is no level setting DIGITAL GAMMA DIGITAL...

Page 44: ...ton is pressed the mode changes in the following sequence ON OFF AUTO 4 While the ON is displayed press to select the level The level selection indicator that shows the current level appears ON G BIT RATE Mbps 0 5 10 S RETURN ENTER ENTER SELECT Press RETURN to return to the previous screen 5 Press SET ENTER to confirm the setting You can go on to specify other setings EDIT 100 OPEN CLOSE POWER SKI...

Page 45: ...ITLE on this recorder The Title screen will not be displayed when pressing TITLE if no titles are recorded on the disc EDIT 100 OPEN CLOSE POWER SKIP SEARCH AUDIO TIMER ON OFF TITLE MENU ANGLE SETUP FUNCTION DNR RETURN REV FWD SET ENTER VCR PLUS TIMER PROG REC MODE PROGRAM AM PM ERASE STILL PAUSE REC PLAY STOP SLOW SKIP F ADV ORIGINAL PLAY LIST DISC TIMER CH DISPLAY ON SCREEN POWER INPUT VOL CH TV...

Page 46: ... contained on the same disc Before Starting Recording Refer to About Recording on page 9 for information on recording NOTE DVD recorders perform high precision recording Pay attention to the following matters so that data is recorded accurately on the disc Do not subject the recorder to impacts Do not use the recorder in unstable locations or locations subject to vibrations Do not unplug the recor...

Page 47: ...ecommended to check disc information before recording Disc information can be displayed while the disc is stopped by pressing ON SCREEN page 28 Up to 99 original titles and Playlist titles each can be created on VR mode discs Up to 99 titles can be created on Video mode discs Although the number of chapters that can be created on a single disc varies according to available memory space it is gener...

Page 48: ... the DISC IN indicator on the Front Panel is blinking The indicator lights when the disc is finished being identified LOAD disappears If you load a completely blank disc the recorder takes a short while to initialize the disc It takes around 60 to 90 seconds 6 Press CH to select the TV channel to record Check whether the channel is set to the channel you want to record on the TV screen 7 Press REC...

Page 49: ... be disabled except for opening and closing of the tray Take out the disc when this happens When recording in the Video mode a maximum of about 60 seconds of recorded material prior to the point where recording is interrupted may be lost EDIT 100 OPEN CLOSE POWER SKIP SEARCH AUDIO TIMER ON OFF TITLE MENU ANGLE SETUP FUNCTION DNR RETURN REV FWD SET ENTER VCR PLUS TIMER PROG REC MODE PROGRAM AM PM E...

Page 50: ...EC PLAY STOP SLOW SKIP F ADV ORIGINAL PLAY LIST DISC TIMER CH DISPLAY ON SCREEN POWER INPUT VOL CH TV CONTROL STILL PAUSE ZOOM INPUT Useful Recording Functions Watching Other TV Programs while Recording The TV channel can be changed by pressing the channel button on the TV The TV can also be turned off Accurately Starting Recording from a Desired Part When recording onto a DVD RW or DVD R disc a b...

Page 51: ... SETUP FUNCTION DNR RETURN REV FWD SET ENTER VCR PLUS TIMER PROG REC MODE PROGRAM AM PM ERASE REC PLAY STOP SLOW SKIP F ADV ORIGINAL PLAY LIST DISC TIMER CH DISPLAY ON SCREEN POWER INPUT VOL CH TV CONTROL STILL PAUSE ZOOM INPUT Changing the Settings of the Simple Recording Timer 1 Press ÆREC The stop time is blinking on the TV screen 2 Press ÆREC to change the stop time as desired Cancelling the S...

Page 52: ...ER KEYS ENTER RETURN ENTER Timer Recording withVCR Plus System 3 Press number buttons to enter PLUSCODE NO and then press If you make a mistake in entering the numbers press ERASE to erase the numbers one by one or press to move the cursor then re enter the correct number TIMER PROGRAM PLUSCODE NO 1234 ONCE WEEKLY DAILY SELECT CHANGE REMAIN 1h11m FINE ENTER RETURN ENTER 4 Press to select ONCE WEEK...

Page 53: ...t then ERROR will appear To correct press ERASE and re enter the PlusCode number The following causes are possible when the TIMER indicator is blinking or ERROR is displayed when TIMER ON OFF has been pressed A recording has been programmed having a recording time of 1 minute Inadequate available disc space The disc is protected No disc is loaded in the recorder Disc identification is not finished...

Page 54: ...ock setting screen will appear TIMER PROGRAM 1 2 DATE CH START STOP 2 2 REMAIN 1h11m FINE SELECT CLEAR C ENTER RETURN ENTER 3 Press SET ENTER to set the timer program Timer Recording EDIT 100 OPEN CLOSE POWER SKIP SEARCH AUDIO TIMER ON OFF TITLE MENU ANGLE SETUP FUNCTION DNR RETURN REV FWD SET ENTER VCR PLUS TIMER PROG REC MODE PROGRAM AM PM ERASE STILL PAUSE REC PLAY STOP SLOW SKIP F ADV ORIGINAL...

Page 55: ...ding press ËSTOP If a button is not pressed within 3 minutes during the setting procedure the screen will return to the normal screen There are two timer setting screens 1 2 2 2 The following causes are possible when the TIMER indicator is blinking or ERROR is displayed when TIMER ON OFF has been pressed A recording has been programmed having a recording time of 1 minute Inadequate available disc ...

Page 56: ... is turned off and the TIMER indicator on the recorder lights up Timer standby mode Make sure to check both the TIMER indicator and the DISC TIMER indicator light up POWER OPEN CLOSE CHANNEL TIMER ON OFF REC DISC TIMER AV AUTO REC STANDBY TIMER DISC IN TIMER DISC TIMER DiscTimer Recording NOTE DVD R discs and DVD RW discs initialized in the Video mode cannot be used for disc timer recording Disc t...

Page 57: ... recorder is in the disc timer recording mode only the DISC TIMER indicator is lit Press and hold DISC TIMER for at least 2 seconds DiscTimer Recording EDIT 100 OPEN CLOSE SKIP SEARCH AUDIO TIMER ON OFF TITLE MENU ANGLE SETUP FUNCTION DNR RETURN REV FWD SET ENTER VCR PLUS TIMER PROG REC MODE PROGRAM AM PM ERASE STILL PAUSE REC PLAY STOP SLOW SKIP F ADV ORIGINAL PLAY LIST DISC TIMER CH DISPLAY ON S...

Page 58: ...R ON OFF The recorder will not enter recording standby unless disc identification has been completed 2 Press TIMER ON OFF The power is turned off and the TIMER indicator lights up to indicate timer standby POWER OPEN CLOSE CHANNEL TIMER ON OFF REC DISC TIMER AV AUTO REC STANDBY TIMER DISC IN TIMER Using the Recorder DuringTimer Standby Mode EDIT 100 OPEN CLOSE POWER SKIP SEARCH AUDIO TIMER ON OFF ...

Page 59: ...ecording Timer recording you cannot confirm or cancel the programs After checking or cancelling the program contents press TIMER ON OFF to enter the Timer Standby mode if you have other timer recordings EDIT 100 OPEN CLOSE POWER SKIP SEARCH AUDIO TIMER ON OFF TITLE MENU ANGLE SETUP FUNCTION DNR RETURN REV FWD SET ENTER VCR PLUS TIMER PROG REC MODE PROGRAM AM PM ERASE STILL PAUSE REC PLAY STOP SLOW...

Page 60: ...he VIDEO AUDIO IN 1 jacks on the rear of the recorder Satellite receiver etc The Recorder To VIDEO AUDIO IN 1 jacks Video Audio cable Supplied To VIDEO AUDIO output jacks COMPONENT OUT 480I 480P Y PB PR IN FROM ANTENNA VHF UHF CATV OUT TO TV DIGITAL OUT OPTICAL IN 1 AUTO REC IN 3 OUT R AUDIO L VIDEO S VIDEO LINE EDIT 100 OPEN CLOSE POWER SKIP SEARCH AUDIO TIMER ON OFF TITLE MENU ANGLE SETUP FUNCTI...

Page 61: ...OOM INPUT NOTE When recording PPV pay per view programs of satellite broadcasts always make sure to set the satellite receiver etc to Record Certain programs may not be able to be recorded or require additional charges Only DVD RW Ver 1 1 CPRM compatible discs in the VR mode can be used to record Copy once satellite broadcasts etc Use AV AUTO REC in combination with a satellite broadcast receiver ...

Page 62: ... is finished Consequently the start of the second timer program is delayed by a maximum of about 1 minute TIMER indicator is blinking Timer recording does not work Front Panel Display Causes There is no disc loaded A non recordable disc is loaded There is enough blank space on the disc The disc is unplayable The disc that s loaded is protected Timer Recording is full The clock has not been set The...

Page 63: ... page 66 Erasure of titles page 71 Title erasure in the case of recordings that have been recorded in the Video mode is provided so that the title is no longer displayed during playback and does not mean that the recording is actually erased Remaining recording time does not increase However in the case of DVD RW discs that have been recorded in the Video mode remaining recording time can be incre...

Page 64: ... points may be altered slightly or the DiscNavi screen may be slightly different REM 1 59SP 02 03 VR ORG 01 00 00 DVD RW 4 55AM Example of Original screen The screen for editing originals is displayed when operation is switched to DiscNavi or editing REM 1 59SP 02 03 VR PL 01 00 00 DVD RW 4 55AM Example of Playlist screen The screen for editing the playlist is displayed when operation is switched ...

Page 65: ...es of steps 4 and 5 The start point is canceled when REV and SKIP are pressed to go back to before the start point after the start point has been set Some playback buttons can be used when searching for a part page 74 Important Selecting Start Point and End Point when Erasing a Part The first and last 5 seconds of a title to be edited cannot be selected as part erasure start or end points If a sta...

Page 66: ...ce a disc recorded in the Video mode has been finalized 1 Press EDIT while the disc is stopped The Original Edit Title List screen appears 2 Press to select the title and then press SET ENTER EDIT ORG 4 ERASE PART RENAME CHP MARK NAVIMARK PROTECT 1 2 3 42AM CH 2 SP SELECT ENTER RETURN ENTER 3 Press to select RENAME and then press SET ENTER 4 Rename the title 1 Move the cursor to a character you wa...

Page 67: ...o re select the point select NO The screen in the step 3 appears 6 Press SET ENTER The added chapter marker is displayed in blue If you want to add another chapter marker repeat steps 3 through 6 Pressing RETURN returns the operation to the screen described in step 2 7 Press EDIT to exit the edit mode Erasing Chapter Markers You can erase chapter markers that you no longer want Chapter markers tha...

Page 68: ... want to re select the chapter marker select NO The screen in the step 4 appears 7 Press SET ENTER The chapter marker is erased and the part is connected to the previous chapter If you want to add erase chapter mark repeat steps 4 through 7 Pressing RETURN returns the operation to the screen described in step 2 8 Press EDIT to exit the edit mode Navimark VR MODE DVD RW In the DiscNavi each title i...

Page 69: ... the step 2 appears 8 Press EDIT to exit the edit mode Protecting the Title VR MODE DVD RW This prevents disc contents from being edited or erased so that they cannot be altered by mistake This is convenient for keeping discs safe during editing This function cannot be used with discs recorded in the Video mode NOTE The protect function cannot be used in the case of playlists or discs recorded in ...

Page 70: ...l titles when disc protect is set to ON in the PROTECT page 88 of the DISC SETUP menu In this case none of the titles can be unprotected Cancel disc protection in the Disc Setup Screen to unprotect discs 1 Press EDIT while the disc is stopped The Original Edit Title List screen appears 2 Press to select the protected title and then press SET ENTER 3 Press SET ENTER EDIT ORG PROTECT 3 UNPROTECT YES...

Page 71: ...ing on the recording status of the disc such as in the case the disc contains a lot of titles Erasing One Title VR MODE DVD RW VIDEO MODE DVD RW DVD R This is used to erase a specific title by selecting that title Since remaining recording time can be increased by erasing unnecessary titles this function is convenient since it enables you to record repeatedly on the same disc In the case of DVD RW...

Page 72: ...P SLOW SKIP F ADV DISC TIMER CH DISPLAY ON SCREEN POWER INPUT VOL CH TV CONTROL ORIGINAL PLAY LIST ZOOM INPUT You can create a new Playlist by specifying the range of the material to be made into a Playlist from an Original When specifying the range of a Playlist the titles used for the Playlist have to be consecutive titles DVD RW discs recorded in the VR mode can be used to create Playlists Play...

Page 73: ...art point of the part Press PLAY FWD REV STILL PAUSE SKIP SKIP SLOW or SKIP SEARCH to find the start point RETURN ENTER ENTER EDIT PL MAKE TITLE 1 END POINT 1 1 1 26 END POINT 6 Press SET ENTER to set the end point of the part RETURN ENTER ENTER EDIT PL MAKE TITLE 1 PREVIEW YES NO 1 26 SELECT NOTE When copying a part make sure to select a part that continues for at least 5 seconds Parts of less th...

Page 74: ...title Æ Moving to the start of titles and chapters When currently viewing or a title or chapter that is far away from the part to be selected first search for the title or chapter with the SKIP or SKIP Making a New Playlist PL EDIT 100 OPEN CLOSE POWER AUDIO TIMER ON OFF TITLE MENU ANGLE SETUP FUNCTION DNR RETURN REV FWD SET ENTER VCR PLUS TIMER PROG REC MODE PROGRAM AM PM ERASE REC PLAY STOP SLOW...

Page 75: ...rt point or end point When the end of a title has been selected the end of a title is selected as the end point In addition when erasing 5 seconds before or after a chapter mark that has been automatically added during addition or erasure of a part as well those parts cannot be selected as part erasure start or end points in the same manner as above Editing a PlaylistTitle Moving the Title VR MODE...

Page 76: ...is added to the end of the Playlist title 1 Press EDIT while the disc is stopped The Original Edit Title List screen appears 2 Press ORIGINAL PLAY LIST to select Playlist mode The Playlist Edit Title List screen appears ENTER RETURN ENTER EDIT PL PAGE 1 1 1 2 3 4 5 NEW 1 02 6 12AM PL SELECT Editing a PlaylistTitle EDIT 100 OPEN CLOSE POWER AUDIO TIMER ON OFF TITLE MENU ANGLE SETUP FUNCTION DNR RET...

Page 77: ... ENTER EDIT PL ADD PART 1 ADD YES NO 5 1 2 6 1 AM PL SELECT You can test playback the range from the added start point to the added end point It may take up to about 1 minute until the confirmation screen is displayed 9 Press to select YES and then press SET ENTER The part is added to the end of Playlist 1 The screen in the step 4 appears Editing a PlaylistTitle 10 Press EDIT to exit the edit mode...

Page 78: ...ed in red on the Chapter Erase screen page 68 step 4 Chapter markers that have been inserted automatically when recording is started Chapter markers that have been added automatically after adding a part Chapter markers that have been added automatically after erasing a part Renaming the Title VR MODE DVD RW 1 Press EDIT while the disc is stopped The Original Edit Title List screen appears 2 Press...

Page 79: ...ms while you are away from home Tamper Proof Setting DVD VIDEO VR MODE DVD RW VIDEO MODE DVD RW DVD R VIDEO CD AUDIO CD Press and hold SET ENTER and RETURN together for more than 2 seconds on the Front Panel Display starts blinking and then lights up Disengaging Tamper Proof Press and hold SET ENTER and RETURN together for more than 2 seconds when the Tamper Proof function is set starts blinking a...

Page 80: ... DVD video The output is set at 16 9 regardless of the TV screen setting during playback When recording wide screen material 16 9 from a satellite broadcast in the VR mode When playing back with this recorder and viewing with a normal 4 3 TV the screen size during playback can be changed according to the setting for TV MODE of PLAYBACK SETUP However if the recording mode of the disc is set to LP o...

Page 81: ...an that produced by an Audio CD This is to provide the widest possible dynamic range To counteract this this recorder automatically raises the overall average volume level of a disc recorded using Dolby Digital to a level that is similar to that of an Audio CD ON Dolby Digital average audio level is increased so it sounds similar to that of an Audio CD OFF Audio level recorded on disc is played ba...

Page 82: ... by a parental lock level and the way a DVD can be controlled vary from disc to disc Some discs for example may let you edit out parts and replace them with parts suitable for children You can also use the parental lock to completely disable playback of the DVD 1 Press SETUP FUNCTION to display the SETUP screen 2 Press to select the PLAYBACK and then press SET ENTER The PLAYBACK SETUP screen appea...

Page 83: ...m the setting Press SETUP FUNCTION to exit the SETUP screen Important Be sure to try playing back the disc to confirm that the parental level setting is working correctly If it is not working correctly try changing the country code NOTE You can use the parental lock function only with DVD discs that are equipped with the parental lock feature On some DVD discs the PARENTAL level setting is fixed a...

Page 84: ...to select PLAY BACK and then press SET ENTER The PLAYBACK SETUP screen appears 3 Press to select DISC LANG and then press Example Selecting SUBTITLE 4 Press to select SUB TITLE 5 Press to select the language you want to use NOTE Disc language changes as follows ENGLISH FRENCH GERMAN ITALIAN SPANISH CHINESE SWEDISH DUTCH OTHER AA ZU If you select OTHER see Language Code List for Disc Language on pa...

Page 85: ... Cambodian KN Kannada KO Korean KS Kashmiri KU Kurdish KY Kirghiz LA Latin LN Lingala LO Laothian LT Lithuanian LV Latvian Lettish Code Language Name MG Malagasy MI Maori MK Macedonian ML Malayalam MN Mongolian MO Moldavian MR Marathi MS Malay MT Maltese MY Burmese NA Nauru NE Nepali NL Dutch NO Norwegian OC Occitan OM Afan Oromo OR Oriya PA Panjabi PL Polish PS Pashto Pushto PT Portuguese QU Quec...

Page 86: ...NTER Æ OFF Recording continues in the recording mode set during timer recording programming Æ ON The recording mode is changed automatically during timer recording to prevent the recording from ending before it is completed Record Setup Screen ON ON ON ON ON OFF 3 MIN 5 MIN 10 MIN 15 MIN 30 MIN Every Every Every Every Every OFF 3 minutes 5 minutes 10 minutes 15 minutes 30 minutes R REC START When ...

Page 87: ... STEREO SAP SAP ON STEREO SAP OFF STEREO SAP ON MONO SAP SAP OFF MONO SAP SAP ON MONO SAP OFF MONO SAP ON MONO L R MONO L R MONO L R MONO L R MONO L R MONO L R MONO L R MONO L R L R L L R L R L R L L R L MONO MONO MONO MONO MONO MONO MONO MONO L R R L R SAP L R R L R R MONO MONO MONO SAP MONO MONO MONO MONO AUDIO Mode Recording L R AUDIO OUTPUT L R L R L L R SAP L R L L R L MONO MONO MONO SAP MONO...

Page 88: ...VR mode that have been finalized with this recorder can be recorded and edited even after they have been finalized A disc menu is generated for discs in the Video mode that have been finalized with this recorder Discs that have been finalized cannot be used for recording or editing Finalizing cannot be selected when a finalized disc has been loaded in the recorder When a DVD RW disc VR mode that h...

Page 89: ...NCTION to display the SETUP screen SETUP PLAYBACK RECORD DISC CLOCK CHANNEL OPTION OSD LANGUAGE SELECT ENTER RETURN ENTER 2 Press to select DISC and then press SET ENTER The DISC SETUP screen appears Press RETURN to return to the previous screen DISC SETUP VR MODE INITIALIZE VIDEO MODE INITIALIZE FINALIZE PROTECT OFF ON SELECT RETURN 3 Press to select VR MODE INITIALIZE and then press RETURN ENTER...

Page 90: ...his recorder using other equipment the contents displayed on the TV screen may also be recorded This function is for preventing this from happening OPTION SETUP CLOCK DISP OFF ON POWER OFF MAN AUTO DUBBING OFF ON DV LINK OFF ON DV AUDIO INST 1 ST 2 BLUE SCREEN OFF ON 3D Y C OFF ON SELECT RETURN ENTER ENTER Æ OFF On screen display displayed when playing back a disc is displayed to match switching o...

Page 91: ...C OFF ON SELECT RETURN ENTER ENTER Æ OFF The Blue Screen function does not work Æ ON The Blue Screen function works The display may switch to the blue screen when material has been input from external input that involves a special playback format Set this function to OFF if this happens Option Setup Screen 3DY C The 3D Y C separation circuit is a function that lets you enjoy clear viewing and reco...

Page 92: ...een 3 Press to select CLOCK DISP OPTION SETUP CLOCK DISP OFF ON POWER OFF MAN AUTO DUBBING OFF ON DV LINK OFF ON DV AUDIO INST 1 ST 2 BLUE SCREEN OFF ON 3D Y C OFF ON SELECT RETURN ENTER ENTER 4 Press to select ON and then press SET ENTER Each time is pressed the mode toggles between ON and OFF Press SETUP FUNCTION to exit the SETUP screen EDIT 100 OPEN CLOSE POWER SKIP SEARCH AUDIO TIMER ON OFF T...

Page 93: ...pment etc Jack and Plug Colors Audio Left White Audio Right Red Dolby Digital 5 1ch DTS processor or amplifier Optical digital cable commercially available To DIGITAL OUT OPTICAL terminal To optical digital input terminal 1 COMPONENT OUT 480I 480P Y PB PR IN FROM ANTENNA VHF UHF CATV OUT TO TV DIGITAL OUT OPTICAL IN 1 AUTO REC IN 3 OUT R AUDIO L VIDEO S VIDEO LINE NOTE When connecting the audio eq...

Page 94: ...equipment with optical digital input terminal Optical digital cable commercially available To DIGITAL OUT OPTICAL terminal To optical digital input terminal 1 COMPONENT OUT 480I 480P Y PB PR IN FROM ANTENNA VHF UHF CATV OUT TO TV DIGITAL OUT OPTICAL IN 1 AUTO REC IN 3 OUT R AUDIO L VIDEO S VIDEO LINE Important When connecting the audio equipment to the digital connection set the Digital OUT in PLA...

Page 95: ...y The DV signal will not be input if the camcorder is connected to this recorder through other equipment equipped with a DV IN OUT terminal When two of these recorders are connected using the DV IN OUT jack one cannot be used to control the other Signals may not be able to be output or control may not be possible from this recorder in the case of some digital camcorders page 96 Input Output of Vid...

Page 96: ...ing check the setting of DV AUDIO IN page 91 Monaural audio cannot be input through the DV IN OUT terminal 3 Press INPUT The setting changes in the order of DV DV Input L 1 External Input 1 L 2 External Input 2 L 3 External Input 3 Channel and then back to DV DV Input each time this is pressed When DV LINK is set to ON the digital camcorder can be controlled with the remote control of this recorde...

Page 97: ...UTO REC STANDBY TIMER DISC IN LINE IN 2 L MONO AUDIO R VIDEO S VIDEO DV IN OUT RESET To DV IN OUT terminal DV cable Commercially available This recorder Digital camcorder To DV terminal 2 Play back the recorded material with this recorder The material played back with this recorder is output to the digital camcorder Connecting to Audio Equipment NOTE Images protected with a copy guard are not outp...

Page 98: ...ecting the camcorder Recording with this Recorder 1 Setup 1 Connect the equipment to IN 2 of this recorder POWER OPEN CLOSE CHANNEL TIMER ON OFF REC STOP PLAY STILL PAUSE SKIP DISC TIMER AV AUTO REC STANDBY TIMER DISC IN LINE IN 2 L MONO AUDIO R VIDEO S VIDEO DV IN OUT RESET To VIDEO AUDIO input jacks To S VIDEO output jack To VIDEO AUDIO output jack To S VIDEO input jack Camcorder This recorder V...

Page 99: ...acks To VIDEO AUDIO output jacks Video Audio cable Supplied 2 Place a disc for recording in this recorder 2 Select the external input audio Refer to the section on EX AUDIO page 86 or the section on D MONO REC page 86 3 Press INPUT The setting changes in the order of DV DV Input L 1 External Input 1 L 2 External Input 2 L 3 External Input 3 Channel and then back to DV DV Input each time this is pr...

Page 100: ...has been selected select another channel when you want to playback recorded material Make sure that PROGRESSIVE in PLAYBACK SETUP to OFF Check that the Tamper Proof function is active Set the remote control to the same ID number as the recorder Use the remote control within its operating range Replace the batteries Make sure that the volume of the amplifier receiver or TV is not set to minimum The...

Page 101: ...Switch 3D Y C to OFF Check whether or not DUBBING is set to ON When this is set to ON the on screen display is forcibly set to OFF during playback NOTE This recorder is equipped with a microprocessor Its performance could be adversely affected by external electrical noise or interference If this should happen unplug the product and plug it in again after a few minutes Press RESET with a toothpick ...

Page 102: ... the average volume of Dolby Digital audio when playing a DVD This is a digital sound system developed by Digital Theater Systems for use in cinemas This system uses 6 audio channels and provides accurate sound field positioning and realistic acoustics By connecting a DTS Digital Surround decoder you can also listen to DTS Digital Surround sound This function automatically changes the recording mo...

Page 103: ... work with some discs This is a menu displayed by some DVDs for selection of chapters and subtitle set The title menu is also called a top menu These numbers are recorded on DVD discs When a disc contains two or more movies these movies are numbered as title 1 title 2 etc These numbers are assigned to the tracks which are recorded on video CDs and Audio CDs They enable specific tracks to be locate...

Page 104: ...utes LP Approx 240 minutes Tuner Channel coverage VHF 2 13 UHF 14 69 CATV 1 125 Timer Programs 1 year 8 programs Clock Quartz lock 12 hour digital display Memory backup Approx 1 hour Specifications Input Output VHF UHF antenna input output terminal 75Ω F shape Connector Video input Input 1 3 rear 2 front Input level 1 Vp p 75Ω Jacks RCA jack Video output Output level 1 Vp p 75Ω Jacks RCA jack S Vi...

Page 105: ...t Up 108 Reproducción de DVD 109 Reproduce solamente los discos para reproducción 109 Avance rápido Retroceso rápido 109 Función de avance rápido retroceso rápido búsqueda sobre la grabadora 109 Omisión Avance Retroceso 110 Cámara lenta 110 Avance de cuadro Imagen fija pausa 110 Grabación básica 111 DV_RW2UQ S p105 p65 03 1 15 11 23 AM 105 ...

Page 106: ...das para dispositivo digital de Clase B de conformidad con la Parte 15 de las reglas de la FCC Comisión Federal de Comunicaciones Estas reglas están diseñadas para asegurar una protección razonable contra interferencias perjudiciales en las instalaciones residenciales Este equipo genera utiliza y puede emitir energía de radiofrecuencia y si no se instala y utiliza debidamente es decir conforme a l...

Page 107: ...erra de la antena exterior Si una antena exterior o sistema de cables esta conectado al producto asegúrese de que la antena o sistema de cables esté puesto a tierra de forma que proporcione cierta protección contra sobretensiones y acumulaciones de cargas estáticas El estatuto 810 del Código Eléctrico Nacional ANSI NFPA 70 proporciona información relativa a la puesta a tierra adecuada del poste y ...

Page 108: ...T en la parte delantera de la grabadora La función EZ Set Up volverá a funcionar nuevamente Si se conecta la alimentación durante EZ Set Up el ajuste automático de los canales se interrumpirá y los canales del sintonizador no podrán ser preajustados La Puesta en Hora Automática del Reloj puede tardar varios minutos COMPONENT OUT 480I 480P Y PB PR IN FROM ANTENNA VHF UHF CATV OUT TO TV DIGITAL OUT ...

Page 109: ...en la secuencia siguiente DVD 1 alrededor de 2 2 alrededor de 8 3 alrededor de 32 CD de video y CD de audio 1 alrededor de 2 2 alrededor de 8 Función de avance rápido retroceso rápido búsqueda sobre la grabadora Pulse y mantenga SKIP durante más de 2 segundos sobre la parte delantera de la grabadora La velocidad de búsqueda es 2 alrededor de x8 NOTAS En algunos casos la función de exploración rápi...

Page 110: ...ol EDIT 100 OPEN CLOSE POWER SKIP SEARCH AUDIO TIMER ON OFF TITLE MENU ANGLE SETUP FUNCTION DNR RETURN REV FWD SET ENTER VCR PLUS TIMER PROG REC MODE PROGRAM AM PM ERASE REC PLAY STOP SLOW ORIGINAL PLAY LIST SKIP F ADV DISC TIMER CH DISPLAY ON SCREEN POWER INPUT VOL CH TV CONTROL STILL PAUSE ZOOM INPUT Avance de cuadro Imagen fija pausa DVD VIDEO VR MODE DVD RW VIDEO MODE DVD RW DVD R VIDEO CD 1 P...

Page 111: ...isco termina de ser identificado LOAD desaparece Si coloca un disco completamente en blanco la grabadora toma un corto tiempo mientras inicializa el disco toma alrededor de 60 a 90 segundos 6 Pulse CH para seleccionar el canal de TV a grabar Compruebe si el canal está ajustado al canal que desea grabar sobre la pantalla de TV 7 Pulse REC MODE para seleccionar el modo de grabación El modo actual se...

Page 112: ...s in the manner and for the period of time described herein shall constitute complete fulfillment of all liabilities and responsibilities of Sharp to the purchaser with respect to the Product and shall constitute full satisfaction of all claims whether based on contract negligence strict liability or otherwise In no event shall Sharp be liable or in any way responsible for any damages or defects i...

Reviews: