background image

Thank you for purchasing this SHARP product.
To obtain the best performance from this product, please read this
manual carefully. It will guide you in operating your SHARP product.

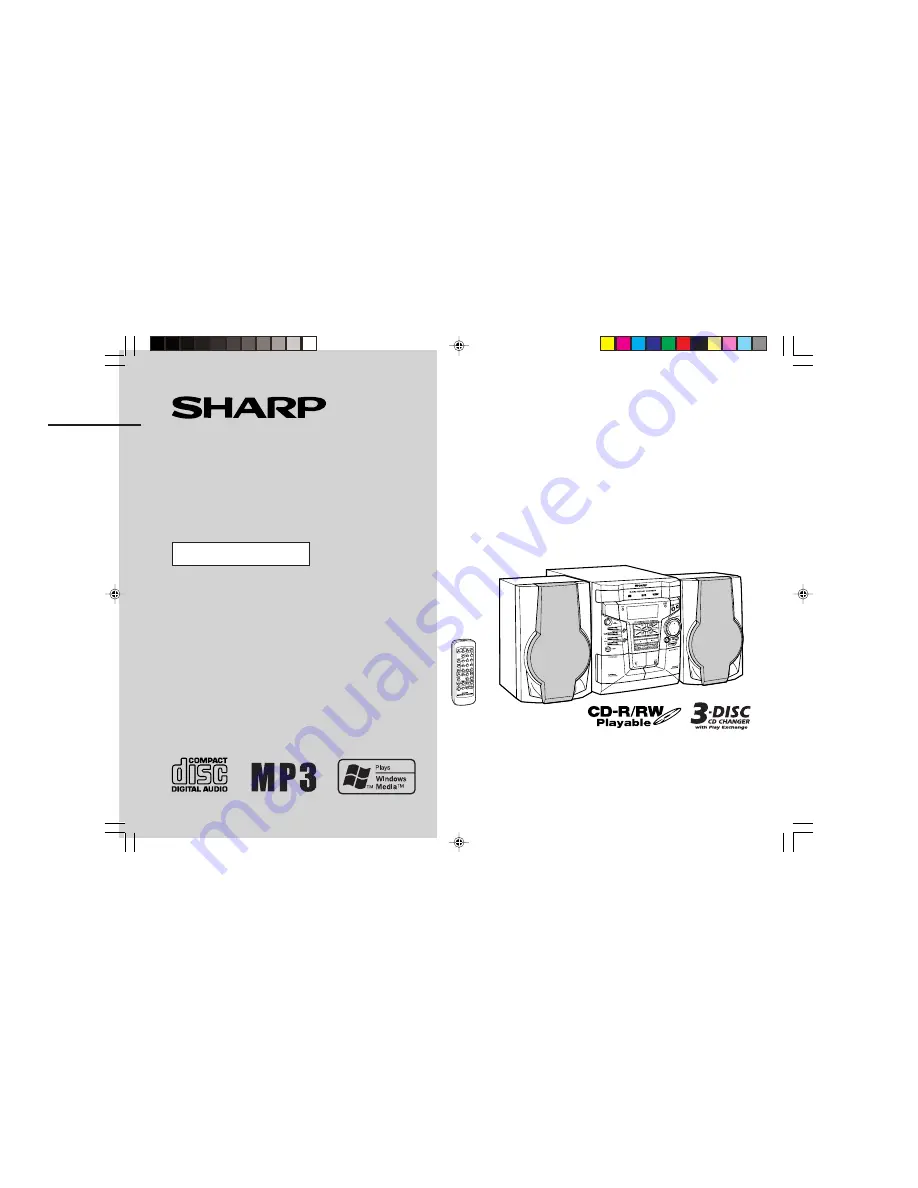
CD-MPX100E Mini Component System consisting of CD-MPX100E (main
unit) and CP-MPX100H (speaker system).

DISPLAY

MINI COMPONENT SYSTEM

MODEL

CD-MPX100E

OPERATION MANUAL

MPX100EA_COVER

12/22/04, 3:36 PM

1

Summary of Contents for CD-MPX100E

Page 1: ...product please read this manual carefully It will guide you in operating your SHARP product CD MPX100E Mini Component System consisting of CD MPX100E main unit and CP MPX100H speaker system DISPLAY MINI COMPONENT SYSTEM MODEL CD MPX100E OPERATION MANUAL MPX100EA_COVER 12 22 04 3 36 PM 1 ...

Page 2: ...ch as vases should be placed on the apparatus Note for users in Australia Copyright may exist in material you wish to record Copying or broad casting such material without permission of the relevant licensees or owners of the copyright is prohibited by law SHARP is not in a posi tion to authorise the copying or broadcasting of copyright materials and nothing in this OPERATION MANUAL should be impl...

Page 3: ...sic Operation General control 12 Setting the clock 13 CD or MP3 WMA disc Playback Listening to a CD or MP3 WMA disc 14 16 Advanced CD or MP3 WMA disc playback 17 19 Radio Listening to the radio 20 21 Tape Playback Listening to a cassette tape TAPE 1 or TAPE 2 22 23 Tape Recording Recording to a cassette tape 23 25 Advanced Features Timer and sleep operation 26 29 Enhancing your system 30 Reference...

Page 4: ...ult in a fire or other type of accident causing damage SHARP will not be held responsible for any dam age resulting from use of this unit with a voltage other than that which is specified Volume control The sound level at a given volume setting depends on speaker effi ciency location and various other factors It is advisable to avoid ex posure to high volume levels Do not turn the volume on to ful...

Page 5: ... 12 13 Extra Bass Demo Mode Button 10 12 14 Volume Up and Down Buttons 12 26 15 Disc Skip Button 14 16 Disc Tray Open Close Button 14 17 Tape 2 Cassette Compartment 22 18 CD Button 14 19 Tape 1 2 Button 22 20 Disc or Tape Stop Button 14 22 21 Disc Track Down or Fast Reverse Tape 2 Rewind Tuner Preset Down Time Down Button 13 16 21 23 22 Tuner Band Button 20 23 Video Auxiliary Button 30 24 Disc Pla...

Page 6: ...icator 15 9 Extra Bass Indicator 12 10 Tape Play Indicator 22 11 FM Stereo Mode Indicator 20 12 Daily Timer Indicator 27 13 FM Stereo Receiving Indicator 20 14 Tape 2 Record Indicator 25 15 Sleep Indicator 29 16 Timer Play Indicator 27 17 Timer Recording Indicator 27 Rear panel Reference page 1 AC Power Lead 8 10 2 FM AM Loop Aerial Socket 8 9 3 Video Auxiliary Audio Signal Input Sockets 30 4 Spea...

Page 7: ...Down Time Down Button 13 16 21 23 9 Equalizer Mode Select Button 12 10 Tuner Band Button 20 11 CD Button 14 12 On Stand by Button 11 13 Extra Bass Button 12 14 Clock Timer Button 13 26 29 15 Disc Direct Search Buttons 18 16 Disc Pause Button 16 17 Disc Track Up or Fast Forward Tape 2 Fast Forward Tuner Preset Up Time Up Button 13 16 21 23 18 Disc Tape Stop Button 14 23 19 Disc Play or Repeat Tape ...

Page 8: ...04 12 22 MPX100EA_1 fm 8 TINSEA091AWZZ CD MPX100E Preparation for Use System connections Wall socket AC 230 240V 50Hz Left speaker Right speaker AM loop aerial FM aerial Black Red ...

Page 9: ...mbling Attaching to the wall Speaker connection Connect the black wire to the minus terminal and the red wire to the plus terminal Caution Placing the speaker system There is no distinction between the right and the left speakers Note The speaker grilles are not removable Wall Screws not supplied Use speakers with an impedance of 6 ohms or more as lower impedance speakers can damage the unit Do no...

Page 10: ...be in use for a prolonged period of time Demonstration mode To cancel the demonstration mode When the unit is in the power stand by mode demonstration mode press the X BASS DEMO button The demonstration mode will be cancelled and the display will disappear To return to the demonstration mode When the unit is in the power stand by mode press the X BASS DEMO button again Note When the power is on th...

Page 11: ... Periodically clean the transmitter on the remote control and the sensor on the unit with a soft cloth Exposing the sensor on the unit to strong light may interfere with operation Change the lighting or the direction of the unit Keep the remote control away from moisture heat shock and vibrations Test of the remote control Check the remote control after checking all the connections see pages 8 10 ...

Page 12: ...o cancel the extra bass mode press the X BASS DEMO X BASS button Equalizer When the EQUALIZER EQUALIZER MODE button is pressed the current mode setting will be displayed To change to a different mode press the EQUALIZER EQUALIZER MODE button repeat edly until the desired sound mode appears Display brightness control When the unit is in power on mode you can change the display brightness by holding...

Page 13: ...ck can also be set with the remote control 1 Press the ON STAND BY button to turn the power on 2 Press the CLOCK TIMER button 3 Within 10 seconds press the or button to select CLOCK and press the MEMORY SET button 4 Press the or button to select 24 hour or 12 hour display and then press the MEMORY SET button 0 00 The 24 hour display will appear 0 00 23 59 AM 12 00 The 12 hour display will appear A...

Page 14: ...e playback time counter in the display may differ from its actual playback time WMA WMA files are Advanced System Format files that include audio files which are compressed with Windows Media Audio codec WMA is developed by Microsoft as an audio format file for Win dows Media Player Notes MP3 or WMA indicator will light up after the unit reads infor mation on an MP3 or WMA disc Auto power on funct...

Page 15: ...ND BY button to turn the power on 2 Press the CD button 3 Press the OPEN CLOSE button to open the disc tray 4 Place the disc on the disc tray label side up When loading a third disc press the DISC SKIP button to turn the disc tray then place the disc in the open position Disc can be placed on any open position on the disc tray Be sure to place 8 cm 3 disc in the middle of the disc positions 5 Pres...

Page 16: ...ched during fast reverse Function Main Unit Remote Control Operation Play Press in the stop mode Stop Press in the playback mode Pause Press in the playback mode Press the button to resume play back from the paused point Track up Track down Press in the playback or stop mode If you press the button in the stop mode press the button to start the desired track Fast for ward Fast reverse Press and ho...

Page 17: ...WMA discs only Note After selecting a disc with one of the 1 3 buttons the display will not change even if the DISPLAY button is pressed and neither the folder nor track name is displayed Total number of tracks Folder name Track name Track number Elapsed playback time Folder name Track name 1 Whilst in the stop mode press the DISPLAY button to dis play the folder name 2 Select the desired folder b...

Page 18: ...he beginning of the track being played will be located In random play the unit will select and play tracks automatically You cannot select the order of the tracks Caution After performing repeat or random play be sure to press the but ton Otherwise the disc s will play continuously 1 Whilst in the stop mode press one of the 1 3 buttons on the remote control or DISC SKIP button to select the de sir...

Page 19: ...stop mode press one of the 1 3 buttons on the remote control to select the desired disc Selected disc number 2 Press the direct search but tons on the remote control to select the desired track Selected track number You can also select a track by pressing the or button 3 Press the MEMORY SET MEMORY button to save the track number Playback order When the track is memorised MEMORY will appear 4 Repe...

Page 20: ...he TUNER BAND button to extinguish the ST indicator The reception changes to monaural and the sound becomes clearer MINI COMPONENT SYSTEM CD MPX100W DISPLAY 1 Press the ON STAND BY button to turn the power on 2 Press the TUNER BAND button repeatedly to select the desired frequency band FM or AM 3 Press the TUNING or button to tune in to the desired station Manual tuning Press the TUNING button as ...

Page 21: ...utton to select the preset channel number Store the stations in memory in order starting with preset channel 1 4 Within 30 seconds press the MEMORY SET MEMORY button to store that station in memory If the MEMORY and preset number indicators go out before the station is memorised repeat the operation from step 2 5 Repeat steps 1 4 to set other stations or to change a pre set station When a new stat...

Page 22: ...inactivity Before playback For playback use normal or low noise tapes for the best sound Metal or CrO tapes are not recommended Do not use C 120 tapes or poor quality tapes as they may cause malfunctions Before loading a tape into the cassette compart ment tighten the slack with a pen or a pencil MINI COMPONENT SYSTEM CD MPX100W DISPLAY Tape 1 playback 1 Press the ON STAND BY button to turn the po...

Page 23: ...n of this unit The volume and sound controls can be adjusted with no effect on the recorded signal Variable Sound Monitor For recording use only normal tapes Do not use metal or CrO tapes Recording can be operated in the TAPE 2 compartment only The TAPE 1 compartment is for playback only Function Main Unit Remote Control Operation Playback Press in the stop mode Stop Press in the playback mode Fas...

Page 24: ...ssette compartment with the side to be recorded on facing you Wind past the leader of the tape on which recording cannot be performed 3 Press the CD button and load the desired disc 4 Press one of the 1 3 buttons on the remote control to select the disc to be recorded first 5 Press the REC PAUSE TAPE 2 button Recording will be paused 6 Press the button to start recording Disc playback will start a...

Page 25: ...you Wind past the leader of the tape on which recording cannot be performed 3 Press the REC PAUSE TAPE 2 button Recording will be paused 4 Press the button to start recording 1 Press the ON STAND BY button to turn the power on 2 Load a prerecorded cassette into the TAPE 1 cassette com partment Insert a blank tape into the TAPE 2 cassette compart ment It is recommended that the recording tape is th...

Page 26: ...g works for one time only at a preset time For example if you are away but want to record a programme on a radio station Daily timer Daily timer play and daily timer recording works at the same preset time everyday For example set the timer as a wake up call every morning 1 Set the daily timer pages 26 28 2 Set the once timer pages 26 28 Start Daily timer Once timer 1 minute or more Stop Start Sto...

Page 27: ... the time to finish as in step 6 and 7 above White Red 9 Switch input with the or button and then press the MEMORY SET button To select the timer playback source CD TUNER TAPE 1 or TAPE 2 To select the timer recording source TUNER When you select the tuner select a station by pressing the or button and then press the MEMORY SET button If a station has not been programmed NO P SET will be displayed...

Page 28: ... daily timer setting is cancelled Cancel the daily timer when it is not used 1 Press the CLOCK TIMER button 2 Within 10 seconds press the or button to select ONCE or DAILY and press the MEMORY SET button 3 Within 10 seconds press the or button to select ONCE CAL or DAILY CAL and press the MEMORY SET button The unit returns to the timer stand by mode after displaying the setting in order 1 Press th...

Page 29: ... but ton SLEEP will appear 6 The unit will enter the power stand by mode automatically after the preset time has elapsed The volume will be turned down 1 minute before the sleep operation finishes 1 Whilst SLEEP is indicated press the CLOCK TIMER button 2 Within 10 seconds press the or button to select SLEEP X XX X XX is sleep remaining time The remaining sleep time is displayed for about 10 secon...

Page 30: ...ing the VOLUME buttons When you press any of the following buttons the unit turns on VIDEO AUX button main unit and remote control The unit turns on and the VIDEO function is activated button main unit and remote control The unit turns on and playback of the last function starts CD TAPE TUNER VIDEO AUX VCR DVD etc To the line output sockets Red RCA lead not supplied White Red White 1 Use a connect...

Page 31: ...ops in the middle or is not performed properly Does the disc satisfy the stan dards Is the disc distorted or scratched Playback sounds are skipped or stopped in the middle of a track Is the unit located near excessive vibrations Is the disc very dirty Has condensation formed inside the unit Symptom Possible cause The radio makes unusual noises continuously Is the unit placed near the TV or compute...

Page 32: ... is not restored in the previous operation unplug and plug in the unit and then turn the power on Note If neither operation above restores the unit clear all the memory by resetting it Clearing all the memory reset 1 Press the ON STAND BY button to enter the power stand by mode 2 Whilst pressing down the PRESET button and the X BASS DEMO button press the REC PAUSE button until CLEAR AL appears Cau...

Page 33: ...ling parts Dirty heads capstans or pinch rollers can cause poor sound and tape jams Clean these parts with a cotton swab moistened with commercial head pinch roller cleaner or isopropyl alcohol When cleaning the heads pinch rollers etc unplug the unit which contains high voltages After long use the deck s heads and capstans may become mag netised causing poor sound Demagnetise these parts once eve...

Page 34: ...W 10 T H D RMS 40 W 20 W 20 W 10 T H D RMS 34 W 17 W 17 W 0 9 T H D Output terminals Speaker 6 ohms Headphones 16 50 ohms recommended 32 ohms Input terminals Video Auxiliary audio signal 500 mV 47 k ohms Type 3 disc multi play compact disc player Signal readout Non contact 3 beam semiconductor laser pickup D A converter 1 bit D A converter Frequency response 20 20 000 Hz Dynamic range 90 dB 1 kHz ...

Page 35: ...SPform019 JUNE 2004 MPX100EA_COVER 12 22 04 3 36 PM 2 ...

Page 36: ...repair This warranty does not extend to accessories or defects or injuries caused by or resulting from causes not attributable to faulty parts or the manufacture of the product including but not limited to defect or injury caused by or resulting form misuse abuse neglect accidental damage improper voltage liquid spillage vermin infestation software or any alterations made to the product which are ...

Reviews: