background image


CD-DK890N_US 


Thank you for purchasing this SHARP product. 
To obtain the best performance from this product, please read this
manual carefully. It will guide you in operating your SHARP product.


2008/June/23


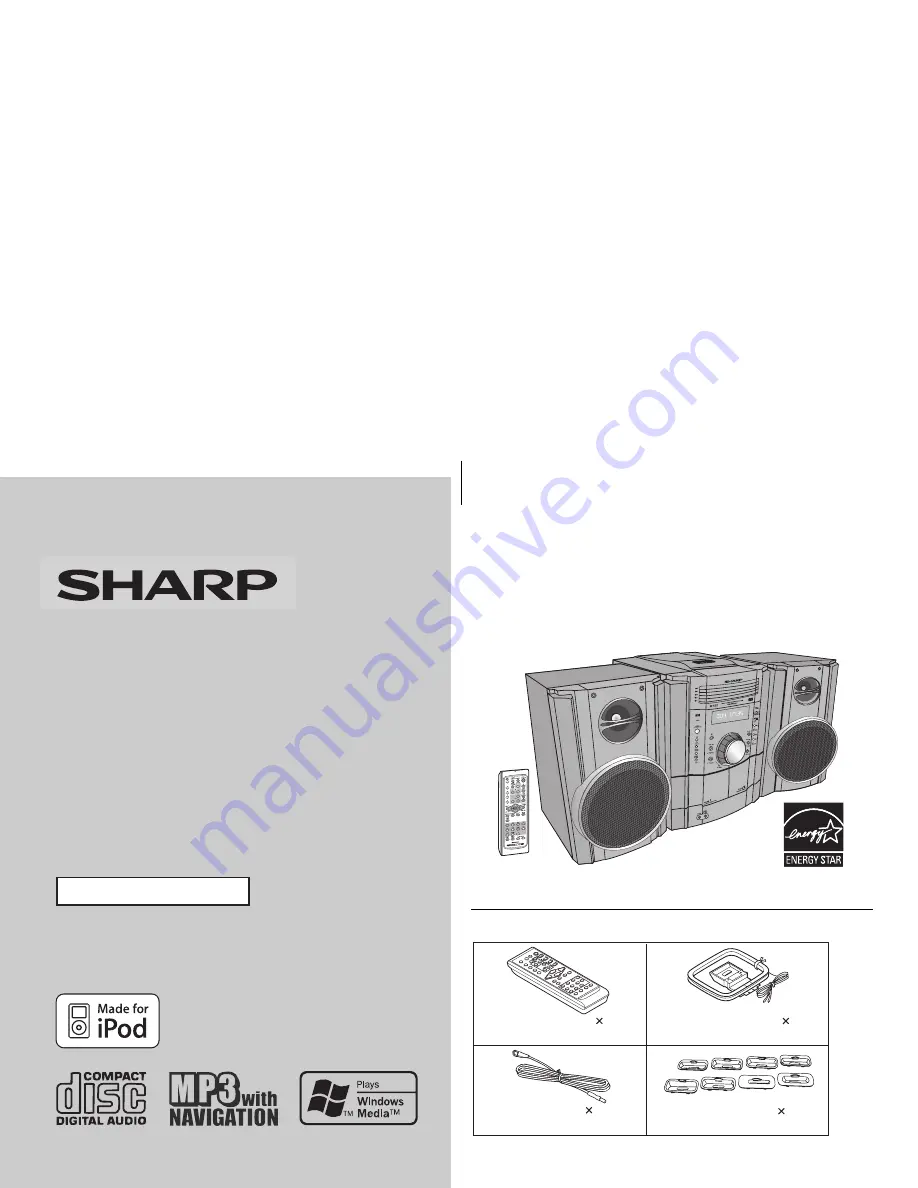
MINI COMPONENT SYSTEM


CD-DK890N Mini Component System consisting of CD-DK890N (main
unit), CP-DK890N (speaker system).


Accessories


Please confirm that only the following accessories are included.


MODEL

OPERATION MANUAL


iPod is a registered trademark of Apple Inc. 


CD-DK890N

(RRMCGA173AWSA)

AM loop antenna     1

(QANTL0010AWZZ)

(92LFANT1535A)

iPod

®

 adaptor     8

(UACRTA008AW01)

Remote control    1

FM antenna     1

Summary of Contents for CD-DK890N

Page 1: ...NI COMPONENT SYSTEM CD DK890N Mini Component System consisting of CD DK890N main unit CP DK890N speaker system Accessories Please confirm that only the following accessories are included MODEL OPERATION MANUAL iPod is a registered trademark of Apple Inc CD DK890N RRMCGA173AWSA AM loop antenna 1 QANTL0010AWZZ 92LFANT1535A iPod adaptor 8 UACRTA008AW01 Remote control 1 FM antenna 1 ...

Page 2: ...as been tested and found to comply with the limits for a Class B digital device pursuant to Part 15 of the FCC Rules These limits are designed to provide reasonable protection against harmful in terference in a residential installation This equipment generates uses and can radiate radio frequency energy and if not installed and used in accordance with the instructions may cause harmful interferenc...

Page 3: ...ower cord from being walked on or pinched particularly at plugs convenience receptacles and the point where they exit from the apparatus 11 Only use attachments accessories specified by the manufacturer 12 Use only with the cart stand tripod bracket or table specified by the manufacturer or sold with the apparatus When a cart is used use caution when moving the cart apparatus combination to avoid ...

Page 4: ...wer lines or circuits When installing an outside antenna system extreme care should be taken to keep from touching such power lines or circuits as contact with them might be fatal 23 Outdoor Antenna Grounding If an outside antenna or cable system is connected to the product be sure the antenna or cable system is grounded so as to provide some protection against voltage surges and built up static c...

Page 5: ...Controls and indicators 7 9 Preparation for Use System connections 10 12 Remote control 13 Basic Operation General control 14 Setting the clock Remote control only 15 iPod Listening to the iPod 16 19 CD or MP3 WMA disc Playback Listening to a CD or MP3 WMA disc 20 22 Advanced CD or MP3 WMA disc playback 23 25 MP3 WMA navigation only for MP3 WMA files 26 29 Radio Listening to the radio 30 31 Tape P...

Page 6: ...e turning the unit on with the volume control setting up high or while continually listening at high volumes Excessive sound pressure from earphones and headphones can cause hearing loss Use the unit on a firm level surface free from vibration Place the speakers at least 12 30 cm away from any CRT TV to avoid color variations across the TV screen If the variations persist move the speakers further...

Page 7: ...uning Down Cursor Down Button 19 26 30 12 Tape 1 Cassette Compartment 32 35 13 Headphone Jack 40 14 Audio In Jack 39 15 Remote Sensor 13 16 Volume Control 14 17 CD iPod Play or Pause Tape Play Button 16 19 20 22 32 33 18 Disc Tray Open Close Button 20 19 Disc Number Select Buttons 20 20 CD Track Up or Fast Forward Tape 2 Fast Forward Tuner Preset Up Time Up Button 15 19 22 31 32 33 36 21 Tuning Up...

Page 8: ... FM Stereo Mode Indicator 30 13 FM Stereo Receiving Indicator 30 14 Tape Play Indicator 32 15 Memory Indicator 25 31 16 Extra Bass Indicator 14 17 Disc Repeat Play Indicator 24 18 Disc Pause Indicator 22 19 Disc Play Indicator 21 Rear panel Reference page 1 Cooling Fan 12 2 AC Power Cord 12 3 FM 75 Ohms Antenna Jack 11 4 AM Antenna Ground Terminal 11 5 AM Loop Antenna Terminal 11 6 Video Out Jack ...

Page 9: ...pe 1 2 Button 32 13 Audio In iPod Button 39 14 Disc Track Up or Fast Forward Tape 2 Fast Forward Tuner Preset Up Time Up Cursor Right Button 15 19 22 31 32 33 36 15 Tuning Down Cursor Down Button 19 26 30 16 Volume Up and Down Buttons 14 17 Clear Dimmer iPod MENU Button 18 19 25 18 Play Mode Button 19 19 Disc Stop Button 22 20 Tape Stop Button 33 21 Memory iPod ENTER Button 15 19 25 31 36 22 iPod ...

Page 10: ...H 0 6 V 0 2 1 C A t f e L p s r e k a e o o l M A p a n n e t n a C A p n o i t c e n n o c r e w o s e e p 2 1 e g a n o i t c e n n o c a n n e t n A s e e p 1 1 e g a Sp n o i t c e n n o c r e k a e s e e p 1 1 e g a e k a M s n u o t e r u p C A the g u l p d r o c r e w o b n o i t c e n n o c y n a g n i k a m e r o f e s ...

Page 11: ...na wire to the FM 75 OHMS jack and position the FM antenna wire in the direction where the strongest signal can be received Supplied AM loop antenna Connect the AM loop antenna to the AM and GND terminals Position the AM loop antenna for optimum reception Place the AM loop antenna on a shelf etc or attach it to a stand or a wall with screws not supplied Assembling Attaching to the wall Wall Screws...

Page 12: ...lt your dealer Note When an outdoor FM antenna is used disconnect the supplied FM antenna wire Cooling fan The main unit is built with a cooling fan at the rear of the unit for improved cooling Please do not cover the opening of the fan with any obstacles as this will block proper ventilation AC INPUT C INPUT AC outlet AC 120 V 60 Hz AC INPUT C INPUT The first time the unit is plugged in the unit ...

Page 13: ...he transmitter on the remote control and the sensor on the unit with a soft cloth Exposing the sensor on the unit to strong light may interfere with operation Change the lighting or the direction of the unit Keep the remote control away from moisture heat shock and vibrations Test of the remote control Check the remote control after checking all the connections see pages 10 12 Point the remote con...

Page 14: ... 3 2 1 2 POWER ON STAND BY 30 MAXIMUM 0 X BASS POPS VOCAL JAZZ FLAT ROCK CLASSIC o t i n u n i a M p n o i t a r e d e n r u t s i l o r t n o c E M U L O V e h t n e h W e s a e r c n i l l i w e m u l o v e h t e s i w k c o l c e h t e s i w k c o l c r e t n u o c d e n r u t s i t i n e h W e s a e r c e d l l i w e m u l o v o l o r t n o c e t o m e R p n o i t a r e o t n o t t u b r o E M...

Page 15: ...appear in step 3 step 4 for selecting the 12 hour or 24 hour display will be skipped To change the 12 hour or 24 hour display 1 Press the ON STAND BY button to turn the power on 2 Press the CLOCK TIMER button 3 Within 10 seconds press the or button to select CLOCK and press the MEMORY button 4 Press the or button to select 12 hour or 24 hour display and then press the MEMORY button AM 12 00 The 12...

Page 16: ...urns on and the iPod playback start regardless of the last function button on the main unit The unit turns on and playback of the last function will start iPod CD TUNER AUDIO IN TAPE iPod adaptor connection Choose the iPod adaptor that fits your iPod Your iPod will fit snuggly into the correct adaptor If your iPod is not mentioned below an iPod adaptor may have been included with your iPod unit No...

Page 17: ...fe to do so even during playback iPod dock iPod connector iPod adaptor iPod iPod bottom Dock connector pull up main unit top 2 Adaptor without tip Insert the tip of a screwdriver type small into the iPod adaptor hole as shown and lift upward to remove 1 Press the ON STAND BY button to turn the power on 2 Press the iPod button to select iPod function 3 Insert iPod unit in iPod dock of main unit DOC...

Page 18: ...it will automatically power on when docked in the unit including TIMER function System off stand by operation When the main unit is turned to stand by mode the docked iPod unit will automatically turn to stand by mode iPod playback detection function Once the play button on the iPod unit is pressed the main unit will automatically change to iPod function overriding the previous function selected C...

Page 19: ...in the playback mode Release the button to resume playback iPod Function Main unit Remote control Operation Back light TV OUT ____ iPod back light ON Press for more than 2 seconds to toggle the video out display between iPod or TV Repeat ____ Press to toggle repeat mode Shuffle ____ Press and hold down to toggle shuffle mode Menu ____ Press to view the iPod menu during iPod function Enter ____ Pre...

Page 20: ...re Advanced System Format files that include audio files which are compressed with Windows Media Audio codec WMA is developed by Microsoft as an audio format file for Windows Media Player MP3 or WMA indicator will light up after the unit reads information on an MP3 or WMA disc Auto power on function When you press any of the following buttons the unit turns on CD button main unit and remote contro...

Page 21: ...ear on the display for 3 seconds and the unit will not function If this occurs press the ON STAND BY button to enter the power stand by mode and then turn the power on again If TV or radio interference occurs during CD operation move the unit away from the TV or radio If a disc is damaged dirty or loaded upside down the disc will skip or not play 1 Press the ON STAND BY button to turn the power on...

Page 22: ...playback time on the display Fast forward fast reverse is possible only within individual tracks When the end of the track is reached during fast forward the next track will be played Playback of the track will begin when its beginning is reached during fast reverse To change the display MP3 WMA discs only Function Main unit Remote control Operation Play Press in the stop mode Stop Press in the pl...

Page 23: ...ed while the disc is stopped press the button to start the desired track on the current disc Notes A track number higher than the number of tracks on the disc cannot be selected During random play direct search is not possible 1 Press one of the 1 5 buttons to select the desired disc Selected disc number 2 Within 5 seconds press the button TIMER CD 4 3 1 5 4 5 3 2 1 2 Use the direct search buttons...

Page 24: ...the button does not allow you to move to the previous track The beginning of the track being played will be located In random play the unit will select and play tracks automatically You cannot select the order of the tracks Caution After performing repeat or random play be sure to press the CD button Otherwise the disc s will play continuously To repeat one disc Press the PLAY MODE button once Pre...

Page 25: ...the stand by mode or change the function from CD to another the programmed selections will not be cleared During the program operation random play is not possible 1 While in the stop mode press the MEMORY button to enter the programming save mode 2 Press one of the 1 5 buttons to select the desired disc Selected disc number 3 Press the direct search buttons on the remote control to select the desi...

Page 26: ... your PC connect words with hyphens This product recognizes the first word as title 1 second one as title 2 and third one as title 3 Up to three words can be recognized Notes MP3 files must have the extension mp3 WMA files must have the extension wma Up to 100 folders or 300 files can be read on the unit If either limit is exceeded no more folders files are displayed This unit recognizes and displ...

Page 27: ...NAVI READ appears and the display shows the total number of folders and files on the selected disc 4 Press the NAVIGATION button 5 Press the or cursor button on the remote control to select FOL T 1 T 2 or T 3 To search files by folder name select FOL will flash The following steps describe file search by folder 6 Press the ENTER button The total number of folders or titles appears for 2 seconds an...

Page 28: ...tton to go to the next page of character display 6 Press the CHARACTER button and the active character will be entered in the 2nd row of the display To delete an entered character move the cursor to the character with the or button and press the CLEAR DIMMER button on the remote control 7 Repeat steps 5 and 6 to enter characters In the folder or title name search you do not have to enter the full ...

Page 29: ...If you press the RANDOM button in the stop mode the MP3 WMA navigation mode will be canceled If tracks are programmed using track numbers see Programmed play on page 25 In the MP3 WMA navigation mode only program by folder or title name are played When you exit the mode the program by folder or title name are cleared When you exit the MP3 WMA navigation mode program by track number are canceled Pr...

Page 30: ...ear when an FM broadcast is in stereo If the FM reception is weak press the TUNER BAND button to extinguish the ST indicator The reception changes to monaural and the sound becomes clearer TIMER CD 4 3 1 5 4 5 3 2 1 PHONES RECORD PLAYBACK PLAYBACK PLAY STOP 2 AUDIO IN TUNER TUNING BAND TUNING POWER ON STAND BY 1 Press the ON STAND BY button to turn the power on 2 Press the TUNER BAND button repeat...

Page 31: ...l 1 4 Within 30 seconds press the MEMORY button to store that station in memory If the MEMORY and preset number indicators go out before the station is memorized repeat the operation from step 2 5 Repeat steps 1 4 to set other stations or to change a preset station When a new station is stored in memory the station previously memorized for that preset channel number will be erased Press the PRESET...

Page 32: ...ot use C 120 tapes or poor quality tapes as they may cause malfunctions Before loading a tape into the cassette compartment tighten the slack with a pen or a pencil TIMER CD 4 3 1 5 4 5 3 2 1 PHONES RECORD PLAYBACK PLAYBACK PLAY STOP 2 AUDIO IN POWER ON STAND BY 1 Press the ON STAND BY button to turn the power on 2 Open the cassette compartment by pushing the area marked 3 Load a cassette into the...

Page 33: ...mode TAPE 2 only Before recording When recording important selections make a preliminary test to ensure that the desired material is properly recorded SHARP is not liable for damage or loss of your recording arising from malfunction of this unit The volume and sound controls can be adjusted with no effect on the recorded signal Variable Sound Monitor For recording use only normal tapes Do not use ...

Page 34: ...d function 2 Insert iPod unit onto iPod dock 3 Load a cassette into the TAPE 2 cassette compartment with the side to be recorded on facing you Wind past the leader of the tape on which recording cannot be performed 4 Press the button Recording will be paused 5 Press the TAPE button to start recording 1 Press the ON STAND BY button to turn the power on 2 Press the CD button 3 Load a cassette into t...

Page 35: ...rts 1 Program discs and tracks see page 25 2 Press the button 3 Press the TAPE button to start recording 1 Tune in to the desired station see page 30 2 Load a cassette into the TAPE 2 cassette compartment with the side to be recorded on facing you Wind past the leader of the tape on which recording cannot be performed 3 Press the button Recording will be paused 4 Press the TAPE button to start rec...

Page 36: ...reset time For example if you are away but want to record a program on a radio station Daily timer Daily timer play or daily timer recording works at the same preset time every day For example set the timer as a wake up call every morning 1 Set the daily timer pages 36 37 2 Set the once timer pages 36 37 Start Daily timer Once timer 1 minute or more Stop Start Stop 1 Check that the clock is set to...

Page 37: ... and then press the MEMORY button If a station has not been programmed NO PRESET will be displayed and timer setting will be canceled Red White 10 Adjust the volume using the VOLUME control and then press the MEMORY button Do not turn the volume up too high 11 Press the ON STAND BY button to enter the power stand by mode The TIMER indicator lights up and the unit is ready for timer playback or tim...

Page 38: ...elect ONCE or DAILY and press the MEMORY button 3 Within 10 seconds press the or button to select ONCE OFF or DAILY OFF and press the MEMORY button Timer will be canceled the setting will not be canceled 1 Turn the power on and press the CLOCK TIMER button 2 Within 10 seconds press the or button to select ONCE or DAILY and press the MEMORY button 3 Within 10 seconds press the or button to select O...

Page 39: ... playback sounds of portable audio player etc Note To prevent noise interference place the unit away from the television 1 While SLEEP is indicated press the CLOCK TIMER button 2 Within 10 seconds press the or button to select SLEEP OFF and press the MEMORY button 1 Set the sleep time see page 38 steps 1 5 2 While the sleep timer is set set the timer playback or recording steps 2 10 pages 36 37 Ti...

Page 40: ...ling your authorized SHARP dealer or service center General CD player 1 Insert a cassette in the TAPE 2 cassette compartment 2 Press the AUDIO IN button 3 Press the button 4 Press the TAPE button 5 Start the system VCR etc TIMER CD 4 3 1 5 4 5 3 2 1 PHONES RECORD PLAYBACK PLAYBACK PLAY STOP 2 AUDIO IN Symptom Possible cause The clock is not set to the correct time Did a power failure occur Reset t...

Page 41: ...oper sound quality Is it a normal tape You cannot record on a metal or CrO tape Cannot erase completely Sound skipping Is there any slack Cannot hear treble Is the tape stretched Sound Fluctuation Are the capstans pinch rollers or heads dirty Cannot remove the tape If a power failure occurs during playback the heads remain engaged with the tape Do not open the compartment with great force Symptom ...

Page 42: ...ght out from the center along the radius Maintenance Cleaning the tape handling parts Dirty heads capstans or pinch rollers can cause poor sound and tape jams Clean these parts with a cotton swab moistened with commercial head pinch roller cleaner or isopropyl alcohol When cleaning the heads pinch rollers etc unplug the unit which contains high voltages After long use the deck s heads and capstans...

Page 43: ...minimum RMS per channel into 6 ohms from 100 Hz to 20 kHz 10 Total harmonic distortion Output terminals Front Speakers 6 ohms Headphones 16 50 ohms recommended 32 ohms Input terminals Audio In audio signal 250 mV 47 k ohms Video output 1Vp p Type 5 disc multi play compact disc player Signal readout Non contact 3 beam semiconductor laser pickup D A converter 1 bit D A converter Frequency response 2...

Page 44: ...on behalf of Sharp The warranties described herein shall be the sole and exclusive warranties granted by Sharp and shall be the sole and exclusive remedy available to the purchaser Correction of defects in the manner and for the period of time described herein shall constitute complete fulfillment of all liabilities and responsibilities of Sharp to the purchaser with respect to the Product and sha...

Reviews: