Sennheiser SK 500 G2, Instructions For Use Manual
The Sennheiser SK 500 G2 is an advanced wireless microphone transmitter that offers exceptional sound quality and reliability. Ensure proper set up and operation by referring to the Instructions For Use Manual, available for free download from our website. Get the most out of your device with this comprehensive manual.
Share
Download


Reviews:
No comments
Related manuals for SK 500 G2

Univerge SV9100
Brand: NEC Pages: 6

SL1000
Brand: NEC Pages: 39

SC-PM500
Brand: Panasonic Pages: 2

RX-E300
Brand: Panasonic Pages: 36

SAPM71 - MINI HES W/CD PLAYER
Brand: Panasonic Pages: 12
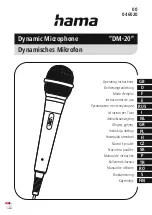
DM-20
Brand: Hama Pages: 38

MIC-AKLED
Brand: Laser Pages: 5

en CORE 200 Series
Brand: Blue Microphones Pages: 8

MU 302
Brand: Audiomusic Systems Pages: 12

MICW81
Brand: HQ Power Pages: 29

MS-66-K
Brand: Senal Pages: 12

MXP 04
Brand: GLEMM Pages: 16

sPod PRO
Brand: Reloop Pages: 16

STARPOWER Series
Brand: Nady Systems Pages: 2

echomap chirp 40 series
Brand: Garmin Pages: 65

MC602
Brand: M&S Systems Pages: 12

HIF-4800RC
Brand: Roadstar Pages: 21

ACC97WK
Brand: LG Pages: 1


