background image

Summary of Contents for WaterWorks RO 2000

Page 1: ...Repair Parts IF YOU HAVE QUESTIONS WHEN INSTALLING OPERATING AND MAINTAINING YOUR REVERSE OSMOSIS SYSTEM CALL TOLL FREE 1 800 86 WATER System Tested and Certified to ANSI NSF Standard 58 See performan...

Page 2: ...er rights which vary from state to state Sears Roebuck and Co D 817 WA Hoffman Estates IL 60179 SEARS INSTALLATION POLICY All installation labor arranged by Sears shall be performed in a neat workmanl...

Page 3: ...sent down the drain with the waste water These minerals and impurities are measured as total dissolved solids TDS The system includes replaceable pre and postfilter sediment carbon cartridges The pref...

Page 4: ...O MEMBRANE BE SURE TO REPLACE THIS CHLORINE REMOVAL CAR TRIDGE AT LEAST EVERY 6 MONTHS OR 900 GALLONS SEE RO CARE GUIDE PAGE 16 NOTE Codes in the state of Massachusetts require installation by a licen...

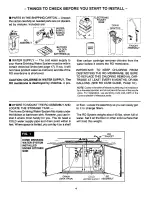
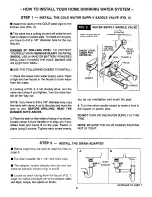
Page 5: ...e is needed for the RO faucet page 7 CAUTION TO AVOID DAMAGING A SINK BEYOND REPAIR CONSULT A QUALIFIED PLUMBER OR INSTALLER FOR GUIDES BEFORE DRILLING HOLES IN PORCELAIN OR STAINLESS STEEL 5 STEPS TO...

Page 6: ...h clamp A up to the pipe and mark the spot to drill BEFORE DRILLING READ THE DANGER NOTE ABOVE 3 Place the seal on the inside of clamp A as shown Locate clamp A turn handle in to align pin if pre dril...

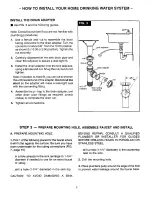
Page 7: ...mble the p trap to the drain adapter and other drain pipe fittings as required check codes to complete the drain run 5 Tighten all connections ferrule O drain adapter ferrule cut if2t _ needed drain t...

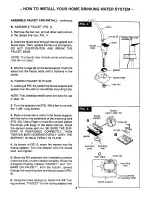
Page 8: ...a notch in the faucet support with the nut on the underside of the mounting hole FIG 5C Use a finger to hold the nut and tighten the screw until snug In the same manner install the second screw and n...

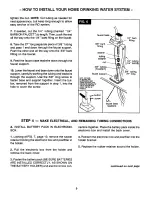
Page 9: ...upport in step 1 into the hole to cover the screw faucet base _ 1 4 barb fitting 3 8 barb fitting washer tubing 3 8 faucet su NOTE FOREASE OFSERVIC_ AND MAINTENANCE KEEP TUBING LENGTHS LONG ENOUGH SOR...

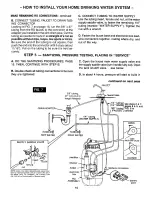
Page 10: ...x lead wire connectors together routing where dry and out of the way STEP 5 SANITIZING PRESSURE TESTING PLACING IN SERVICE A DO THE SANITIZING PROCEDURES PAGE 15 THEN CONTINUE WITH STEP B B Double che...

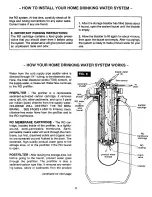
Page 11: ...tomati shutoff PREFILTER The prefilter is a replaceable tank sediment activated carbon cartridge It removes shutoff sand silt dirt other sediments and up to 2 parts RO water per million ppm chlorine f...

Page 12: ...automatic shutoff is forced clos ed Water flow through the system is stopped before it can enter the RO module preventing continued flow to the drain The shutoff remains closed and water is saved unt...

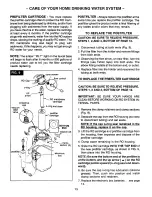
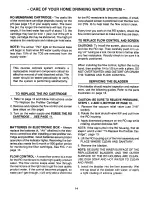
Page 13: ...OM OF PAGE 12 1 Disconnect tubing at both ends Fig 9 2 Pull the filter from the holder and remove fittings from both ends 3 Observing the flow arrow on new filter turn the fittings use Teflon tape int...

Page 14: ...membrane at the right rate to get the best quality product water If the control becomes plugged so water can t get through it will only take a short time for the RO membrane to become useless A small...

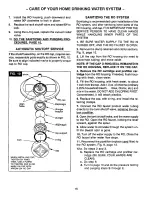
Page 15: ...g 9 page 13 3 Lift the cap from the RO housing no need to disconnect tubing and move aside NOTE IF THE CAP O RING SEAL REMAINED IN THE RO HOUSING REPLACE IT ON THE CAP 4 Remove the RO cartridge and pr...

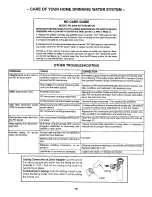
Page 16: ...pply to the RO is needed Correcl this condition before doing maintenance on the RO system Replace the RO membrane cartridge flow control screen pre filter postfilter and batteries in the electronic bo...

Page 17: ...s 1 Up to 2 0 ppm removedby the RO prefilter cartridge NOTE This productis tested and complieswith Water Quality Association Standards You can usethe following chartsto determine RO performance for yo...

Page 18: ..._ _ J I _ 5 34 _ _ 33 _ _ 37 32 _ _ 27 i TO 7 AIRGAR i 1 4 BARB 24 _ 26 Z 3 I 19 _ L I 18 _ L_ SADDLE VALVE NOTE Codes in the state of Massachu setts require installation by _ licensed plumber and do...

Page 19: ...RO Housing Clamp Section 2 Clamp Retainer 2 RO Membrane Cartridge Includes key nos 27 28 KEY NO 27 28 29 3O 31 32 33 34 35 36 37 38 39 4O 41 42 43 44 45 46 47 PART NUMBER 7167764 709503O 7115610 7110...

Page 20: ...and pipe drains It is very important to keep the end of the RO drain tubing at least 1 1 2 above the drain point This provides an air gap to prevent a back siphon of sewer water Omit the following ste...

Reviews: