Seagate GoFlex Cinema, User Manual
The Seagate GoFlex Cinema is a remarkable multimedia player that revolutionizes your entertainment experience. Enjoy seamless playback of your favorite movies, music, and photos on your TV. Access the product's comprehensive User Manual today, available for free download at manualshive.com, to unlock the full potential of your GoFlex Cinema.
Share
Download


Reviews:
No comments
Related manuals for GoFlex Cinema

Token-Ring Network PC Adapter
Brand: IBM Pages: 118
Media Connector Access
Brand: Lightspeed Pages: 12

PL-1200AV2-PEW
Brand: Solwise Pages: 35

XPW2UTRAVEL
Brand: Hamlet Pages: 2

N8104-7151
Brand: NEC Pages: 7

QS1605-840
Brand: QOLSYS Pages: 2

HG7A
Brand: HumminGuru Pages: 2

KTI63136
Brand: K Tool International Pages: 18

EZ Connect SMC2670W
Brand: SMC Networks Pages: 2

i-XLR
Brand: RODE Microphones Pages: 3

SNT1010
Brand: Sveon Pages: 19

41027
Brand: Lindy Pages: 2

Link 950 USB-A
Brand: Jabra Pages: 2

MHEH28-XSC
Brand: Mellanox Technologies Pages: 42

Rosemount 326
Brand: Emerson Pages: 8
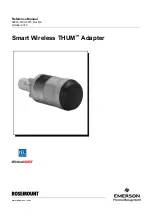
Rosemount Smart Wireless THUM
Brand: Emerson Pages: 60

MF1466-01
Brand: Epson Pages: 19

BT-0260
Brand: Epson Pages: 36


