background image

INSTRUCTION MANUAL

Video Cassette Recorder
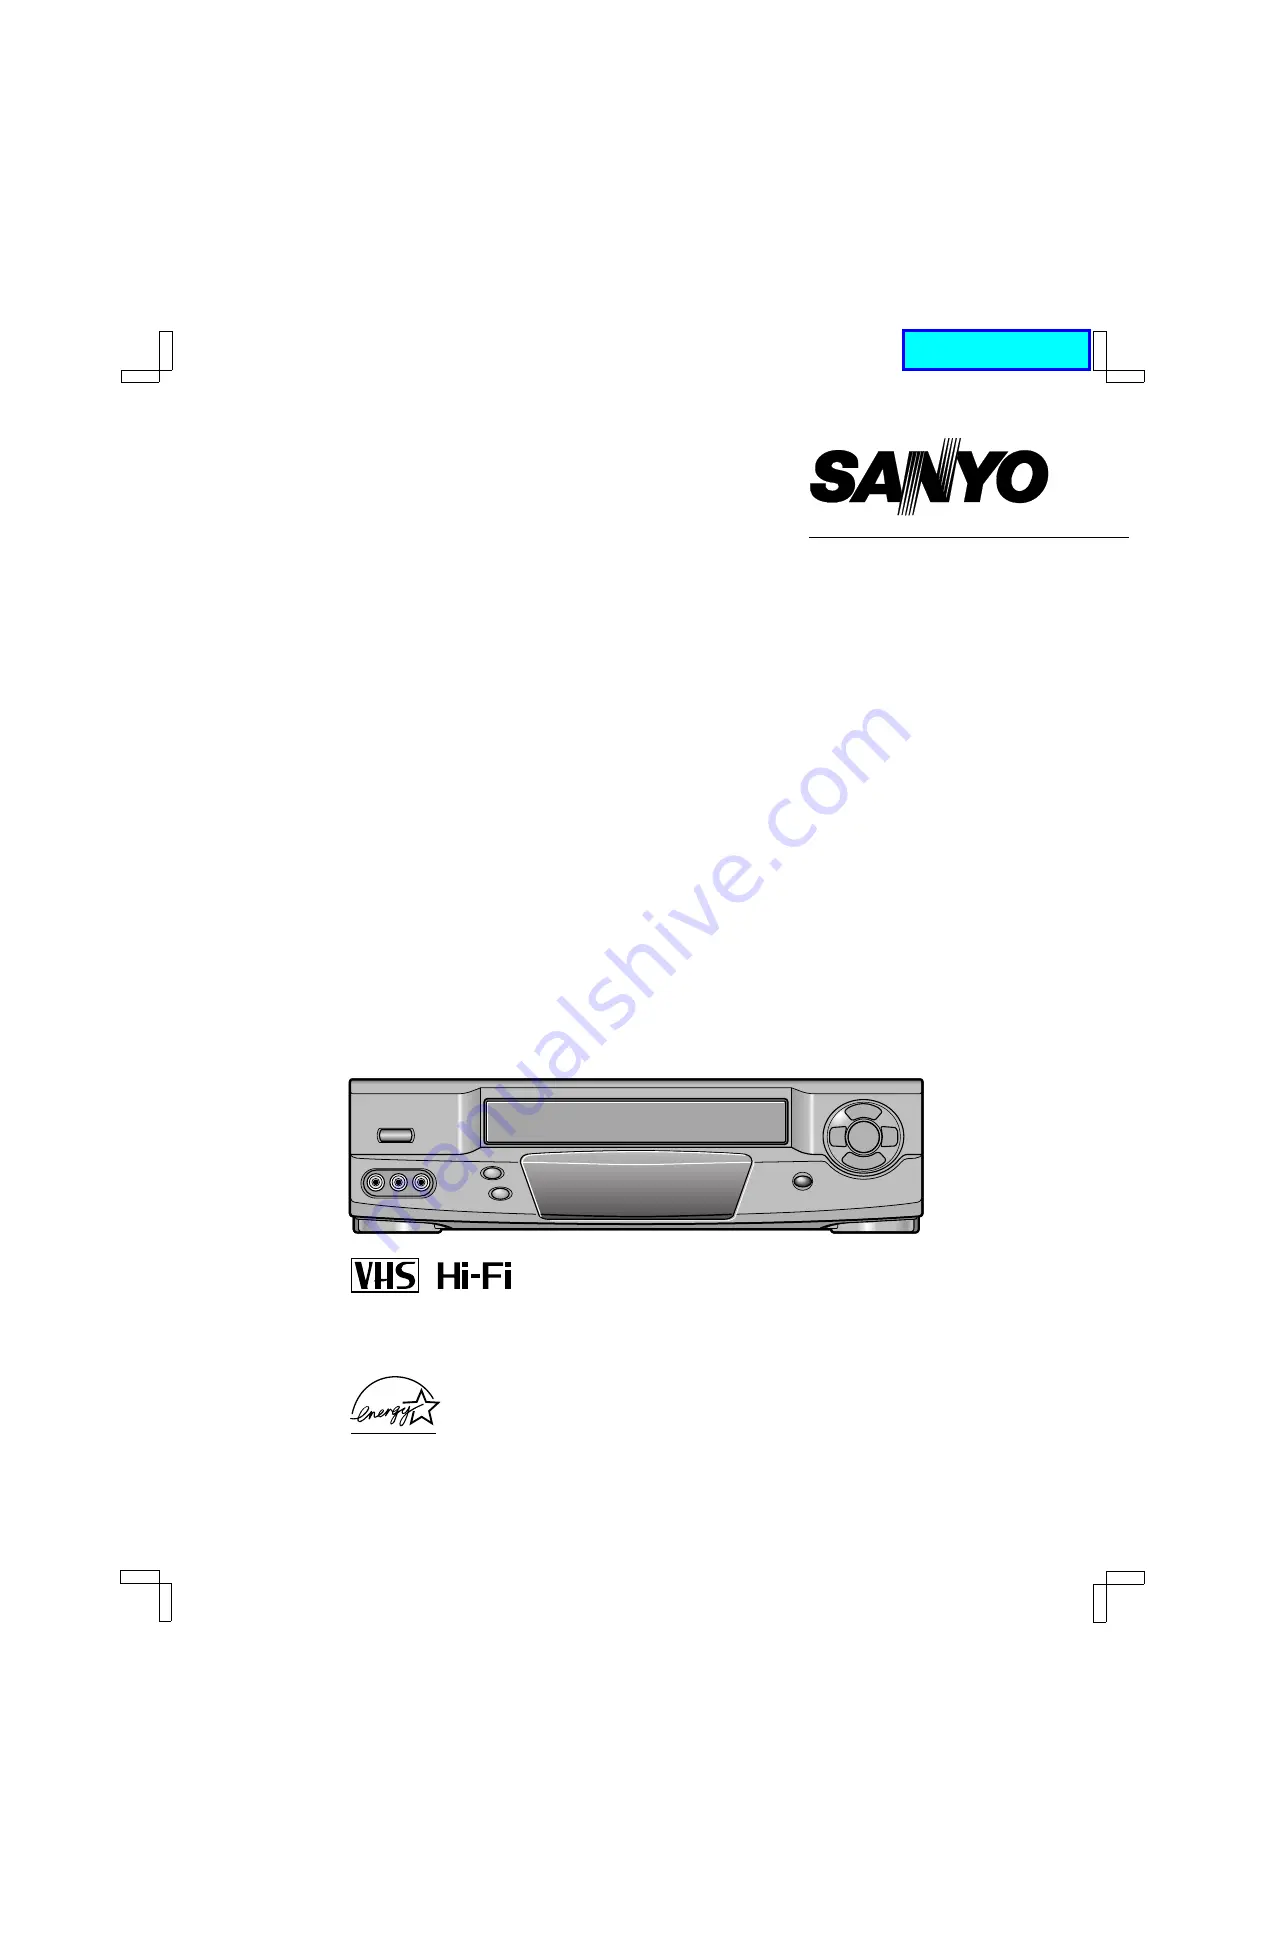
VHR-H619

Only cassettes marked 

w

 can be used with this video cassette recorder.

Please read this manual and accompanying “IMPORTANT SAFETY INSTRUCTIONS” sheet carefully before connecting your
VCR and operating it for the first time.
Be sure to read carefully and follow all the PRECAUTIONS on page 2.
Keep the manual in a safe place for future reference.

(CA)

®

As an E

NERGY

 S

TAR

®

 Partner, 

SANYO has determined that
this product or product model 
meets the E

NERGY

 S

TAR

®


guidelines for energy efficiency.

SU4H/U2 (VHR-H619 GB) Tue. Mar. 09/1999
 

Language Contents

Summary of Contents for VHR-H619

Page 1: ... sheet carefully before connecting your VCR and operating it for the first time Be sure to read carefully and follow all the PRECAUTIONS on page 2 Keep the manual in a safe place for future reference CA As an ENERGY STAR Partner SANYO has determined that this product or product model meets the ENERGY STAR guidelines for energy efficiency SU4H U2 VHR H619 GB Tue Mar 09 1999 Language Contents ...

Page 2: ...ot place the unit on a carpet because this will block the ventilation holes œ Install the VCR in a horizontal position only œ Avoid locations subject to strong vibrations œ Avoid moving the VCR between cold and hot locations see Moisture Condensation Problems this page œ Do not place the VCR directly on top of the TV as this may cause playback or recording problems Avoiding Electric Shock or Fire ...

Page 3: ...TS Precautions 2 Features 3 Accessories 3 DESCRIPTION VHS video cassette tapes 4 Locations of controls and indicators 5 Multibrand universal remote control 8 CONNECTIONS Basic antenna cable connections 11 Alternative cable TV connections 12 Audio video connections 14 BASIC OPERATION Initial setup 15 Multifunction on screen displays 17 On screen menu 18 Setting the clock 20 Changing the menu langua...

Page 4: ... and the Tape In icon o lights NOTES œ If the cassette is not inserted correctly it will be ejected in approximately 3 seconds œ Do not try to pull the cassette out once automatic loading starts œ Do not force the cassette into the VCR CAUTION To avoid possible injury or accident keep children away from this unit Do not put your hand or other objects into the cassette loading slot Safety Tab Unloa...

Page 5: ... 16 24 37 H Front panel AUDIO VIDEO input jacks 25 39 Connect the audio and video outputs from an external unit i e a video camera second VCR to these jacks To record the signals coming from the external unit press the INPUT button on the remote control to display L2 instead of a channel number see page 25 If only one audio jack is to be used connect it to the L left jack Auto A V Selection There ...

Page 6: ...hing TV programs through TV tuner 3 Audio output indicators Left and Right 4 Tape In icon 5 Tape Speed indicators 6 Clock Tape Counter QTR Quick Timer Recording indicators 7 Timer icon 8 ST stereo indicator 9 Input source indicator Channel number or audio video input L1 or L2 F SAP Second Audio Program indicator G CATV indicator C SAP ST REC AM LR PM OFF VCR SP LP EP 1 2 3 4 5 6 7 8 F9 G Example o...

Page 7: ...nit press the INPUT button on the remote control to display L1 instead of a channel number see page 25 If only one audio jack is to be used connect it to the L left jack 3 VHF UHF antenna input jack 4 VHF UHF antenna output jack 5 VIDEO output jack yellow 6 AUDIO output jacks Red for right and white for left 7 RF CHANNEL switch RF CHANNEL 3 4 VIDEO AUDIO VHF UHF FROM ANT TO TV OUT IN IN OUT L R AC...

Page 8: ...rewind button 30 9 STOP button 24 F VCR CATV DSS and TV remote control mode buttons 9 10 15 Lets you select the unit to be operated VCR TV or cable converter DSS receiver G TYPE button 27 H SLOW button 30 I SP EP button 25 J DISPLAY button 17 32 K INPUT button 25 L Tape counter RESET button 32 M Ad JUMP button 38 N CLEAR button 16 21 O SET button 15 16 19 P REC record button 25 37 Q PLAY button 24...

Page 9: ...made by the manufacturers listed below To enter the remote control code for your brand of TV or cable converter decoder follow the steps below For TV operation 1 In the chart below find the code corresponding to your brand of TV 2 While holding down the TV button enter the 2 digit code using the number buttons 0 9 The remote control is now set to operate your TV TV brands Code ADMIRAL 05 10 13 EME...

Page 10: ...08 21 41 STANDARD COMPONENTS 00 11 Cable converter decoder brands Code STARGATE 00 05 06 11 20 22 24 29 TEKNIKA 30 TELECAPTION 26 TELEVIEW 05 06 11 20 22 TOCOM 01 11 07 10 UNIKA 00 01 11 29 UNIVERSAL 00 11 24 27 VIDEOWAY 02 03 14 VIEWSTAR 14 15 20 ZENITH 02 03 14 DSS receiver brands Code PANASONIC 43 RCA 41 SANYO 40 SONY 42 NOTES œ Only remote controlled products can be operated using this remote ...

Page 11: ...twin lead cable or your TV has screw type antenna terminals use a matching transformer not supplied Channel Switch Setting Set your TV to either channel 3 or channel 4 Then set the VCR s RF CHANNEL switch to channel 3 or 4 to match the channel selected on the TV This is your VCR channel The TV must be set to this channel whenever the VCR is used for playing a tape or watching a TV program If in do...

Page 12: ...S œ With this method the TV and VCR receive the same channel Recording one program while watching another is not possible œ With this connection the VCR must be set to the cable converter decoder output channel See next page NOTE TO CATV SYSTEM INSTALLER USA only This reminder is provided to call the CATV system installer s attention to Article 820 40 of the NEC that provides guidelines for proper...

Page 13: ...l or j button to select the Cable box option 9 Press the SET button to set your cable converter decoder output channel The output channel should be indicated on the cable converter decoder back panel If not please refer to the cable converter decoder instruction manual for details Press the SET button repeatedly Each time you press the button the selection changes No Ch02 Ch03 Ch07 The selection i...

Page 14: ...he supplied 75 ohm coaxial cable œ If video and or audio connections are made between the VCR and the TV set the source selector on the television to A V input OUT VIDEO VHF UHF FROM ANT TO TV OUT IN VCR Back panel AUDIO L R AUDIO OUTPUT R Red VIDEO OUTPUT Yellow VIDEO INPUT Yellow AUDIO INPUT L White R Red VIDEO AUDIO IN IN L White VHF UHF ANTENNA IN Stereo monitor TV Back panel L R 3 wire monito...

Page 15: ...izes each active channel in your area in succession It takes about 4 6 minutes 7 When Auto Tuning is completed the VCR will select the channel that carries the XDS signal and proceed to Auto Clock setting Clock set The Auto Clock setting normally takes about 3 minutes During this time the VCR s front panel shows the channel number that is sending the XDS signal for Auto Clock setting Make a note o...

Page 16: ... the VCR the No Signal message appears and the sound is muted Manual Erase You can eliminate unwanted channels or channels with weak or scrambled signals from the memorized channel sequence 1 Select the channel you want to erase 2 Press the CLEAR button for about 2 seconds Erase is displayed on screen for about 3 seconds The channel is now erased from the memory Manual Programming You can add chan...

Page 17: ...1 Press the DISPLAY button on the remote control The status display appears 2 To remove the status display press the DISPLAY button press the button twice if a tape is loaded in the VCR NOTE The status display will not appear if a menu is displayed on screen or during special playback Remaining Tape Duration Display 1 Press the DISPLAY button twice The remaining tape duration appears at the bottom...

Page 18: ...indications SET OK MENU TV The menu items are color coded as shown below œ Menu title On magenta background œ Option selected Highlighted in green œ Operations indications On blue background œ Others On gray background NOTE If the clock has not yet been set the Clock set menu appears To set the clock see SETTING THE CLOCK on page 20 Press the CH TRACK l or j button to select the desired option the...

Page 19: ... pages are shown in square brackets CATV TV 22 œ Indicate whether you subscribe to cable TV or use antenna Cable box 13 step 9 œ If you use a cable converter decoder cable box set the output channel MTS 28 œ Select the MTS Multichannel TV Sound mode stereo SAP or mono Audio out 29 œ Select the audio output mode Child Lock 38 œ Select this to block picture and sound Off timer œ Select this to set t...

Page 20: ...lock time follow the steps under Automatic Clock Adjustment Automatic Clock Adjustment 1 Press the MENU button The main MENU appears 2 Press the CH TRACK l or j button to select the Clock set option then press the SET button The Clock set menu appears Clock set 03 07 Tue 2000 09 30PM Clock adjust Auto Off DISPLAY Clock adjust CH Day STD shift 100 AM PM CLEAR Cancel SET OK 3 Press the DISPLAY butto...

Page 21: ...ay STD shift 100 AM PM CLEAR Cancel SET OK NOTES œ When entering the year press the two number buttons that correspond to the last two digits of the year i e 99 for 1999 05 for 2005 or 25 for 2025 œ If you press the wrong button press the CLEAR button to erase the wrong number Then press the correct button to continue 5 When finished press the SET button to save the settings Standard Daylight Time...

Page 22: ...annel number Channel Programming 1 Follow the steps in Before starting above 2 Press the MENU button The main MENU appears 3 Press the CH TRACK l or j button to select the VCR setup option then press the SET button The VCR setup menu appears CATV TV CATV TV Cable box No Ch02 MTS ST SAP Mono Audio out ST L R Mono Child Lock On Off Off timer Off 2Hr 6Hr Auto AV Select On Off CH Option SET Select MEN...

Page 23: ...At the end of the tape the VCR stops then rewinds œ The cassette is ejected after rewinding Playback of Copyguarded Tapes Some prerecorded tapes employ a copyguard system that may cause intermittent distortion in the upper portion of the picture during playback This distortion is more likely to be visible on an older TV If you experience this problem do the following 1 Select a TV station with a s...

Page 24: ...ions in the condition of a recording an old recording that has been played back many times for example then automatically adjust the playback signal to deliver the best possible image TRACKING CONTROL Tracking Control Adjustments When you play a tape that was not recorded on this VCR some noise may appear in the picture due to incorrect head to tape tracking The VCR will automatically adjust the t...

Page 25: ...the front panel when you want to stop recording The Record indicator goes off Rec List Super Feature The Rec List Super feature lets you keep track of all recordings you make on this VCR The information automatically includes the channel number date and start time In addition you have an option to add the program type to the information list See next page for more detailed instructions on the Rec ...

Page 26: ...ed displays it on screen Wait for the desired recording to be listed Rec List super Ch Date Start Type 1 01 5 06 9 00 Movie 2 22 5 21 6 30 3 04 5 15 7 30 Sport 4 L2 5 27 7 30 Game 5 05 6 01 SPORTS DIGEST 6 L1 6 02 6 30 Child 7 1 7 Select 5 Press the number of the desired recording 1 7 Searching will flash on screen while the tape rewinds to the beginning of the selected recording Playback will sta...

Page 27: ... automatically be entered Then when using the Rec List super function the title will be displayed up to 15 characters The program type is not set Other settings When using the Rec List super function the setting entered here will be displayed as the program type NOTE To cancel press the CLEAR button 3 Press the SET button to enter the settings The entered type code e g Movie MO will be displayed f...

Page 28: ...eo or SAP broadcast set the MTS mode as follows 1 Follow the Before starting steps on page 19 Make sure the input source is set to Tuner A channel number is shown in the indicator panel 1 Press the MENU button The main MENU appears 2 Press the CH TRACK l or j button to select the VCR setup option then press the SET button The VCR setup menu appears 3 Press the CH TRACK l or j button to select the ...

Page 29: ...the CH TRACK l or j button to select the Audio out option then press the SET button to select the desired mode as indicated by the z ST STEREO The left channel sound is heard from the left speaker and the right channel sound is heard from the right speaker Use this setting to listen to a stereo program or tape in stereo L Left channel sound is heard from both speakers Use this setting to listen to...

Page 30: ...an be viewed 2 Press the FF or REW button again to return to the fast forward or rewind mode Frame Advance 1 Press the PAUSE STILL button repeatedly during still mode The picture advances one frame at a time 2 Press the PLAY button to resume normal playback Double Speed Playback 1 Press the x2 button during normal playback The picture plays back at about 2 times the normal playback speed 2 Press t...

Page 31: ...ss the PLAY button 2 Press the PAUSE STILL button A still image appears on the screen 3 Press and hold the CH TRACK l or j button or CHANNEL on the front panel to reduce the vertical jitter œ This adjustment also corrects tracking errors during double speed playback and slow motion playback NOTES œ During special effects playback the sound is muted œ Noise bands narrow white lines in the picture m...

Page 32: ... to the beginning of the current program or skip to the beginning of the next program and start playback œ EXAMPLE To skip to the next program 1 Press the INDEX button in the play or stop mode f Index Search e will be displayed on screen 2 Press the FF button The tape quickly advances to the beginning of the next program Playback begins NOTES œ There may be a slight discrepancy between the positio...

Page 33: ...M DD H MM H MM 4 Press the number buttons 0 9 to set the timer program œ EXAMPLE To record a program on channel 10 once Once recording mode on March 9 from 09 00 PM to 10 30 PM using the EP recording speed March 9 03 09 œ Channel 10 Press 1 0 Date March 9 Press 0 3 0 9 Daily Weekly setting Press CH TRACK j Timer Recording Modes Daily M F Records a program at the same time Monday through Friday Wee...

Page 34: ...ording standby mode The Timer icon n appears Smart Speed Record Function When the Smart Speed Record function is set the VCR automatically calculates the remaining time left on the tape during timer recording If there is not enough time left for the program to be taped the VCR switches the recording speed from SP standard play to EP extended play to enable the entire program to fit onto the remain...

Page 35: ...change to EP and the Smart Speed Record function will not operate Note that even if the Smart Time Record function is set to Off the tape speed will remain as set and will not return automatically to its previous setting œ If the program transmission start time is delayed more than 3 hours the function will be canceled œ The function may not operate properly if a different program with the same ra...

Page 36: ...ps under Clearing the Program Timer to erase the program that you wish to change 2 Follow the steps under Timer Programming to add a new timer program Using Timer Recording for Several Programs If two or more programmed recording times overlap on the same day the VCR will not begin recording a new program until the previous program has ended as shown below Program Recording Order TIMER SETTING NOT...

Page 37: ...inute increments Auto Setting If an XDS encoded broadcast is being recorded AUTO appears at step 1 above and blinks for 10 seconds in the display The VCR timer receives the end time information from the XDS signal and the recording continues until the end of the program Notes on using the AUTO setting œ To set the recording end time manually press the REC button while AUTO is blinking The display ...

Page 38: ...function is active the message Blocked will appear on the TV screen NOTES œ Even when the child lock function is activated timer recording and other functions can still operate normally œ Since the child lock function can be activated or deactivated by remote control you may wish to store the remote control in a secure location while the child lock function is activated Ad JUMP The Ad JUMP feature...

Page 39: ...de 7 Place VCR 2 in the record pause mode 8 Press PLAY on VCR 1 9 When the tape in VCR 1 has reached the desired point press release PAUSE STILL on VCR 2 Recording begins F Press STOP or STOP EJECT on the front panel on both VCRs when finished MAINTENANCE Head Care and Cleaning œ Under normal conditions the heads should not require cleaning If you suspect a problem contact a factory authorized ser...

Page 40: ...e in the cassette œ The channel selected on the VCR does not correspond to the cable converter decoder output channel œ Select the correct channel CH 02 07 The picture is poor during playback œ The TV channel selector is not set to the proper channel œ During playback set the TV s channel selector to channel 3 or 4 to match the VCR s channel switch setting œ The TV fine tuning is not set correctly...

Page 41: ...nverter Converter output Channel 3 or 4 selectable Time indication AM PM 12 hour system Timer 1 year 8 event programmable Terminals Antenna input VHF UHF F type Antenna output VHF UHF F type Video input output RCA jack Audio input output RCA jack Electrical Specifications Video output level impedance 1 V p p 75 ohms Audio output level impedance 316 mV 10 dBV less than 2 2 kohms Video input level i...

Page 42: ...21605 Plummer Street 1AC6P1P2000 A Chatsworth California 91311 SU4H U2 0399KP SJC Issue No 2 Copyright SANYO 1999 All rights reserved Printed in Indonesia SU4H U2 VHR H619 GB Tue Mar 09 1999 ...

Reviews: