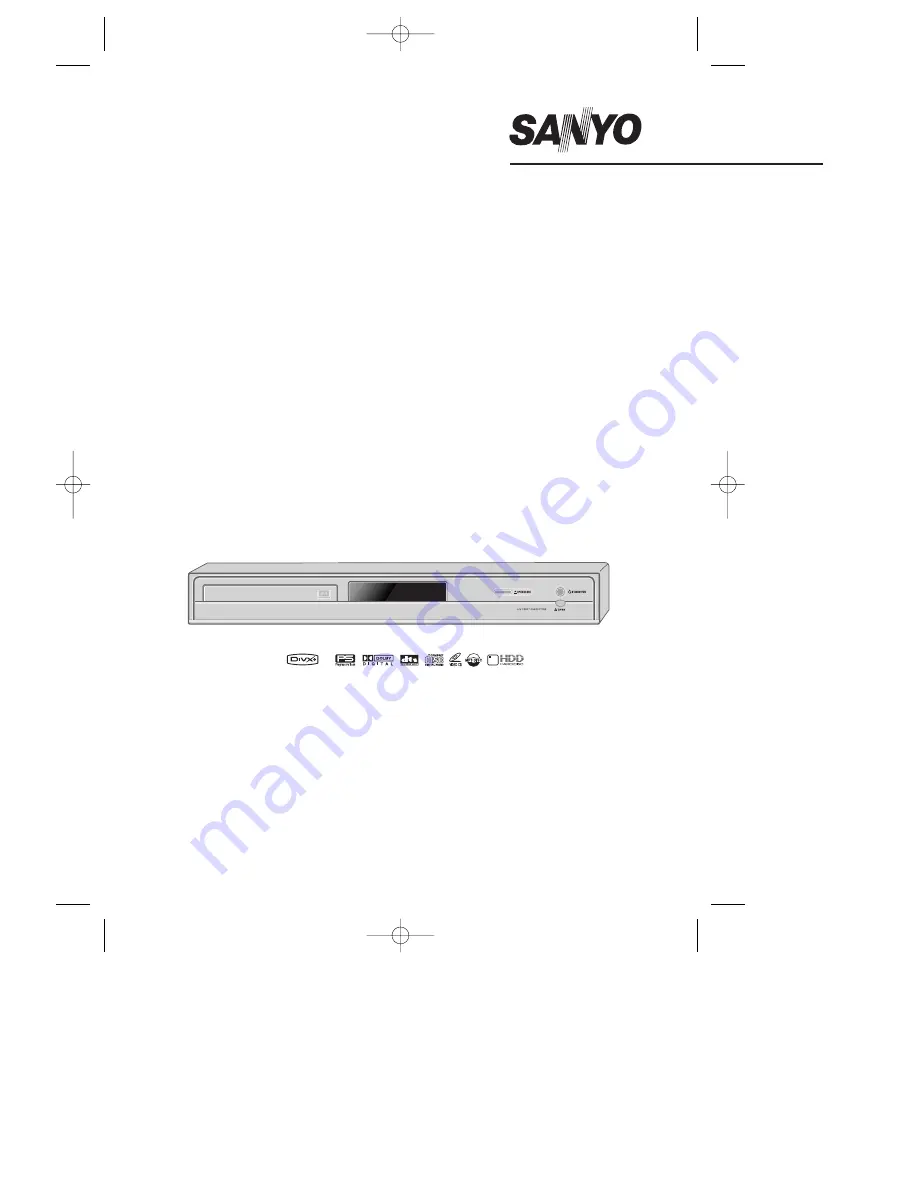
background image

HDD/DVD Recorder

HVR-DX700
HVR-DX710

INSTRUCTION MANUAL

Please read this manual carefully before connecting your HDD/DVD
Recorder and operating it for the first time.

Keep the manual in a safe place for future reference.

P/N : 97P95600D0-AX

DG-M13-23E1D-HR-O(GB)  2006.7.18 10:18 AM  ˘

` A   mac001  1200DPI 100LPI

Summary of Contents for HVR-DX700

Page 1: ...MANUAL Please read this manual carefully before connecting your HDD DVD Recorder and operating it for the first time Keep the manual in a safe place for future reference P N 97P95600D0 AX DG M13 23E1D HR O GB 2006 7 18 10 18 AM A mac001 1200DPI 100LPI ...

Page 2: ...SANYO Electric CO Ltd Code No 0000000 DG M13 23E1D HR O GB 2006 7 14 3 59 PM B mac001 1200DPI 100LPI ...

Page 3: ...ced at least 10 cm apart from other home appliances or obstacles to ensure sufficient ventilation The product should not be exposed to dripping or splashing and no objects filled with liquids such as vases should be placed on top of the product Before a storm and or lightning unplug the product from the mains supply and aerial Put the product on a steady flat surface Only clean the product with a ...

Page 4: ...bol within an equilateral triangle is intended to alert the user to the presence of uninsulated dangerous voltage within the product s enclosure that may be of sufficient magnitude to constitute a risk of electric shock The exclamation point within an equilateral triangle is intended to alert the user to the presence of important operating and servicing instructions in the literature accompanying ...

Page 5: ...se openings must not be blocked or covered These openings must not be blocked by placing the unit on a bed sofa rug or other similar surface This unit should never be placed near or over a radiator or heat radiator This unit should not be placed in a built in installation such as a bookcase or rack unless proper ventilation is provided or the manufacturer s instructions have been adhered to 10 POW...

Page 6: ...for service 20 REPLACEMENT PARTS When replacement parts are required have the service technician verify that the replacements he uses have the same safety characteristics as the original parts Use of replacements specified by the unit manufacturer can prevent fire electric shock or other hazards 21 SAFETY CHECK Upon completion of any service or repairs to this unit ask the service technician to pe...

Page 7: ...___________________1 Important Safeguards _________________________2 Table of Contents ______________________________5 Overview______________________________________6 Identification of Controls ______________________10 Introduction Connecting Antenna Cable ____________________15 Connecting a TV _______________________________15 Connecting an Amplifier Receiver _____________16 Connecting Optional E...

Page 8: ...ram is being simultaneously recorded Program Recording Recording from TV tuner or analog AV input Manually set up timer recording for a TV program or a recurring TV program Personal video copying by external input Analog and DV camcorder tapes VCR tapes High speed dubbing Select program s from HDD and copy them to DVD Also copy from DVD to HDD Available with VR Format JPEG MP3 DivX Watch a TV prog...

Page 9: ...e than a thousand times What is a DVD R Unlike a DVD RW disc a DVD R write once DVD can only be written to once If it is not finalised after a recording further recordings can be added to it Old recordings can be deleted but they can no longer be overwritten The deleted recordings titles are marked deleted title Before a DVD R can be played in a DVD player it must be finalised in the HDD DVD Recor...

Page 10: ...tomatically and an error message will be displayed on screen Copyright Notice Audio and video recordings you make using the HDD DVD Recorder are for your personal use only You may not sell lend or rent them to other people This product incorporates copyright protection technology that is protected by U S patents and other intellectual property rights owned by Macrovision Corporation and other righ...

Page 11: ...e sensor Angle Within 30 in each direction of the remote sensor Remote Control Battery Installation Detach the battery cover on the rear of the remote control and insert two AAA batteries Make sure the polarities and are aligned correctly Precautions Caution Do not mix old and new batteries Never mix different types of batteries standard alkaline etc Notes on Discs Handling Discs Do not touch the ...

Page 12: ...N CLOSE DVD Opens or closes the disc tray STANDBY ON Turns the HDD DVD Recorder on and off SELECT DVD HDD Toggles control between the DVD mode and the HDD mode MENU Accesses media browser or return to previous menu PR Scans up or down through memorized channels Also moves up and down in menus PLAY PAUSE ENTER Starts playback of a disc or HDD Pauses playback or recording temporarily STOP Stops play...

Page 13: ...0 OTR Recording mode SAFE Indicates when the HDD DVD Recorder is locked The front panel is locked by pressing and holding the button over 5 seconds on the remote control and is unlocked by pressing any key on the remote control I S Indicates when the HDD DVD Recorder is outputting the video signal in Interlaced Scan mode P S Indicates when the HDD DVD Recorder is outputting the video signal in Pro...

Page 14: ...exits the main setup menu Confirms menu selections œ Selects menu options PR Selects channels Displays the edit menu for DVD or HDD Displays information about the currently loaded disc HDD or TV channel Selects numbered options in menus Selects TV channels Clears previous setting of timer recording or file name Starts playback Pauses playback or recording temporarily Press again to exit Pause mode...

Page 15: ...g time For more details Refer to One Touch Record OTR on page 40 Repeats the current chapter track title or the entire disc Repeats playback between two points A and B Progressive Scan Mode If your TV supports Progressive Scan you can view high quality video by setting the HDD DVD Recorder to Progressive Scan mode If your TV does not support Progressive Scan do NOT change to Progressive Scan mode ...

Page 16: ...let AC Power Cord Plug into a power outlet COAXIAL OPTICAL Digital Audio Out Connect to an amplifier with a coaxial or optical digital audio input AV IN JACK Connection of an additional device s video_output and audio_output ANT OUT Connect to a TV with an RF input Cooling Fan 14 Rear panel Caution Do not touch the inner pins of the jacks on the rear panel Electrostatic discharge may cause permane...

Page 17: ...your TV 2 Connect this cable to the jack marked ANT IN FROM ANT on the rear panel of the HDD DVD Recorder There are a variety of ways to connect the HDD DVD Recorder to your TV and other equipment Use only one of the connections described below Whichever TV connection you use will work with all input sources Please refer to the manuals for your TV VCR stereo system or other devices as necessary to...

Page 18: ...he audio cables Connections Be sure to set the HDD DVD Recorder to Progressive Scan mode by pressing and holding P SCAN for 5 seconds or changing the Video Output in the Setup Menu see page 24 Progressive Scan does not work with the RF Audio Video or S Video connections Due to the DTS Licensing agreement the digital output will be in DTS digital out when the DTS audio stream is selected If the aud...

Page 19: ...ossible to connect a DV digital camcorder video deck or DVD R RW recorder and digitally transfer DV tapes or DVD R RW discs to DVD R DVD RW or HDD in HDD DVD Recorder Use a DV cable not supplied to connect the DV In Out jack of your DV camcorder video deck to the front panel DV IN jack of the HDD DVD Recorder Connecting a Digital Camcorder This jack is for connection to DV equipment only It is not...

Page 20: ...nish French Czech Danish German Instructions Enter Confirm Setup Exit Move Installation Welcome Press Enter to begin auto channel search Ensure aerial is connected Instructions Setup Exit You must follow the initial installation process to set the time date channels and language preferences for the HDD DVD Recorder 18 Initial Installation Initial Installation Installation Please select disc subtit...

Page 21: ...ped with the Multi Tuner You can search broadcasting of other countries If the set can not search the channels please Re Install see page 18 The HDD DVD Recorder Setup menu includes six categories including Installation Recording Options Languages Preferences System Info and Restore Defaults Press SETUP and œ on the remote control to view the first and second levels of the Setup menu Setup Menu Ov...

Page 22: ...ct this Setup menu Manual Setup Standard PAL II Reception Aerial Auto Search CH 02 Fine Tune Decoder N A Store Channel PR 01 Program Name P 01 Instructions Enter Confirm Setup Exit Move Manual Setup Standard PAL II Reception Aerial Auto Search CH 02 Fine Tune Decoder N A Store Channel PR 01 Program Name P 01 Instructions Enter Confirm Setup Exit Move Manual Setup Standard PAL II Reception Aerial A...

Page 23: ...ss ENTER The Set Clock menu appears 4 Enter the date and time œ left right Moves the cursor to the previous or next column up down Changes the setting at the current cursor position 5 Press ENTER to confirm your setting then press SETUP to exit the Setup menu After Auto Set is complete follow the instructions above to make sure that Tuning Band is set correctly Installation SearchingforavailableTV...

Page 24: ... press ENTER 22 Setup menu Installation Manual Set Auto Set Set Clock Adjust Channels Instructions Enter Confirm Setup Exit Move Adjust Channels PR 01 PR 02 PR 03 PR 04 PR 05 PR 06 Instructions Enter Confirm Setup Exit Move Select Channel Options Edit Align Delete RECORDING OPTIONS Settings DVD Record Quality You can set the default DVD recording quality to Approx time HQ High Quality 1 hr disc SP...

Page 25: ... press to select OSD Language 4 Press ENTER to move to the second level 5 Use to select the desired language 6 Press ENTER to confirm your selection then press SETUP to exit the menu Recording Options DVD Record Quality SP HDD Record Quality SP Auto Chapter 5 min Instructions Enter Confirm Setup Exit Move Select HDD Quality SLP EP SP HQ Recording Options DVD Record Quality SP HDD Record Quality SP...

Page 26: ...onitor using the COMPONENT jacks set Video Output to Interlace or Progressive RGB Not available Follow the same procedure as TV Aspect Ratio to change the Video Output Caution Once the Progressive Scan setting is entered an image will only be visible on a Progressive Scan compatible TV or monitor Press and hold P SCAN for 5 seconds to return to Interlace Scan mode Video TV Aspect Auto Video Output...

Page 27: ... HDD DVD Recorder s digital audio signal will be output in the PCM 2ch format when you play a DVD or HDD recorded with a Dolby Digital only for DVD or MPEG soundtrack If the DVD is recorded with a DTS sound track then no sound will be heard Setup menu Audio Digital Output Bitstream Dynamic Range Off Virtual Surround Off Instructions Enter Confirm Setup Exit Move Select Digital Output Off Bitstream...

Page 28: ... select Parental Controls And press ENTER 4 Use to select Set Parental Level and press ENTER The Password Input dialog will appear Enter a 4 digit password using the 0 9 buttons If this is the first time you have entered a password you will be prompted to enter the password again to confirm it Preferences Video Audio Parental Controls Auto Settings N A Hard Disk Instructions Enter Confirm Setup Ex...

Page 29: ...onfirm press ENTER Parental Control Set Parental Level Adult Change Password Parental Country Code AU Set Hdd Parental Lock Off Instructions Enter Confirm Setup Exit Move Parental Control Set Parental Level Adult Change Password Parental Country Code AU Set Hdd Parental Lock Off Instructions Enter Confirm Setup Exit Move Change Password Current Code Enter New Code Confirm Code _ _ Instructions Set...

Page 30: ...et Parental Level Adult Change Password Parental Country Code AU Set Hdd Parental Lock Off Instructions Enter Confirm Setup Exit Move Select the parental lock Off On Auto Title Delete 1 Use to select Auto Title Delete while the HardDisk submenu is displayed Press ENTER or to go to the second level 2 Use to select the desired option 3 Press ENTER to confirm your selection 4 Press SETUP to exit the ...

Page 31: ...menu HDD Preferences Auto Title Delete On Buffering Mode Preserve Jump To Interval 5 Min Reset Hard Disk Model ST3160022ACE 160GB Instructions Enter Confirm Setup Exit Move Select Jump Interval 30 Sec 1 Min 3 Min 5 Min Reset HardDisk This feature enables you to erase the entire content of the HDD Please proceed with caution as this process is irreversible 1 Use to select Reset Hard Disk while the ...

Page 32: ...st set the country language channel and clock settings again Restore Defaults If you select this function all settings will be removed and the product will be set into initial factory mode Instructions Enter Confirm Setup Exit Move Restore Defaults Are you sure you want to restore default settings Yes No Instructions Enter Confirm Setup Exit System Version Version FD30902DXVL Main Build 3 6 5 Mico...

Page 33: ... Press ENTER to display a submenu 3 Use to change the numbers Press ENTER to confirm The On Screen Display provides feedback on the status of the HDD DVD Recorder and or the currently loaded disc or HDD To access the On Screen Display or OSD press DISPLAY To display information about the currently loaded disc or HDD On screen display operation 1 Press DISPLAY repeatedly to display change the infor...

Page 34: ...d skips to the desired time 1 Press DISPLAY during playback The on screen display appears on the TV screen 2 Use to select the Elapsed icon on the on screen display Press ENTER to search by time The submenu appears 3 Use to change the numbers and use œ to move left or right 4 Within 7 seconds press ENTER to confirm the start time Playback starts from the selected time on the disc For the title rec...

Page 35: ...io system on and select the input source connected to the HDD DVD Recorder 2 Press OPEN CLOSE to open the disc tray 3 Load your disc in the tray with the playback side down label side up 4 Press OPEN CLOSE to close the tray 5 LOAD appears on the front panel display and playback starts automatically If playback does not start press PLAY In some cases the Disc menu may appear instead Playing a DVD W...

Page 36: ...ise the Disc menu may appear 2 The Title menu may contain camera angles spoken languages and subtitle options as well as the chapters for the title The Zoom function may not work on some DVDs ex Jpg The Zoom function does not work in PAUSE mode Repeat 1 To repeat the currently playing chapter press REPEAT REPEAT CHAPTER appears on the TV screen 2 To repeat the currently playing title press REPEAT ...

Page 37: ... Subviewer The file size of the DivX subtitle is limited to 128KB Playable MPEG 4 SP and ASP is XVID DivX5 1 DivX5 05 DivX5 02 DivX4 1 2 DivX3 11 and Dr DivX1 0 2 ASP does not support GMC Qpel Quarter Pixel Playable biterates is to max 4MBPS Playable frame number of screens per a second is 30 25 24 12 and 8 Playable resolution is from Min 200X100 to max 720X576 Playable audio stream formats are DT...

Page 38: ...st the tracks in the folders Use to select a folder then press ENTER Press REPEAT to repeat a track file and press again to repeat the whole media If the disc contains JPEG files as well as MP3 files you can change the Play mode to display JPEG image files by pressing MENU CD Music Item CD Audio TRACK 1 00 03 45 Tr 3 13 TRACK 2 00 03 46 TRACK 3 00 03 47 STOP TRACK 4 00 03 48 TRACK 5 00 03 49 TRACK...

Page 39: ...es 1 Prepare the Disc which includes both MP3 and JPEG files Or copy the files to HDD Media category 2 Insert the disc Then press MENU to bring up Media browser 3 Select the media you want to play between HDD Media and DVD and go to music category 4 During playback of the MP3 files press MENU to return to the selected media browser The music playback will not stop 5 Go to Picture category and sele...

Page 40: ...serve and change Channels the Time shifting buffer data will be maintained Time shifting is stored in a buffer that contains 60 minutes of recording After 60 minutes the buffer will be progressively overwritten If you need to keep the video contained in this buffer for future usage you can Save all or part of the buffer During Time shifting a Timer recording may come up As you cannot watch one pro...

Page 41: ... and the recording takes all the available space on the hard disk drive the HDD DVD Recorder will erase unprotected titles to the amount of about 10 hours in HQ mode approx 40GB and keep recording If the unit is set as Setup Preferences Hard Disk Auto Title Delete Off if the STOP is not pressed and the recording takes all the available space on the hard disk drive the HDD DVD Recorder will stop re...

Page 42: ... will hear during recording For example if the TV broadcast is in Stereo then setting the HDD DVD Recorder to Stereo will record the broadcast in Stereo and the Monitor Audio will also be in Stereo Broadcast Audio Monitor L Ch R Ch Audio MONO MONO MONO MONO MONO STEREO L R STEREO MONO MONO MONO MONO BIL I BIL I BIL I BIL I BIL BIL II BIL II BIL II BIL II BIL Off BIL I BIL I BIL Off TV Broadcast ST...

Page 43: ...ecordable media such as DVD R DVD RW if you are recording to DVD 2 Press TIMER The Timer Recording menu appears Use to move to a timer recording slot and press ENTER to modify it If you did not set the clock on the HDD DVD Recorder you must do so before programming a timer recording Media Choose desired media DVD or HDD using PR No Choose the desired channel or one of the external inputs from whic...

Page 44: ... you want to erase on the Timer Recorder List then press ENTER to modify it Use œ to select Delete then press ENTER Or just press CLEAR on the Timer Recorder List After a Timer Recording has started you can still cancel the program by pressing and holding STOP for 5 seconds Stopping a Timer Recording in Progress Even if a Timer Recording is set the HDD DVD Recorder will not record if No disc is lo...

Page 45: ...g from External Components You can record from a digital camcorder connected to the DV IN jack on the front panel of the HDD DVD Recorder 1 Make sure your digital camcorder is connected to the front panel DV IN jack see page 17 2 Press DV to select the DV input Recording from a Digital Camcorder If your source is copy protected you will not be able to record it using the HDD DVD Recorder See Copyr...

Page 46: ...index picture chapter mark in HDD Videos to DVD or vice versa The Media BROWSER can not be activated in the middle of dubbing that means play stop any edits does not work Dubbing from HDD to DVD Media Dubbing HDD to DVD DVD to HDD Move œ Select ENTER Back MENU Exit SETUP HDD to DVD Dubbing Date 22 06 05 1 Title PR 01 Time 11 16 2 Title PR 02 Length 00 13 3 Title PR 03 Quality HQ 4 Title PR 04 5 Ti...

Page 47: ...1 Titles No DVD Space 99 13 Titles 1 13 Move œ Select ENTER Back MENU Exit SETUP DVD to HDD Dubbing Completed Dubbing from DVD to HDD Media files Copying Media files Copying Copying and Editing media file DVD HDD Copying will copy the media files jpg mp3 DivX in HDD Media to DVD or vice versa HDD Media to HDD Media copy DVD to DVD is also available If you want to copy media files on your DVD to HD...

Page 48: ...can add as many titles you want Media Copy will appear 4 Select Done and press ENTER after selecting all the titles you want to copy and then Media Copy Select Destination appears 5 Select the media you want to copy to and press ENTER HDD Music Play DVIX View Info 1 Edit MU 02_LIVIN ON PRAYER MP3 4572 MB Free 4 Items 4 4 Move œ Select ENTER Back MENU Exit SETUP HDD Music Delete DVIX Copy 1 Create ...

Page 49: ... Title PR 05 6 Title PR 06 7 Title PR 06 8 Title PR 06 9 Title PR 06 10 Title PR 06 Free Space 99 13 Titles 1 13 Move Select ENTER Back MENU HDD Videos Play 1 Title PR 01 Delete 2 Title PR 02 Edit 3 Title PR 03 Sort 4 Title PR 04 Dubbing 5 Title PR 05 6 Title PR 06 7 Title PR 06 8 Title PR 06 9 Title PR 06 10 Title PR 06 Free Space 99 13 Titles 1 13 Move Select ENTER Back MENU HDD Videos Date 22 0...

Page 50: ...ences Parental Controls Set Hdd Parental Lock menu When you lock a program the parental password selected in the Setup menu will be used The user will be asked to Unlock the program before Play or any Edit or Dubbing operation 4 Select the title to be locked using ENTER HDD Videos Name 1 Title PR 01 Parental Lock 2 Title PR 02 Unprotect 3 Title PR 03 Video Edit 4 Title PR 04 5 Title PR 05 6 Title ...

Page 51: ...itle Hide Chapter Use to hide or unhide chapter markers in the title Depending on whether a chapter is currently hidden or unhidden one of the HDD Playback and Editing HDD Videos Name 1 Title PR 01 Parental Lock 2 Title PR 02 Delete protect 3 Title PR 03 Video Edit 4 Title PR 04 5 Title PR 05 6 Title PR 06 7 Title PR 06 8 Title PR 06 9 Title PR 06 10 Title PR 06 Free Space 99 13 Titles 1 13 HDD Vi...

Page 52: ...les HDD Videos Play 1 Title PR 01 Delete 2 Title PR 02 Edit 3 Title PR 03 Sort 4 Title PR 04 Dubbing 5 Title PR 05 6 Title PR 06 7 Title PR 06 8 Title PR 06 9 Title PR 06 10 Title PR 06 Free Space 99 13 Titles 1 13 Move Select ENTER Back MENU HDD Videos Record Date 1 Title PR 01 Alphabetical 2 Title PR 02 Delete Order 3 Title PR 03 Protected 4 Title PR 04 5 Title PR 05 6 Title PR 06 7 Title PR 06 ...

Page 53: ...isc Edit menu Press then Press then Press then Press MENU then At first go to Disc Edit mode 1 Press MENU to go to Disc Menu menu 2 Press Disc Top menu will be displayed 3 Press Disc Edit menu will be displayed Disc Information 4 Use œ to select the Information menu The Disc Information Menu shows you disc information such as disc type number of recordings total titles free space etc Erase the dis...

Page 54: ...disc Erase the disc All recordings will be lost Yes No Instructions Enter Confirm Move Make Compatible Make Compatible for a DVD RW will automatically create a menu screen for navigating the disc This menu screen is accessible by pressing TITLE 4 Use œ to select Make Compatible for DVD RW Press ENTER as shown on the screen 5 Select Yes using and press ENTER to make the disc compatible 6 Press ENTE...

Page 55: ...S T U V W X Y Z Enter Confirm Move Change Disc Name Problem This disc is locked It cannot be renamed ok Instructions Enter Confirm Move Finalise Finalising a DVD R or DVD RW locks its recordings in place so the disc can be played on most standard DVD players or computers equipped with DVD ROM drives 4 Use œ to select Finalise Disc for a DVD R or DVD RW Press ENTER as shown on the screen 5 Select Y...

Page 56: ...Edit mode 1 Press MENU to go to Disc Menu menu 2 Select the desired title you want to manage using 3 Press Title Edit menu will be displayed Play a Title To play a title 4 Select Play Title using œ 5 Press ENTER to play the title You can erase titles on DVD RW discs only Large arrow pointing to disc menu or next page is only visible for a moment when is pressed Erase Title Press Enter to erase thi...

Page 57: ...cord it as a new title Others Allows you to record your new title until the end of the disc For DVD RW The last blank title Allows you to record your new title until the end of the disc The last recorded title Allows you to record over your last recorded title and then stop Allows you to record over your last recorded title and continue recording until the end of the disc Allows you to append your...

Page 58: ...screen DVD Edit Title 1 of 2 Chapter 1 of 11 Edit Chapters Hide Chapter Change Index Picture Split Title Instructions Enter Confirm Setup Exit Move Choose the edit Function Add Delete Delete All Split Title This feature allows you to split a title into two titles 1 Use to select Split Title 2 Press ENTER to display the submenu 3 Use to select Yes if you prefer to split the title 4 Press ENTER at t...

Page 59: ...onnected The TV is not set to receive HDD DVD Recorder signal output The video cable is not connected securely The TV power is turned off The equipment connected with the audio cable is not set to receive HDD DVD Recorder signal output The audio cables are not connected securely The power on the equipment connected with the audio cable is turned off The audio cables are damaged The disc is dirty N...

Page 60: ...Changing the TV Audio Channel on page 32 Point the remote control at the remote sensor of the HDD DVD Recorder Operate the remote control within 23 ft 7m Remove the obstacle Replace the batteries The remaining blank space on the disc is insufficient The source you are trying to record is copy protected When setting the recording channel the channel is tuned on your TV s tuner Clock in HDD DVD Reco...

Page 61: ...S N Over 50 dB Audio S N Over 65 dB Resolution Over 500 lines HQ Recording DVD Specifications Frequency response DVD PCM 48 kHz 8 Hz to 22 kHz CD 8 Hz to 20 kHz Video S N More than 60 dB Audio S N More than 90 dB Harmonic distortion Less than 0 04 Dynamic range More than 90 dB Resolution Over 500 lines HQ Recording Inputs Antenna In Out U V mixed 75 Ω unbalanced Video In 1 0 Vp p unbalanced Audio ...

Reviews: