


Reviews:
No comments
Related manuals for VP-DX205(i)

UXDV-3
Brand: Ultramax Pages: 4
Classic Tele Studex Mk2 G1504 G1504
Brand: Gitzo Pages: 1

Everio GZ-R315BE
Brand: JVC Pages: 108

ZR20
Brand: Canon Pages: 6

ZR60
Brand: Canon Pages: 6

ZR400
Brand: Canon Pages: 2

ZR100
Brand: Canon Pages: 2

ZR500
Brand: Canon Pages: 2
TL-43
Brand: Canon Pages: 2
MA-300
Brand: Canon Pages: 2
VL-3
Brand: Canon Pages: 2
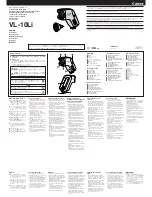
VL-10Li
Brand: Canon Pages: 2

WD-58
Brand: Canon Pages: 2

ZR-1000
Brand: Canon Pages: 2

ZR500
Brand: Canon Pages: 92

ZR100
Brand: Canon Pages: 103

ZR20
Brand: Canon Pages: 114

ZR25 MC
Brand: Canon Pages: 146


