background image

 © 2012 Samsung Electronics Co., Ltd. All rights reserved.


 BN68-04495A-01

 Contact SAMSUNG WORLDWIDE

 If you have any questions or comments about Your Samsung TV, please contact the SAMSUNG customer care center.

 Country

 Customer Care Center 

 Web  Site

 Address

 CANADA

 1-800-SAMSUNG  (726-7864)

 www.samsung.com

 Samsung Electronics Canada Inc., Customer Service 55 
Standish Court Mississauga, Ontario L5R 4B2 Canada

 U.S.A

 1-800-SAMSUNG  (726-7864)

 www.samsung.com

 Samsung Electronics America, Inc. 85 Challenger Road 
Ridgefi eld Park, NJ 07660
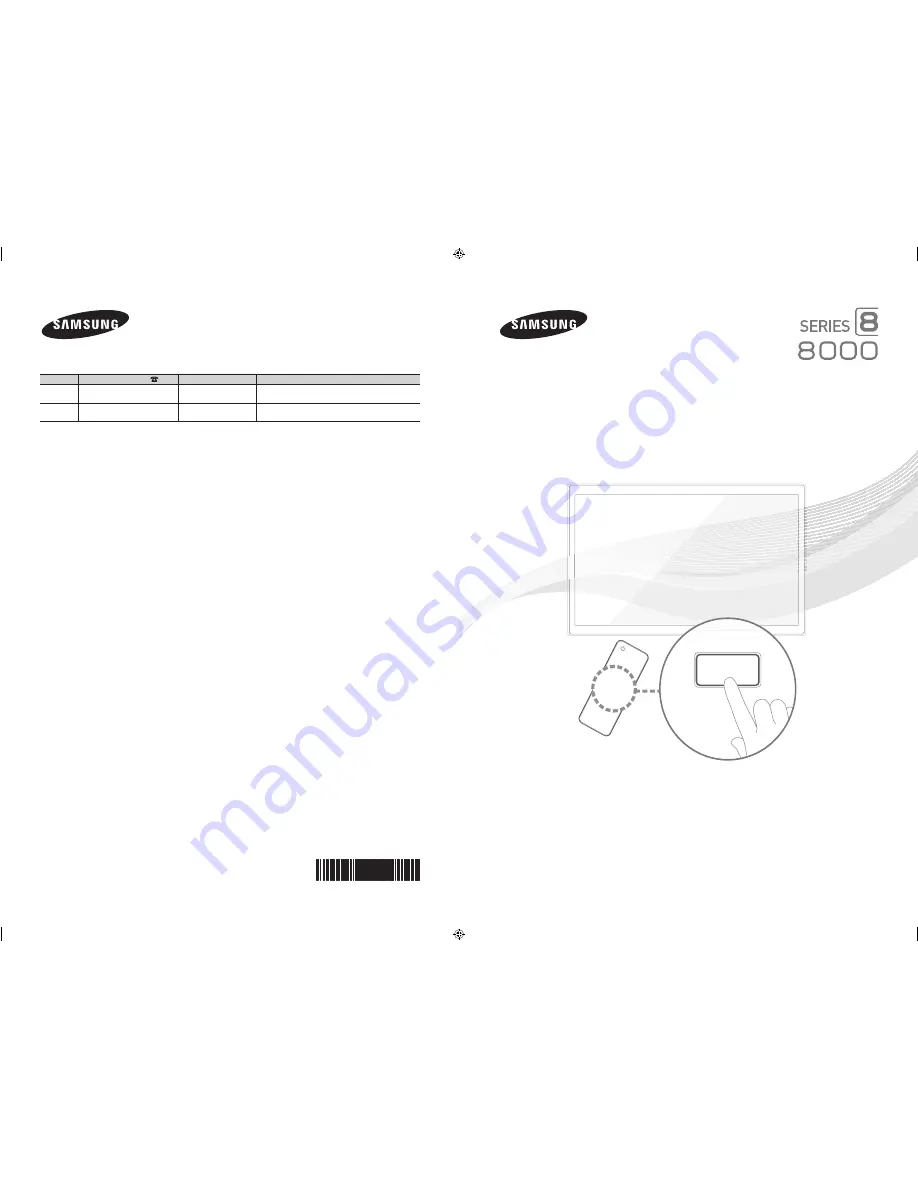
 

 LED  TV

 user  manual

SUPPORT

 Thank you for purchasing this Samsung product. 

To receive more complete service, please register 

your product at

 www.samsung.com/register

 Model _____________ Serial No. _____________


 If you have any questions, please call us at 1-800-SAMSUNG (1-800-726-7864) for assistance.

[UE8000-ZA]BN68-04495A-00Eng.indb   1

2012-06-21   �� 4:10:30

Summary of Contents for UN65ES8000F

Page 1: ...er Service 55 Standish Court Mississauga Ontario L5R 4B2 Canada U S A 1 800 SAMSUNG 726 7864 www samsung com Samsung Electronics America Inc 85 Challenger Road Ridgefield Park NJ 07660 LED TV user manual SUPPORT Thank you for purchasing this Samsung product To receive more complete service please register your product at www samsung com register Model _____________Serial No _____________ If you ha...

Page 2: ...IMITED WARRANTY STATEMENT Subject to the requirements conditions exclusions and limitations of the original Limited Warranty supplied with Samsung Electronics SAMSUNG products and the requirements conditions exclusions and limitations contained herein SAMSUNG will additionally provide Warranty Repair Service in the United States on SAMSUNG products purchased in Canada and in Canada on SAMSUNG prod...

Page 3: ...evices 22 Connecting to a PC 23 The EX Link Cable Connection 23 Changing the Input Source 24 Using Smart Hub 25 SMART Interaction 26 Voice Control 27 Motion Control 29 Face recognition 32 The Evolution Kit Slot Kit Sold Separately 34 Connecting to a Network 35 Configuring Network Connections 37 The Smart Touch Control 39 The IR Blaster 43 Setting up the Universal Remote Control 45 Using the Search...

Page 4: ... TV by grouping and sorting apps to your taste AllShare Play Lets you access view or play photos videos or music located on USB devices digital cameras cell phones and PCs PCs and cell phones can be accessed wirelessly through your wireless network Anynet HDMI CEC Allows you to control all connected Samsung devices that support Anynet with your Samsung TV s remote e Manual Provides a detailed on s...

Page 5: ...atteries AA x 4 Remote Control AA59 00637A Batteries AAA x 2 User Manual Cleaning Cloth BN63 01798B Warranty Card Safety Guide 3D Active Glasses Power Cord AV Adapter Holder Wire stand Holder Ring x 4 BN39 01154H BN61 08391A BN96 18153A Assembling the Stand Wire Holder Input Cables Sold Separately You will need one or more of these cables to connect your TV to your antenna or cable outlet and your...

Page 6: ...ing it in Illustrations of common plugs and jacks are below Cable Plugs Ports Jacks HDMI USB Optical Warning Do not plug cables in upside down Be sure to check the orientation of the plug before plugging it in Wireless Keyboard Sold Separately Wireless Keyboard ...

Page 7: ...ow to connect the TV to the stand For more detailed instructions see the separate stand installation guide 1 4 3 2 B A C 2 1 2 1 Place a soft cloth over a table to protect the TV and then place the TV on the cloth screen side down x6 M4 X L10 55 60 and 65 inches only or x6 M4 X L12 46 inches only DO NOT USE CHEMICALS DO NOT USE GREASE DO NOT USE OIL ATTENTION ...

Page 8: ...or injury to yourself or others if you elect to install the wall mount on your own To order the wall mount kit contact Samsung Customer Care at 1 800 SAMSUNG 1 800 726 7864 VESA Wall Mount Kit Notes and Specifications Install your wall mount on a solid wall perpendicular to the floor Before attaching the wall mount to surfaces other than plaster board please contact your nearest dealer for additio...

Page 9: ...n a wall Product Family TV size in inches VESA screw hole specs A B in millimeters Standard Screw Quantity LED TV 26 100 X 100 M4 4 32 40 200 X 200 M6 46 65 400 X 400 M8 Remove the screws in the mounting holes before you install the wall mount Do not install your Wall Mount Kit while your TV is turned on It may result in personal injury due to electric shock Installing a Wall Mount from Another Ma...

Page 10: ...install your TV using a stand or a wall mount we strongly recommend you use parts provided by Samsung Electronics only If you use parts provided by another manufacturer it may cause difficulties with the product or result in injury caused by the product falling Installation with a stand Installation with a wall mount 4 inches 4 inches 4 inches 4 inches 4 inches 4 inches 4 inches Other Warnings The...

Page 11: ... tape attached or not in rear of the TV camera and then you can use a TV camera after adjust a camera angle When you don t want to use a TV camera we recommend to use after a camera lens fixes to upwards In this case Face recognition and Motion Control are not available Power on Turn the TV on by pressing the Controller when the TV is in standby mode Adjusting the volume Adjust the volume by movin...

Page 12: ...n press the Controller To close the Menu Smart Hub or Source press the Controller for more than 1 second Standby mode Your TV enters Standby mode when you turn it off and continues to consume a small amount of electric power To be safe and to decrease power consumption do not leave your TV in standby mode for long periods of time when you are away on vacation for example It is best to unplug the p...

Page 13: ...ature For details refer to the e Manual Moves the cursor selects the on screen menu items and changes the values seen on the TV s menu Turns the remote control light on or off When on the buttons become illuminated for a moment when pressed Using the remote control with this button set to On will reduce the battery usage time Returns to the previous channel Changes channels Displays a list of rece...

Page 14: ...n about the Smart Touch Control see page 39 NOTE Install the batteries so that the polarity of the batteries matches the illustration in the battery compartment Use the remote control within 23 feet of the TV Bright light may affect the performance of the remote control Avoid using it near fluorescent lights or neon signs The color and shape of the remote may vary depending on the model ...

Page 15: ... TOOLS RETURN HISTORY MENU EXIT 1 2 3 5 4 1 MENUm button Displays the main on screen menu 2 TOOLST button Displays the Tools menus when available 3 E and Direction buttons Use the Direction buttons to move the cursor and highight an item Use the Enter button to select an item or confirm the setting 4 RETURNR button Returns to the previous menu 5 EXITe button Exits the on screen menu How to Operate...

Page 16: ... Language screen appears Select the menu language you want using your remote and then select Next The TV will display on screen menus using the language you select beginning with the next step in the Setup process 2 Use Mode Select the Home Use Mode On the Use Mode screen select the Home Use using your remote and then select Next The Network Settings screen appears Store Demo is for retail environ...

Page 17: ...To redisplay letters select 1F again 3 When done select Next if you have entered a security key or WPS PIN if you have entered a WPS PIN 4 The TV checks the wireless connection If the connection is successful the You are connected to the Internet If you have any problems using online services please contact your Internet Service Provider message appears Select Next and then go to 4 Software Upgrad...

Page 18: ... a cable connection without a set top box If you select this option go to 6 Auto Program 2 Step No I don t need to Select if you have a satellite or cable set top box You do not need to run Auto Program If you select this option go to 8 Clock on the next page 6 Auto Program 2 Select the search options 1 Select Air or Cable using your remote A check appears on your selection When done select Next Y...

Page 19: ...otion Control Setting the Voice and Motion Control function You can turn the Voice and Motion Control function on or off Select Off or On and then select Next 10 Setup Complete Review the Setup data and then select Close to finish The completed settings are displayed 11 Set the Universal Remote 1 Turn on the POWER button on the bottom of the IR Blaster and then press the PAIRING button 2 Select Ye...

Page 20: ... uses an older version of HDMI the video and audio may not work If this occurs ask the manufacturer of the device about the HDMI version and if it is out of date request an upgrade Be sure to purchase a certified HDMI cable Otherwise the picture may not display or a connection error may occur We recommend using a basic high speed HDMI cable or an HDMI cable that is Ethernet compatible Note that th...

Page 21: ... use MHL devices via an HDMI cable The TV will be recognized as the HDMI input In this case the TV may work differently than when you use MHL devices via a MHL cable For the best cable connection to this product use cables no thicker than the cable illustrated below Maximum thickness 0 55 inches 14mm Using a Component Cable up to 1080p HD signals or an Audio Video Cable 480i analog signals only Us...

Page 22: ... you can hear sound output from the TV s optical jack When the TV is receiving a DTV signal the TV will send 5 1 CH sound to the home theater receiver When the source is a digital component such as a DVD player Blu ray player cable box STB Set Top Box satellite receiver and you connected it to the TV via HDMI you will only hear 2 CH audio from the home theater receiver If you want to hear 5 1 CH a...

Page 23: ...d The optimal resolution is 1920 X 1080 60 Hz See the Display Resolution page for all available resolutions page 58 NOTE For an HDMI to DVI cable connection you must use the HDMI IN 1 DVI jack For PCs with DVI video out jacks use an HDMI to DVI cable to connect the DVI out on the PC to the HDMI IN 1 DVI jack on the TV Use the PC s speakers for audio PC D Sub input is not supported The EX Link Cabl...

Page 24: ...Source list is displayed The following selections appear under Edit Name VCR DVD Cable STB Satellite STB PVR STB AV Receiver Game Camcorder PC DVI PC DVI Devices TV IPTV Blu ray HD DVD DMA Select an input jack and then select the name of the device connected to that jack from the list that appears For example if you have your Blu ray player attached to HDMI IN 2 ARC select Blu ray for that input I...

Page 25: ...en you press the z button Web Browser Lets you browse the Internet Schedule Manager Lets you schedule shows and channels for viewing Source Lets you select a connected external video source to view AllShare Play Lets you access view or play photos videos or music located on USB devices digital cameras cell phones and PCs PCs and cell phones can be accessed wirelessly through your wireless network ...

Page 26: ...o use the TV Camera anymore we recommend rotating the TV Camera lens and tucking it into the bezel of the TV This will prevent any inadvertent and unintentional TV Camera functionalities and Face Recognition and Motion Control will not be functional Motion Control Motion Control works with the built in TV Camera so it is important that you are within the sightline of the TV Camera Performance will...

Page 27: ...ed to your TV from within 13 ft of your TV When you use microphone attached to your TV your voice may not be recognized because of ambient noise in your surrounding environment or other factors If this occurs try using the microphone on your Smart Touch Control by pressing the VOICE button on your Smart Touch Control The VOICE button on your remote is always activated If you want to use the TV s m...

Page 28: ... remaining quiet select Next to conduct the Noise Test This measures the ambient noise in the room The ambient noise in your room should be below 40 decibels for Voice Control to work properly Mic Speaker Test Select Start with your remote to begin the Mic Speaker Test A melody will play on your TV during this test This measures the noise in the room against the volume of your TV speakers If you h...

Page 29: ...1 Say Search All while in Voice Control mode 2 Say the word or phrase you wish to search for 3 The TV executes the spoken function Voice Text Input Mode performance may vary depending on the language spoken your pronunciation the volume of your voice and your surrounding environment including ambient noise levels Motion Control Menu System Voice and Motion Control Motion Control Motion Control wor...

Page 30: ...prompt that reads Brightness Test failed This means that it is too dark for Motion Control to see your movements It is suggested that you increase the brightness in your room Also check the angle of the camera to be sure it is facing out at you Rotate the camera angle dial located on the back of the camera After checking these things select retest If there is enough light in the room the prompt wi...

Page 31: ...and that is indicated by the cursor or is highlighted Action Clench your fist Return Return to the previous menu Action Spread your hand and rotate counterclockwise Channel Volume Control Changes the channel or adjust the volume To increase or decrease the volume move the cursor to hover over the w or v Volume button The cursor will turn blue and a small circle will appear indicating you can now c...

Page 32: ...ange account information The Change account information screen appears 4 Select Register Face A pop up message appears If you agree to use Face recognition select OK A QWERTY Keyboard screen appears 5 For security purposes you may be prompted to enter your password When done Select OK Now your TV Camera will activate 6 Position yourself so your face is in the center of the red face recognition cir...

Page 33: ... Turn your face towards the TV with your face level with the camera Password mode Pause RReturn 3 The TV starts Face recognition Face the front of the TV screen Try to hold still A green circle indicates a registered face A red circle indicates an unregistered face If the TV fails to recognize your face try again 4 Once the TV recognizes your face it will log you into your Samsung account automati...

Page 34: ...ned to accept an extension device called the Evolution Kit The Evolution Kit enables the TV to run a variety of the latest applications for a better user experience The Evolution Kit which may not be available depending on the product will be sold separately in 2013 or later ...

Page 35: ...ss IP Router or Modem that has a DHCP Server This TV supports the IEEE 802 11a b g and n communication protocols Samsung recommends using IEEE 802 11n If you play video using IEEE 802 11a b or g the video may not play smoothly Most wireless network systems incorporate a security system that requires devices that access the network through an access point or AP typically a wireless router or modem ...

Page 36: ...d Modem Cable Not Supplied External Modem ADSL VDSL Cable TV The Modem Port on the Wall External Modem ADSL VDSL Cable TV IP Router that has a DHCP Server TV Rear Panel Modem Cable Not Supplied LAN Cable Not Supplied LAN Cable Not Supplied The LAN Port on the Wall TV Rear Panel LAN Cable Not Supplied The TV does not support network speeds less than or equal to 10Mbps Use Cat 5 or 6 STP Type cable ...

Page 37: ...ow the directions on the screen 5 Enter your network security key or WPS PIN using your remote Enter numbers and letters using your remote If you are using the standard remote you can enter numbers by pressing the number buttons on your remote To enter a letter move the Highlight to the letter and then select it You can enter numbers in the same fashion if you choose To display capital letters or ...

Page 38: ...trations on page 36 2 Turn on your TV and then go to the Network Settings screen Menu Network Network Settings 3 Select Start 4 The Network Connection screen appears and verifies the network connection When the connection has been verified the You are connected to the Internet If you have any problems using online services please contact your Internet Service Provider message appears Network set u...

Page 39: ...he Smart Touch Control press the Touch Pad If you press and hold the Touch Pad it has the same effect as pressing the MUTEM button on your remote However this action scrolls the page on a Web Browser Press the Touch Pad or RETURNR button to return to the general mode Displays color and playing control functions You can select a function using the Touch Pad Displays the shortcut functions list You ...

Page 40: ...d press any key on the Smart Touch Control 2 The connection icon appears at the bottom left of the screen and the Smart Touch Control is automatically connected to the TV If you want to perform the pairing process again press the reset button in the center of the back cover using a pin or the tip of an unbent paper clip The Smart Touch Control will be initialized Smart Touch Control PAIRING Reset ...

Page 41: ...ger on the Touch Pad and then slide it from one side to the other from top to bottom or bottom to top To move the Highlight continuously flick your finger across the Touch Pad from right to left left to right top to bottom or bottom to top Menu Source RETURN VOICE NUMBER To Select an item Press the Touch Pad Open the History screen Press the Š button in the left of the Touch Pad Displays a list of...

Page 42: ...URNR button to return to the general mode To Enter a channel number through Smart Touch Control 1 While watching a broadcast press the NUMBERš button on the Smart Touch Control The TV displays the number button screen 2 Using the Touch Pad highlight a number and then press the Touch Pad The TV displays a list of channels that start with the number you selected 3 Using the Touch Pad highlight the c...

Page 43: ...er within 50 cm and 45 degrees of the up down left and right directions of the IR sensor of the external device IR Blaster OPEN ON OFF PAIRING OPEN 1 2 1 Power Switch Device Indicator LED IR Blaster shows the pairing state Pairing Button Installing batteries Battery size AA X OPEN O P E N OPEN O P E N 1 2 1 1 2 1 1 2 1 1 1 2 1 Hold the both sides of the battery holder and pull it out 2 Install fou...

Page 44: ...ease turn off and on the IR Blaster try again from step 2 OPEN ON OFF PAIRING OPEN IR Blaster PAIRING Reset button To set an Universal Remote Control after pairing an IR Blaster select Yes To use IR Blaster universal remote control setup needs to be complete Do you want to continue with setup Yes No Precautions for Using an IR Blaster To use an IR Blaster the IR Blaster must be located nearby with...

Page 45: ... your TV Blu ray DVD player Which device do you want to control Previous Next 3 Select the port used to connect the external device and then press the Touch Pad Make sure that the selected device is on If it is turned off turn the power on and press Refresh Which port is your Set top box plugged in to Select the port that the Set top box is connected to If the port you want to select is deactivate...

Page 46: ...h Model and enter the correct model number for your Set top box What is the model number of your Set top box Previous Next 6 Select Download and then press the Touch Pad Download the configuration data for the IR Blaster in the same way Setup data for your device will now be downloaded to your Smart Touch Control Select Download on the TV screen using your Smart Touch Control Previous Download 1 2...

Page 47: ...rward to the IR sensor of the external device and press the Touch Pad to test if the device works Point your remote towards the Set top box then press the button below until the power is turned off and on on your Set top box Is it working Yes go to the next step No try the test with a different code set Previous Test Next 4 If the downloaded recommended model code does not work repeat the steps fr...

Page 48: ...movies in a darkened room Picture modes apply preset adjustments to the picture N When your TV is connected to a PC via the HDMI to DVI cable you can only select Entertain and Standard Picture Picture Mode Backlight Brightness Color Contrast Sharpness Tint G R G50 Changing the Preset Picture Mode Picture Mode Menu Picture Picture Mode Dynamic Brightens the screen Suitable for a bright room Standar...

Page 49: ...te The Index screen appears 2 To search for a topic select a letter The Index displays a list of topics and keywords that begin with the letter you selected 3 Select a topic or keyword you want 4 The e Manual page with the topic appears To close the Index screen press the RETURNR button To Change the screen position of the e Manual If the e Manual screen is not invisible well because the OSD Menus...

Page 50: ...e there are no device issues Self Diagnosis User Menu Support Self Diagnosis Picture Test If the problem does not appear in the Picture test make sure Your connections are all consistent For example if you ve used the AV In jack on your TV make sure you have used the AV Out jack on your video source You have connected your devices to the correct jacks For example if you use the Component jacks lab...

Page 51: ...he TV turns on If you find that you are having trouble powering on your Samsung television there are a number of things to check before making a call to the service department If you re sure your power cord remote control and PC are functioning properly you may be having a cable issue If you have a cable or satellite box your TV may appear to be off because the cable or satellite box is not output...

Page 52: ... input source Reboot the connected device by unplugging it and then reconnecting the device s power cable The remote control does not work Replace the remote control batteries Make sure the batteries are installed with their poles in the correct direction Clean the sensor s transmission window on the remote Try pointing the remote directly at the TV from 5 6 feet away The cable set top box remote ...

Page 53: ...duct can get scratched during cleaning Be sure to wipe the exterior and screen carefully using the cloth provided or a soft cloth to prevent scratches Do not spray water directly onto the product Any liquid that goes into the product may cause a failure fire or electric shock Clean the product with a soft cloth dampened with a small amount of water Do not use a flammable liquid e g benzene thinner...

Page 54: ...e a wood screw screw and molly or other screw appropriate for the wall or cabinet you intend to secure the TV Holder string to We recommend a size M4xL20 wood screw TV Holder BN96 15753A Screw M8 X L19 Installing the TV Holder 1 Remove the screw attached to the back of your TV and then connect the TV Holder to the TV with the screw included in the TV Holder Kit that is designated for your TV Make ...

Page 55: ...rds for safety purposes Check the cord occasionally to make sure it is secure Before moving the TV separate the connected cord first 4 Verify all connections are properly secured Periodically check the connections for any sign of fatigue or failure If you have any doubt about the security of your connections contact a professional installer To purchase the TV Holder Kit contact Samsung Customer Ca...

Page 56: ...0 7 inches 52 0 x 154 0 x 19 5 mm Weight Without Batteries Including Batteries 0 1 lbs 84 0 g 0 2 lbs 130 0 g Specifications IR Blaster Model Name VG IRB2000 Power Source Battery AA x 4 To extend the battery life use of alkaline battery is recommended Compatibility LED TV Above LED E7500 PDP TV E8000 Dimension W x H x D 3 7 x 2 6 x 3 1 inches 95 0 x 65 0 x 79 0 mm Weight Without Batteries Includin...

Page 57: ...al 60 Class 60 0 measured diagonally 65 Class 64 5 measured diagonally Sound Output 10 W X 2 Dimensions W x H x D Body With stand 53 8 x 31 8 x 1 2 inches 1368 5 x 808 8 x 31 5 mm 53 8 x 33 3 x 8 2 inches 1368 5 x 847 9 x 210 0 mm 58 2 x 34 5 x 1 3 inches 1480 5 x 877 2 x 33 1 mm 58 2 x 36 0 x 11 4 inches 1480 5 x 916 0 x 291 0 mm Weight Without Stand With Stand 45 3 lbs 20 5 kg 51 8 lbs 23 5 kg 5...

Page 58: ... 640 x 480 800 x 600 800 x 600 800 x 600 1024 x 768 1024 x 768 1024 x 768 1152 x 864 1280 x 720 1280 x 800 1280 x 1024 1280 x 1024 1366 x 768 1440 x 900 1600 x 900RB 1680 x 1050 1920 x 1080 31 469 37 861 37 500 37 879 48 077 46 875 48 363 56 476 60 023 67 500 45 000 49 702 63 981 79 976 47 712 55 935 60 000 65 290 67 500 59 940 72 809 75 000 60 317 72 188 75 000 60 004 70 069 75 029 75 000 60 000 ...

Page 59: ... standard bit rate frame rate above the compatible Frame sec listed in the table above If the Index Table is damaged the Seek Jump function is not supported When you play video over a network connection the video may not be played smoothly The menu may take longer to appear if the video s bit rate exceeds 10Mbps Some USB digital camera devices may not be compatible with the player Video decoder Su...

Page 60: ...33 1 6 2 4 6 7 3 UN60ES8000 15 7 15 7 35 8 8 9 6 0 9 3 UN65ES8000 15 7 15 7 38 0 11 1 6 1 11 9 NOTE All drawings are not necessarily to scale Some dimensions are subject to change without prior notice Refer to the dimensions prior to performing installation of your TV Not responsible for typographical or printed errors 2012 Samsung Electronics America Inc ...

Page 61: ...tional 8 IR Blaster Pairing 44 L Language 27 Licenses 53 M Menu Language 16 Motion Control 29 Motion Control Environment Test 30 S Securing the TV to the Wall 54 Setting up the Universal Remote Control 45 SMART Interaction 26 Software Upgrade 18 Specifications 57 Store Demo 16 T The Evolution Kit Slot Kit Sold Separately 34 The IR Blaster 43 The Smart Touch Control 39 To Change the screen position...

Page 62: ...the equipment and receiver Connect the equipment into an outlet on a circuit different from that to which the receiver is connected Consult the dealer or an experienced radio TV technician for help FCC Caution Any changes or modifications not expressly approved by the party responsible for compliance could void the user s authority to operate this equipment This device complies with Part 15 of the...

Page 63: ...brouillage est susceptible d en compromettre le fonctionnement For product available in the USA Canada market only channel 1 11 can be operated Selection of other channels is not possible This device and its antenna s must not be co located or operation in conjunction with any other antenna or transmitter Under Industry Canada regulations this radio transmitter may only operate using an antenna of...

Reviews: