background image

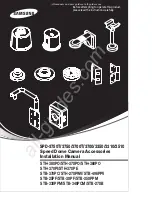
STH-380PO/STH-370PO/STH-360PO

STH-370PI/STH-370PE

STB-370PC/STH-270PWV/STB-496PPV

STB-25PF/STB-30PF/STB-350PPM

STB-330PPM/STB-340PCM/STB-270B

SPD-3750T/3750/3700T/3700/3350/3310/2510

Speed Dome Camera Accessories 

Installation Manual

Before attempting to operate this product, 
please read the instructions carefully.

All manuals and user guides at all-guides.com

all-guides.com

Summary of Contents for SPD-2510

Page 1: ...STB 30PF STB 350PPM STB 330PPM STB 340PCM STB 270B SPD 3750T 3750 3700T 3700 3350 3310 2510 Speed Dome Camera Accessories Installation Manual Before attempting to operate this product please read the instructions carefully All manuals and user guides at all guides com a l l g u i d e s c o m ...

Page 2: ...ll installations need to be carried out by experienced engineers Do not use it for purposes other than the installation mentioned above For product inquiries please contact the retail shop where you bought the camera The use of equipment such as an aerial ladder while providing after sales service shall be at your expense SamsungTechwin cares for the environment at all product manufacturing stages...

Page 3: ...erature Lightweight 20 50 On Spee STH 370PI Indoor Housing with a built in install base for the Samsung Speed Dome Camera Indoor Flush Mount with a built in install base for the Samsung Speed Dome Camera STH 380PO STH 370PO STH 360PO STB STH 370PE 1 Product Category 1 1 Housing Accessories 1 2 I 1 3 M This STH STB 2 This of ST STB 2 This Cam hous STH STB STB Product Category All manuals and user g...

Page 4: ...stallation of indoor or outdoor housing of Samsung Speed Dome Camera Wal STB 330PPM STB 340PCM STB 270B Corner Mount for the Samsung Speed Dome Camera Setup Box for the Samsung Speed Dome Camera Pole Mount for the Samsung Speed Dome Camera 2 S Penda On Cei Indoor Product Category Spe All manuals and user guides at all guides com ...

Page 5: ...tallation STH 380PO STH 370PO STH 360PO STH 370PI STH 270PWV STH 380PO 370PO 370PI 360PO 1 Securi As show of the b installa 2 Prepar Open t Hold th 3 Conne To prev cable o Do no power STH 3 produ accide Pendant Type Installation To store All manuals and user guides at all guides com ...

Page 6: ...the safety cable on the bracket loop before connecting the housing Neglecting this caution may expose you to injury caused by a fallen housing Notes 4 Assembling Housing and Bracket After hooking the safety cable fit the housing into the fixture grooves on the bracket as shown in the picture When attaching locate the Samsung logo on the housing facing the center front 5 Securi Check to the b brack...

Page 7: ...larm and AUX output terminals is DC30V 2A Connecting the power connector and GND incorrectly to the NC NO and COM ports can cause a short circuit which may lead to fire and damage the camera Notes Control Signal Connection 7 Prepar Once th camera flush m detach 8 Setting DIP swi camera 9 Conne Careful the pict The safe the safe Pendant Type Installation To attach Make you m This wiring diagram ind...

Page 8: ...ull the camera downward while pushing the unlock buttons on the camera upward 10 Assembling Dome Cover Once the camera is successfully attached secure the mount with the transparent dome cover Next turn on the power 11 Dome Cover Setting Once the installation is complete please optimize the camera focus settings On the camera s OSD Menu set the Dome Cover setting to Outdoor Directory Main Menu Cam...

Page 9: ...pter enclosed with the product 2 Assembling STB 30PF and Pipe After sealing the screw taps assemble the STP 30PF flange securely to the pipe Using unsealed screw taps can cause the product to fall down or allow water leakage that may lead to fire or damage the product Sealing tape is not enclosed with the product and needs to be purchased at your expense Notes Do not connect the camera to a power ...

Page 10: ...e screw taps and then secure the STP 25PF flange securely to the mount with the enclosed screws 4 Wiring Connec close th 5 Setting DIP sw For the 3 Assembling Mount and Flange First hook the safety cable on the mount and then fit the housing into the fixture groove on the bracket as shown in the picture Once the housing is safely attached to the bracket secure the housing with the enclosed screws ...

Page 11: ... picture Make sure to first hook the camera s safety cable to the mount before proceeding Otherwise you may be exposed to serious injury caused by a fallen camera Notes To attach or detach the camera refer to the picture Attaching the camera Hold up the camera and push it to the mount as shown in the picture Push the camera until you hear a click Detaching the camera To detach the camera pull the ...

Page 12: ...as shown in the picture Hold the knob on the hinged door to open 3 Setting DIP sw camera 5 Conne Careful in the p camera pull ou 2 WiringTerminal Cables Connect the cables to the terminal block on the hinged door For the location of the wiring pins please refer to the CameraWiring Diagram on Page 12 Once the wiring is successful close the hinged door Do not connect the camera to a power outlet unt...

Page 13: ... push it to the mount as shown in the picture Push the camera until you hear a click Detaching the camera To detach the camera pull the camera downward while pushing the unlock buttons on the camera upward To attach the camera To detach the camera UNLOCK Unlock Button On Ceiling Mount Type Installation Ind All manuals and user guides at all guides com ...

Page 14: ...to a desired location on the ceiling Drill 3 holes of 50 mm diameter in 120 degree intervals following the marks on the template and then drill one 200 mm hole in the center of the template 3 Wiring andArrangingAnti fall Eyebolts Attach the enclosed turnbuckle and eyebolts inside the ceiling and then drop the camera cables down from the ceiling through the hole 5 Inserti Arrang the cei 6 Securi Tw...

Page 15: ... then attach the camera The safety cable is coiled inside the install base As shown in the leftward picture pull out the safety cable from the install base and then hook it to the mount To attach the camera to the mount refer to the alignment guide marks as shown in the picture Make you m Be ca during may d perfor To attac Attach pictur Detac the un 7 Arranging Camera Cables and Closing Hinged Doo...

Page 16: ...r the Samsung Speed Dome Camera series STB 350PPM STB 340PCM STB 330PPM STB 270B STB STH 370PE 1 Using s bracket 2 Fill unw Secure fastene 3 Place th as show 4 Using h to the b cables in the c 5 Feed th bracket screws 6 Lastly f wrench box Mounting Accessory Installation M All manuals and user guides at all guides com a l l g u i d e s c o m ...

Page 17: ...es on the wall according to the holes in the corner mount 2 Using a tool insert anchor bolts and then set the corner mount on the bolts Use 8 nuts to fasten the bolts Compatible Models STB 270PWV STH 380PO 370PO 360PO 370PI Compatible Models STB 270PWV STH 380PO 370PO 360PO 370PI Wall type mount Anchor bolt 8EA Wall type mount 1 4 SCREW 4EA Corner mount 1 4 SCREW 4EA Compati Parapet moun Anchor bo...

Page 18: ...34 SPEED DOME CAMERAACCESSORIES Unit mm Product External Dimensions Wall Mounting Ceil Ceil P All manuals and user guides at all guides com ...

Page 19: ...A DC12V 0 06A Operating Temp More than 45 Less than 10 Fan 2EA DC12V 0 06A Operating Temp More than 45 Less than 10 Fan 1EA DC12V 0 06A Operating Temp More than 45 Less than 10 Heater AC 24V 46W Operating Temp less than 10 Heater AC 24V 33W Operating Temp less than 10 Heater AC 24V 33W Operating Temp less than 10 Antivibration Waterp roof IP 67 IP 67 IP 67 IP 66 Weight Net 3 2kg 3 2kg 3 2kg 740g 2...

Page 20: ...MEMO All manuals and user guides at all guides com ...

Page 21: ...1 8 FAX 82 31 740 8145 SAMSUNGOPTO ELECTRONICSUK LTD SamsungHouse 1000HillswoodDrive HillswoodBusinessPark ChertseySurreyKT16OPS TEL 44 1932 45 5308 FAX 44 1932 45 5325 SAMSUNGTECHWINAMERICA LTD 1480CharlesWillardSt Carson CA90746 UNITEDSTATES TEL 1 310 632 1234 FAX 1 310 632 2195 SALESNETWORK All manuals and user guides at all guides com a l l g u i d e s c o m ...

Reviews: