background image

Disassembly Instructions

Samsung SF-555P Toner Cartridges

First released in June 2003, Samsung SF-555P fax machines are loosely based on
the Samsung SF-5100 engine, (which is a modified version of the Samsung
ML-1210). The SF-555P runs at 12 ppm with a maximum resolution of 600 dpi.

Samsung has been releasing quite a few machines lately, and this is one of the lat-
est batch. In a recent PC magazine (7/2003) article on service and reliability,
Samsung actually beat HP in the monochrome printer segment. They took second
overall to HP. Samsung machines are rapidly growing in popularity. They have a
long way to go before they can challenge HP as far as placements go, but by keep-
ing the costs low and the quality high, it seems that they are determined to get
there.

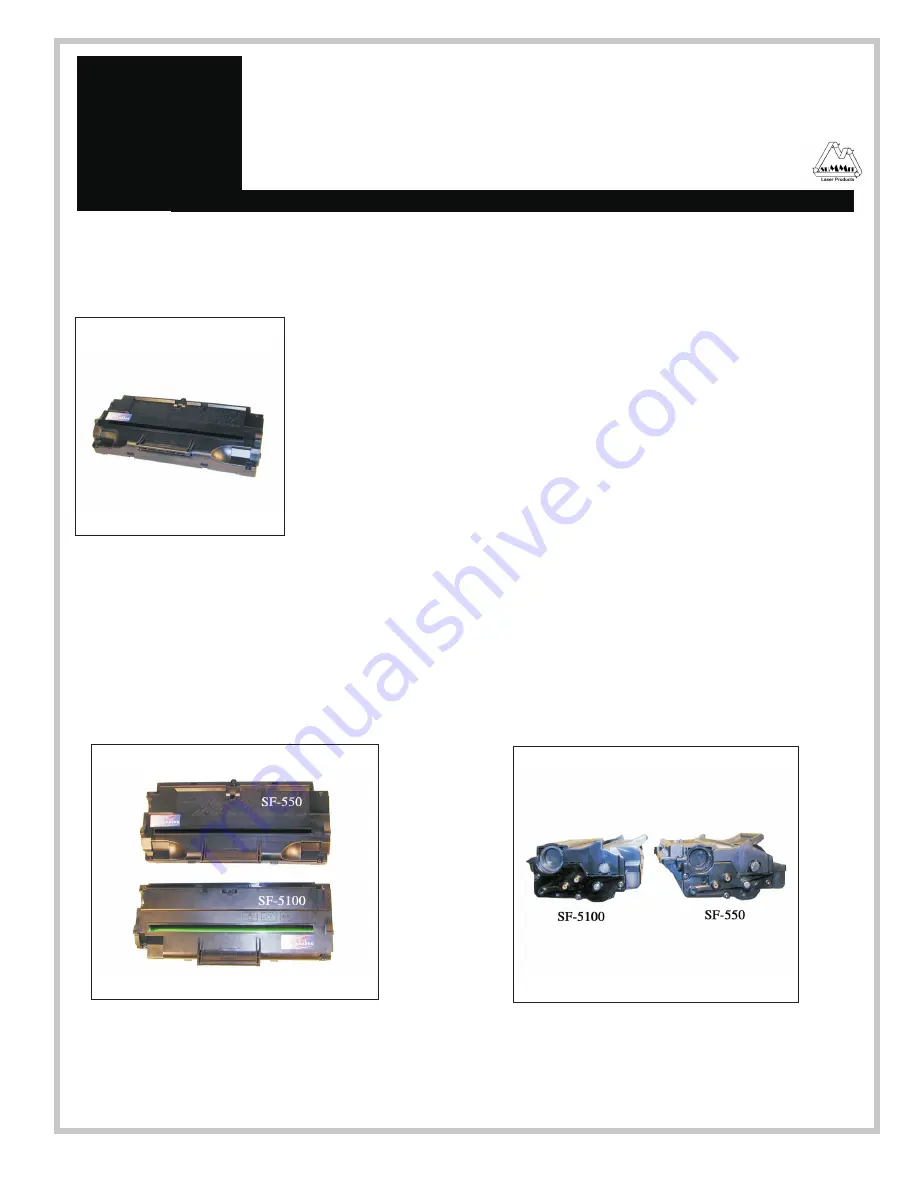
The SF-550D3 cartridge looks similar to the SF-5100, but is different enough to
warrant it’s own separate instruction. One very interesting thing is that although the
cartridges are physically different, if a Lexmark E210 machine is modified as shown
in our ML-1210 instructions, the SF-550D3 cartridge can be tested in it. For some

of the physical differences between the cartridges, see Figure’s 1 & 2. We will repeat the Lexmark E210 machine
modification instructions at the end of this article.

These cartridges do not have a drum cover, and come new with a piece of heavy paper taped around the cartridge.
(See Figure 3) The SF-550 also does not use a seal. All new cartridges opened so far have shown some toner leak-
age that would have shown on any prints.

The standard cartridge (Samsung part# SF-550D3/XAA comes new with 90g toner, and is rated for 3,000 pages at
4% coverage. It appears that Samsung has discovered our industry, the top of the cartridge is embossed with
Samsung all over it. Samsung cartridges all now come with a card that states the cartridge is a genuine Samsung.
This card also gives the Model #, Serial #, and Production date. See Figure’s 4 & 5

DOC-0333

Page 1

www.summitlaser.com

SU

MM

IT

Laser Products

95 Orville Drive

Bohemia, New York 11716

Tel: 631-218-8376

Fax: 631-218-3275

ech

nical Document

T

Figure 1

Figure 2

Summary of Contents for SF-555P

Page 1: ... physically different if a Lexmark E210 machine is modified as shown in our ML 1210 instructions the SF 550D3 cartridge can be tested in it For some of the physical differences between the cartridges see Figure s 1 2 We will repeat the Lexmark E210 machine modification instructions at the end of this article These cartridges do not have a drum cover and come new with a piece of heavy paper taped a...

Page 2: ...igure 5 Required Tools 1 Toner approved vacuum 2 A small Common screw driver 3 A Phillips head screwdriver 4 Needle nose pliers Required Supplies 90g Toner Fuse 63mA 250V 5x20mm fast acting glass type New Drum Recommended ML 1210 New PCR Optional ML 4500 New Developer Roller sleeve Optional ML 4500 ...

Page 3: ...h the handle of the cartridge to the right and left there are 2 plastic tabs GENTLY press them in and lift the cover off See Figure 7 CAUTION The upper half of the toner hopper is being removed If there is a lot of toner left in the hopper it can dump out all over Vacuum the hopper clean 3 With the toner hopper facing away from you remove the three screws on the right side end cap Remove the end c...

Page 4: ... Remove the PCR See Figure 12 6 Clean the PCR with your normal PCR cleaner WARNING Do not clean the OEM PCR with alcohol as this will remove the conductive coating from the roller If the PCR is an aftermarket follow the cleaning methods recommended by the manufacturer If the PCR is an OEM we recommend it be cleaned with your standard PCR cleaner 7 With the toner hopper away from you remove the thr...

Page 5: ...ft up from both sides when removing this blade Note that these screws have a different length than the black screws See Figures 14 15 9 It is very important that the PCR cleaner be cleaned Vacuum or blow off any residual toner from the foam felt 10 With the PCR Cleaner Assembly removed the drum can easily be removed by lifting it out See Figure 16 11 Clean out any remaining toner from the cartridg...

Page 6: ...be cleaned with out removing it Dampen a cotton swab with alcohol and clean the blade Be careful not to press too hard and damage the blade If the blade has a heavy buildup of toner on it clean it with Acetone and then alcohol Removing the blade is difficult because of the foam seals attached If the seals are torn the cartridge will leak That is why we do not recommend it Once replacement Dr Blade...

Page 7: ...o Gold Colored screws See Figure 22 20 Clean the conductive grease off the left side Non Gear end cap and replace with fresh grease Replace the end cap and three screws See Figure 23 21 Install the PCR See Figure 24 22 Install the 5 gears right side end cap and screws Make sure the PCR fits correctly in its holder and all the gears are aligned See Figure 25 ...

Page 8: ...l the hopper with 90g of the SF 550 toner See Figure 26 This can also be done through the fill plug but the fill plug tends to leak and will probably have to be sealed with silicon 24 Carefully snap the cover on making sure all the tabs lock in place See Figure s 27 28 25 Install the five screws in the top cover See Figure 29 ...

Page 9: ...e Right or Left ARROWS until MAINTENANCE appears Press the START ENTER key The display will show CLEAN DRUM Press the START ENTER key A Cleaning page will then print Cleaning the Scanner These machines can also be adjusted for a dirty scanner Personally I would just clean it but there may be a time where this procedure becomes useful When the scanner starts to fail so I am including it here Load a...

Page 10: ...scratch the glass Common Cartridge Problems A Dirty or Bad Primary Charge Roller PCR located Inside the cartridge this will show on the test print as verti cal gray streaks down the page as a gray background throughout the page as ghosting where part of a previously printed area is repeated or as a mark that repeats every 37mm Dirty PCR Connection This will show as horizontal dark black bars acros...

Page 11: ... almost certainly void the warranty of the machine Perform the following modifi cation at your own risk 26 Remove the two top silver screws The top cover will come loose Lift up and remove the top cover See Figure 31 27 Remove the three black screws from the laser unit Carefully flip up the laser unit so that the metal tab is ex posed See Figure 32 You can see that with a total of eight slots and ...

Reviews: