background image

ENGLISH

PHO

TO


DVD+ReWritable


DVD+R DL

AF


Auto Focus

CCD


Charge Coupled Device

LCD


Liquid Crystal Display

Owner’s Instruction Book

Before operating the unit, please read this Instruction Book 

thoroughly, and retain it for future reference.

Use only approved battery packs.

Otherwise, there is a danger of overheating, fire or explosion.

Samsung is not responsible for problems occurring due to 

using unapproved batteries.
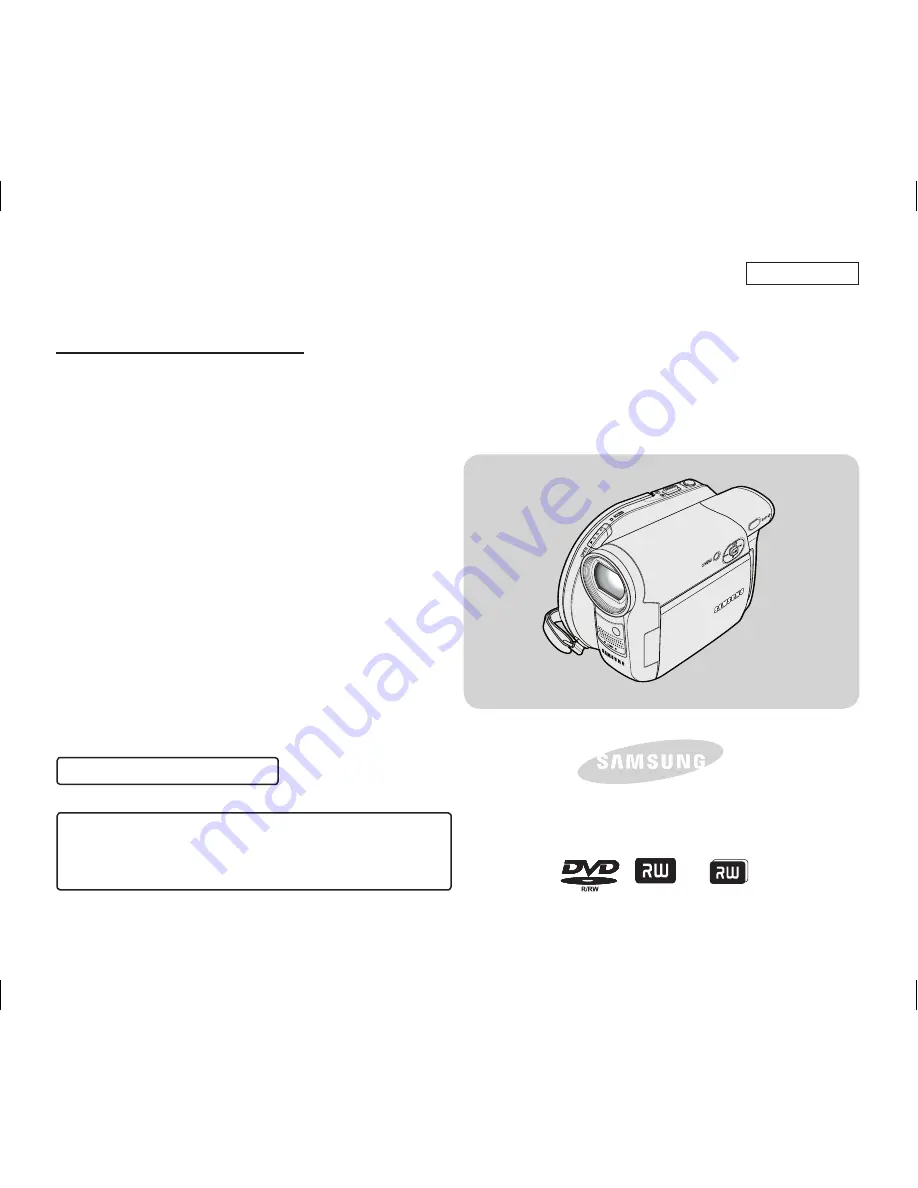
DVD Camcorder

SC-DC171/DC173(U)/DC175/DC575

US PATENT 4415844

AD68-01230A 

AD68-01230A_US_R2.indb   1

2007-07-09   ¿ÀÈÄ 1:01:01

Summary of Contents for SC-DC171

Page 1: ...read this Instruction Book thoroughly and retain it for future reference Use only approved battery packs Otherwise there is a danger of overheating re or explosion Samsung is not responsible for prob...

Page 2: ...splay in M Cam Mode M Player Mode SC DC173 U DC175 DC575 only 29 Turning the OSD On Screen Display On Off 29 Initial Setting System Menu Setting 30 Setting the Clock Clock Set 30 Setting the Wireless...

Page 3: ...Playlist 63 What is the Thumbnail Index 63 What s a Playlist 63 DVD Camcorder 64 Playing Title Scenes 64 Adjusting the Volume 64 Various Functions while in Player Mode 65 Deleting a Title Scene Delet...

Page 4: ...rotect 96 Deleting Photo Images and Moving Images Delete 97 Formatting the Memory Card Format 99 Recording Moving Images MPEG on a Memory Card 100 Playing the Moving Images MPEG on a Memory Card 101 R...

Page 5: ...DVD Camcorder Abroad 115 Troubleshooting 116 Troubleshooting 116 Setting menu items 121 Miscellaneous Information 123 Disc Type Description 123 Speci cations 124 Index 125 Warranty SEA users only 126...

Page 6: ...reen Make sure not to contact the magnetic stripe of your credit card near the LCD panel Your credit card information may be removed Notes regarding the LCD Screen View nder Lens 1 Direct sunlight can...

Page 7: ...further cause the disc to play abnormally Do not use benzene thinner detergent alcohol or anti static spray when cleaning the disc It may cause a malfunction Press the supporting holder in the center...

Page 8: ...ide to outside during the summer Notices regarding Copyright SC DC175 DC575 only Television programs video tapes DVD titles lms and other program materials may be copyrighted Unauthorized copying of c...

Page 9: ...C DC173 U DC175 DC575 only LCD Enhancer Gives you a clear quality image on the LCD Screen even in bright daylight Mega pixel CCD SC DC575 only Your DVD Camcorder incorporates a 1 0 mega pixel CCD High...

Page 10: ...gain Format the disc in the mode you want according to your needs Video mode Once nalized the recordings on the disc will play in most DVD players recorders drives VR Video Record mode You can easily...

Page 11: ...orded or edited material and or damage to the recorder arising from the misuse of discs For stable and perpetual recording and playback use the TDK MKM Verbatim disks that have the sign for VIDEO CAME...

Page 12: ...electing the desired disc and disc formatting page 42 Recording the desired Images page 44 Playing Back Selecting a scene to play back from the thumbnail index screen page 64 Editing You may edit only...

Page 13: ...USB Cable SC DC173 U DC175 DC575 only 8 Software CD DV Media PRO SC DC173 U DC175 DC575 only 9 Lens Cover 10 Lens Cover Strap Optional Accessories 11 3 1 2 inch 8cm DVD RW Disc 12 Carrying Case Notes...

Page 14: ...Player Mode SC DC173 U DC175 DC575 only Photo image Moving image Up FADE Down Stop Stop Left Backward Search Skip Backward Skip Backward Search Right Forward Search Skip Forward Skip Forward Search O...

Page 15: ...ord Start Stop Button page 44 5 MENU Button 6 DISPLAY Button page 29 7 C NITE LIGHT S SHOW Button SC DC173U DC175 DC575 only page 49 50 95 C NITE S SHOW Button SC DC173 only page 49 95 C NITE Button S...

Page 16: ...ob page 39 3 View nder 4 Record Start Stop Button page 44 5 Power Switch ON OFF Camera Player 6 USB Jack SC DC173 U DC175 DC575 only 7 Zoom W T Lever page 46 8 Mode Switch DISC CARD SC DC173 U DC175 D...

Page 17: ...ery Cover 3 AV Jack 4 DC IN Jack 5 Hand Strap Hook 6 Tripod Receptacle 7 Memory Card Slot SC DC173 U DC175 DC575 only 8 BATT RELEASE Switch Usable Memory Cards 2GB Max SC DC173 U DC175 DC575 only SD M...

Page 18: ...T STOP 2 DISPLAY page 29 3 Skip 4 Stop 5 Play Still 6 MENU 7 Up Down Left Right OK 8 PHOTO page 94 9 W T Zoom page 46 10 Search 11 Slow 12 Q MENU Remote Control SC DC175 DC575 only 1 10 11 8 12 9 2 3...

Page 19: ...Strap Insert the Hand Strap into the Hand Strap Hook 2 Insert your hand into the Hand Strap and adjust its length 3 Close the Hand Strap Lens Cover 1 Hook up the Lens Cover with the Lens Cover Strap...

Page 20: ...e the battery holder to match its mark with the mark on the remote control and turn the battery holder clockwise to x it Precautions regarding the Lithium Battery 1 The Lithium Battery maintains the c...

Page 21: ...to the DC IN jack on the DVD Camcorder The charging indicator will start to blink showing that the Battery is charging 6 When the Battery is fully charged disconnect the Battery Pack and the AC Power...

Page 22: ...1hr 30min Approx 3hr Mode Continuous recording time Playback time Mode Continuous recording time Playback time LCD ON XP Approx 55min Approx 1hr XP Approx 1hr 50min Approx 1hr 55min View nder LCD ON...

Page 23: ...etely discharged Battery Pack Management The Battery Pack should be recharged in an environment between 32 F 0 C and 104 F 40 C The Battery Pack should never be charged in a room with a temperature th...

Page 24: ...ife please contact your local dealer The batteries have to be dealt with as chemical waste Make sure that the Battery Pack is fully charged before starting to record A brand new Battery Pack is not ch...

Page 25: ...g to worry about the battery power You can keep the Battery Pack attached the battery power will not be consumed 1 Connect the AC Power adapter AA E9 TYPE to a wall socket The plug and wall socket typ...

Page 26: ...Switch SC DC173 U DC175 DC575 only Using the Joystick The Joystick is used to make a selection and to move the cursor left right up and down Using the Joystick you can easily make your selection and...

Page 27: ...2 M Player Mode SC DC173 U DC175 DC575 only Delete Delete All Protect Print Mark Format page 97 page 98 page 96 page 103 page 99 For example Setting the White Balance 1 Press the Q MENU button The qui...

Page 28: ...emaining Time 21 Record Mode page 43 22 Operating Mode 23 Zoom Position page 46 Digital Zoom Position page 62 24 LCD Enhancer page 39 25 Volume Control page 64 26 Message Line page 117 27 Voice Plus I...

Page 29: ...er of the moving image 10 Image Counter Current Image Total number of recorded images Turning the OSD On Screen Display On Off Turning OSD On Off Press the DISPLAY button on the left side control pane...

Page 30: ...s 7 You can set the day year hour minute and AM PM following the same procedure after setting the month 8 Press the Joystick after setting minute A message Complete is displayed 9 To exit press the ME...

Page 31: ...oystick up or down to select System then press the Joystick 5 Move the Joystick up or down to select Remote then press the Joystick 6 Move the Joystick up or down to select On or Off then press the Jo...

Page 32: ...layer 3 Press the MENU button The menu list will appear 4 Move the Joystick up or down to select System then press the Joystick 5 Move the Joystick up or down to select Beep Sound then press the Joyst...

Page 33: ...ress the MENU button The menu list will appear 4 Move the Joystick up or down to select System then press the Joystick 5 Move the Joystick up or down to select Shutter Sound then press the Joystick 6...

Page 34: ...u list will appear 4 Move the Joystick up or down to select System then press the Joystick 5 Move the Joystick up or down to select Language then press the Joystick The available language options are...

Page 35: ...3 Press the MENU button The menu list will appear 4 Move the Joystick up or down to select System then press the Joystick 5 Move the Joystick up or down to select Demonstration then press the Joystic...

Page 36: ...Power switch to Camera or Player 3 Press the MENU button The menu list will appear 4 Move the Joystick up or down to select Display then press the Joystick 5 Move the Joystick up or down to select the...

Page 37: ...oystick 6 Move the Joystick up or down to select the Date Time display type then press the Joystick Date Time display type Off Date Time Date Time 7 To exit press the MENU button Notes The Date Time w...

Page 38: ...n The menu list will appear 4 Move the Joystick up or down to select Display then press the Joystick 5 Move the Joystick up or down to select TV Display then press the Joystick 6 Move the Joystick up...

Page 39: ...ay cause you to drop it Note Viewing the sun or any strong light source through the View nder for a prolonged period may be harmful or cause temporary impairment Using the LCD ENHANCER The LCD ENHANCE...

Page 40: ...g a recording viewing the LCD Screen from below 4 Self recording Making a recording viewing the LCD Screen from the front 5 Recording with the View nder In circumstances where it is dif cult to use th...

Page 41: ...ouch the pickup lens 4 Gently push the section marked PUSH CLOSE on the disc cover to close it Once inserted the disc is recognized and the ACCESS indicator blinks Do not cut off the power supply duri...

Page 42: ...isc is required to record on it To format later use the Disc Manager menu page 79 For a DVD RW disc You are prompted with the Disc format All les will be deleted message Move the Joystick left or righ...

Page 43: ...k up or down to select the desired record mode XP SP or LP then press the Joystick 7 To exit press the MENU button The icon of the selected mode is displayed Recording Times based on Disc Type DVD RW...

Page 44: ...displayed on the LCD screen after blinking If you press the Record Start Stop button to record again a new title scene will be created The title scene number will not appear in the STBY mode but in t...

Page 45: ...settings 5 Press the EASY Q button again in the STBY mode to turn the EASY Q mode off The EASY Q function will not turn off while you are recording The DVD Camcorder will return to the settings that w...

Page 46: ...lts and a reduction of battery usage time This DVD Camcorder allows you to record using optical 34x SC DC171 DC173 U DC175 only or 26x SC DC575 only power zoom and digital zoom 1 Move the Zoom lever o...

Page 47: ...he Record Start Stop button and at the same time release the Joystick Recording starts and the picture and sound gradually appear fade in To Stop Recording 5 When you wish to stop recording move the J...

Page 48: ...st a snowy background 1 Set the Mode switch to DISC or CARD SC DC173 U DC175 DC575 only 2 Set the Power switch to Camera 3 Press the MENU button The menu list will appear 4 Move the Joystick up or dow...

Page 49: ...DC173 only or C NITE LIGHT SC DC173U DC175 DC575 only button shutter speed is changed to Color N 1 30 Color N 1 15 and off SC DC171 DC173 only Color N 1 30 Color N 1 15 Color N 1 15 and off SC DC173U...

Page 50: ...ger The LIGHT can become extremely hot Do not touch it while in operation or soon after turning it off otherwise serious injury may result Do not place the DVD Camcorder into the carrying case immedia...

Page 51: ...4 Move the Joystick up or down to select Record then press the Joystick 5 Move the Joystick up or down to select Wind Cut then press the Joystick 6 To activate the Wind Cut function move the Joystick...

Page 52: ...settings are displayed Recommended Shutter Speeds When Recording Outdoor sports such as golf or tennis 1 2000 or 1 4000 Moving cars or trains or other rapidly moving vehicles such as roller coasters...

Page 53: ...e containing several objects some close to the DVD Camcorder others further away b A person enveloped in fog or surrounded by snow c Very shiny or glossy surfaces like a car d People or objects moving...

Page 54: ...ts moving quickly Portrait mode For focusing on the background of the subject when the background is out of focus The Portrait mode is most effective when used outdoors The shutter speed automatically...

Page 55: ...ed When the Auto mode is selected no icon is displayed Notes You can directly access the Program AE function by using the Q MENU button page 27 The Program AE function will not operate in EASY Q mode...

Page 56: ...the Mode switch to DISC or CARD SC DC173 U DC175 DC575 only 2 Set the Power switch to Camera 3 Press the MENU button The menu list will appear 4 Move the Joystick up or down to select Camera then pres...

Page 57: ...d lighting then press the Joystick The Set White Balance will disappear and the white balance setting will commence 8 To exit press the MENU button Custom WB icon is displayed Notes You can directly a...

Page 58: ...effect 3 Sepia mode This mode gives the images a reddish brown pigment 4 Negative mode This mode reverses the colors creating a negative image 5 Mirror mode This mode cuts the picture in half using a...

Page 59: ...Nite is in use Digital Effect modes are not available while EASY Q is in use Once DIS EASY Q Color Nite is set Mosaic Mirror Emboss2 or Pastel2 mode will be released Digital Zoom is not available in t...

Page 60: ...up or down to select On then press the Joystick If you do not want to use the 16 9 Wide function set the 16 9 Wide menu to Off 7 To exit press the MENU button The display mode is set to the selected...

Page 61: ...ction move the Joystick up or down to select On then press the Joystick If you do not want to use the DIS function set the DIS menu to Off 7 To exit press the MENU button DIS icon is displayed Notes Y...

Page 62: ...e Joystick 6 Move the Joystick up or down to select desired zoom value Off 100x 200x 400x or 1200x then press the Joystick 7 To exit press the MENU button When using the Zoom lever or Zoom button an d...

Page 63: ...can be registered on a playlist Example You have recorded a few scenes on a DVD RW in VR mode You want to save the original recording but you also want to create a digest by putting your favorite sce...

Page 64: ...then press the Joystick left or right to match the direction of the arrow Use the MENU button to adjust brightness or color of the LCD Screen page 36 5 Use the Joystick to select a title scene to be p...

Page 65: ...sc if you move the Joystick right and hold it moves to the next scene If you Move the Joystick left and hold it moves to the beginning of the scene One more press and hold makes it move to the beginni...

Page 66: ...it means X16 speed To resume normal playback press the Joystick You can also use the buttons on the remote control SC DC175 DC575 only Slow Playback Forward Reverse SC DC175 DC575 only Forward Slow P...

Page 67: ...Joystick to select title scenes to delete then press the Joystick The selected title scenes will be marked Select All Deletes all title scenes To delete all title scenes simply press the Joystick afte...

Page 68: ...ou press the Joystick up the picture will advance one frame When you press the Joystick down the picture will go back one frame Press the Joystick up and hold to play back the picture frame by frame f...

Page 69: ...to highlight the playlist icon 4 Press the Q MENU button 5 Move the Joystick up or down to select New Playlist then press the Joystick The thumbnail index screen appears 6 Use the Joystick to select a...

Page 70: ...switch to DISC SC DC173 U DC175 DC575 only 3 Set the Power switch to Player The thumbnail index screen appears 4 Move the Joystick up to highlight the thumbnail index screen icon then move the Joystic...

Page 71: ...ress the Joystick 6 Move the Joystick up or down to select Select or Select All then press the Joystick Select Deletes an individual playlist To delete a playlist use the Joystick to select a playlist...

Page 72: ...h to add scenes then press the Joystick The scenes inside the playlist will appear 5 Press the Q MENU button 6 Move the Joystick up or down to select Add then press the Joystick The title scenes to be...

Page 73: ...e then press the Joystick The scenes inside the playlist will appear 5 Press the Q MENU button 6 Move the Joystick up or down to select Move then press the Joystick 7 Use the Joystick to select the sc...

Page 74: ...se the Joystick to select the playlist which contains the scenes to be deleted then press the Joystick The scenes inside the playlist will appear 5 Press the Q MENU button 6 Move the Joystick up or do...

Page 75: ...on then move the Joystick right to highlight the playlist icon The playlist scenes will be displayed in the form of a thumbnail index 4 Use the Joystick to select the playlist which contains the scene...

Page 76: ...hold to play back the picture frame by frame backward 9 Press the Joystick at the start point to pause the screen 10 Use the Joystick to search the end point of scene to be deleted 11 Press the Joyst...

Page 77: ...the Joystick up or down to select Disc Manager then press the Joystick 5 Move the Joystick up or down to select Disc Info then press the Joystick Disc Name Disc Type Disc Format Used Space and Free Sp...

Page 78: ...to move the cursor to Delete then press the Joystick to delete the existing disc name 8 Use the Joystick to select the desired characters and items then press the Joystick 9 Use the Joystick to selec...

Page 79: ...Camcorder but playback is only possible on a DVD Recorder that supports VR mode Refer to page 11 for Finalized disc compatibility If you insert DVD RW disc message Disc format All les will be deleted...

Page 80: ...o not cause impact or vibration to your DVD Camcorder This could cause a malfunction Notes The Finalize Format functions are not available when the battery level is between and Once nalized the title...

Page 81: ...d audio may pause or skip when you play back a DVD disc on your PC In this occurs copy the data into your hard disk drive A DVD RW disc recorded in VR mode can not play back on your PC Playing back a...

Page 82: ...wn to select Disc Un nalize then press the Joystick 6 Move the Joystick left or right to select Un nalize then press the Joystick The message Un nalizing please wait will appear When un nalizing is co...

Page 83: ...ect Record then press the Joystick 5 Move the Joystick up or down to select AV In Out then press the Joystick 6 Move the Joystick up or down to select Out or AV In then press the Joystick Out Select t...

Page 84: ...le The yellow jack Video The white jack Audio L mono The red jack Audio R If you connect to a mono TV connect the yellow jack Video to the video input of the TV and the white jack Audio L to the audio...

Page 85: ...o R 2 Connect a TV to the VCR 3 Set the Mode switch to DISC SC DC173 U DC175 DC575 only 4 Set the Power switch to Player 5 Turn on both the TV and VCR Set the input selector on the VCR to Line Select...

Page 86: ...in your DVD Camcorder 4 Insert a new tape in your VCR 5 Connect the DVD Camcorder to your VCR with AV cable Connect the AV cable to the input jack on your VCR The yellow jack Video The white jack Aud...

Page 87: ...To cancel press the Record Start Stop button again Notes Voice Plus is available only when the AV cable is connected If a USB cable SC DC173 U DC175 DC575 only is connected the Voice Plus function may...

Page 88: ...r selecting and formatting discs To record from a VCR 4 Insert the tape to be played in your VCR Pause at the starting point of playing 5 Start copying by pressing the Record Start Stop button on your...

Page 89: ...MMC be careful not to edit or delete data by mistake Deleting Photo Moving Images stored in Memory Card Marking Photo Images with Print Information Formatting Memory Cards Inserting a Memory Card 1 Op...

Page 90: ...Mode and M Player Mode Because wide LCD supports only 4 3 mode Structure of Folders and Files on the Memory Card The photo images that you recorded are saved in JPEG le format on the Memory Card The m...

Page 91: ...yed Number of Images that can be stored on a Memory Card Quality Photo Size 128MB 256MB 512MB 1GB 2GB Super Fine 800x600 Approx 600 Approx 1200 Approx 2400 Approx 4830 Approx 9740 1152X864 Approx 300...

Page 92: ...directly access the Photo Size function by using the Q MENU button page 27 The number of recordable images varies depending on the recording environment Regarding detailed image capacity see page 91 P...

Page 93: ...Press the MENU button The menu list will appear 4 Move the Joystick up or down to select Memory then press the Joystick 5 Move the Joystick up or down to select File No then press the Joystick 6 Move...

Page 94: ...9 2 Set the Mode switch to CARD 3 Set the Power switch to Camera 4 After framing your subject fully press the PHOTO button to take the picture The picture is taken and saved into the Memory Card withi...

Page 95: ...view the next image move the Joystick right To view the previous image move the Joystick left Press Joystick left right and hold to search for an image quickly Holding the Joystick left or right will...

Page 96: ...he MENU button The menu list will appear 5 Move the Joystick up or down to select Memory then press the Joystick 6 Move the Joystick up or down to select Protect then press the Joystick 7 Move the Joy...

Page 97: ...o select Delete then press the Joystick The message Delete will appear 7 Move the Joystick left or right to select Yes then press the Joystick The selected image will be deleted Press the MENU button...

Page 98: ...t Yes or No then press the Joystick 8 To exit press the MENU button Notes You can directly access the Delete All function by using the Q MENU page 27 Deleting all les using the Delete All menu may tak...

Page 99: ...t All les will be deleted message will appear 6 Move the Joystick to the left or right to select Yes then press the Joystick The Complete message will appear when the formatting is completed Notes You...

Page 100: ...oximate as recording capacities can be affected by variables such as subject matter and memory card type Notes The DVD Camcorder supports memory cards ranging up to 2GB Recording time is limited to on...

Page 101: ...ght to match the direction of the arrow You can control playback using the Joystick During the playback use the VOL button to increase or decrease the volume Notes MENU and Q MENU buttons are not avai...

Page 102: ...e the Joystick to select a title scene to be played then press the Joystick The selected scene will be played continuously 4 Press the PHOTO button The still image is recorded on the Memory Card Durin...

Page 103: ...umbnail index of photo images appears If there are no recorded images on the Memory Card the No le message will appear 3 Use the Joystick to search for the photo image that you want to mark 4 Press th...

Page 104: ...to 000 Notes You can directly access the Print Mark function by using the Q MENU button page 27 If the Print Mark is set to This File you can set the number of copies from 001 to 999 If the Print Mark...

Page 105: ...enu list will appear 4 Move the Joystick up or down to select System then press the Joystick 5 Move the Joystick up or down to select USB Connect then press the Joystick 6 Move the Joystick up or down...

Page 106: ...r printer manufacturer The Date Time menu cannot be set up if the printer does not support this option The PictBridge is a registered trademark of CIPA Camera Imaging Products Association an image tra...

Page 107: ...th Service Pack 4 or later installed Windows XP High speed USB on a system with Service Pack 1 or later installed Windows VISTA High speed USB on a system with Service Pack 1 or later installed System...

Page 108: ...be sure that the Memory Card is inserted into the DVD Camcorder before connecting USB cable If no Memory Card or an unformatted Memory Card is inserted the PC will not recognize your DVD Camcorder as...

Page 109: ...k up or down to select System then press the Joystick 5 Move the Joystick up or down to select USB Connect then press the Joystick 6 Move the Joystick up or down to select Computer or Printer then pre...

Page 110: ...stalled automatically Following drivers will be installed PC Camera USB Streaming driver Capture Driver 2 Click on Con rm to nish driver installation 3 If the DirectX 9 0 is not installed it is instal...

Page 111: ...hat came with this DVD Camcorder We do not guarantee compatibility for different CD versions For photo editing use Photo Express For movie playback on a PC install software in this order DV Driver Dir...

Page 112: ...disc icon and click the right mouse button to select Eject 2 Select Con rm and disconnect the USB cable when the Windows Splash screen appears Notes If you disconnect the USB cable from the PC or the...

Page 113: ...g on the video conferencing software In this case connect an external microphone to the soundcard of the PC to enable voice communication Using the DVD Camcorder with PC Net meeting program installed...

Page 114: ...end to the USB jack on your computer 2 Setup and execute Windows Movie Maker Windows Movie Maker is used for Windows XP users C program les Movie maker moviemk exe Using the Camcorder as a Removable D...

Page 115: ...order Player the television set or an external device must be NTSC compatible and have the appropriate Audio Video jacks Otherwise you may need to use a separate Video Format Transcoder NTSC PAL forma...

Page 116: ...a DVD RW RW disc un nalize it Cover is opened Slow Cover is opened Close the cover Recovering Data While recording if the power is suddenly turned off the le writing is not properly done When you turn...

Page 117: ...n happens when a DVD Camcorder is moved to a place where there is a signi cant temperature difference from the previous place In other words the water vapor in the air turns into dew because of the te...

Page 118: ...charged battery pack Charge runs out quickly The atmospheric temperature is too low The Battery Pack has not been charged fully The Battery Pack is completely dead and cannot be recharged use another...

Page 119: ...e disc Disc was nalized Make sure the disc is writable to record additional pictures DVD Camcorder is too hot Turn off the power and cool it down a while Disc is not recognized and the disc cover open...

Page 120: ...ded DVD RW RW R R DL disc on a PC Clean the disc using a cleaning cloth Finalize the disc except DVD RW Pushing the OPEN switch does not open the Disc Cover Check the Power supply Battery Pack or AC P...

Page 121: ...Minimizing wind noise 51 Memory Photo Size Selecting the Photo Size 92 Photo Quality Selecting Image Quality 91 Delete Deleting Files 97 Delete All Deleting all Files 98 Protect Preventing Accidental...

Page 122: ...ecting the USB device 109 Language Selecting the OSD language 34 Demonstration Demonstration 35 SC DC175 DC575 only SC DC173 U DC175 DC575 only Trademark Acknowledgements miniSD is a trademark of SD c...

Page 123: ...RW disc you must format it in Video or VR mode When loading a DVD RW disc you must format it We cannot guarantee that you will be able to play back in all other manufacturer s DVD Camcorders DVD Play...

Page 124: ...tput 1Vp p 75 terminated Audio output 7 5dBs 600 terminated USB output SC DC173 U DC175 DC575 only Mini B type connector General Power source DC 8 4V Lithium Ion Battery Pack 7 4V Power source type Li...

Page 125: ...LCD Enhancer 39 LIGHT 50 Lithium Ion Battery Pack 21 M Memory Card 89 Move 73 Moving Image 100 N Name 78 O Operating Modes 26 OSD 28 29 OSD Language 34 P Partial Delete 68 75 Photo images 95 Photo Qua...

Page 126: ...sented to the authorized service center EXCLUSIONS WHAT IS NOT COVERED This warranty does not cover damage due to accident re ood and or other acts of God misuse incorrect line voltage improper instal...

Page 127: ...HUNGARY 06 80 SAMSUNG 7267864 www samsung com hu ITALIA 800 SAMSUNG 7267864 www samsung com it LUXEMBURG 0032 0 2 201 24 18 www samsung lu NETHERLANDS 0900 20 200 88 0 10 Min www samsung com nl NORWA...

Page 128: ...AMSUNG 726 7864 www samsung com RoHS compliant Our product complies with The Restriction Of the use of certain Hazardous Substances in electrical and electronic equipment and we do not use the 6 hazar...

Reviews: