Samsung NX5837750SS, User Manual
The Samsung NX5837750SS is a high-performance kitchen appliance designed to exceed your cooking expectations. To make the most of its advanced features, a comprehensive User Manual is essential. Accessible for free download at manualshive.com, this manual provides a step-by-step guide for mastering the Samsung NX5837750SS's functionalities effortlessly.
Share
Download


Reviews:
No comments
Related manuals for NX5837750SS

CR6 Series
Brand: Cobra Pages: 28

JAS640
Brand: GE Pages: 56

NE595R0ABSR
Brand: Samsung Pages: 59

NE59 431 Series
Brand: Samsung Pages: 156

NE59 432 Series
Brand: Samsung Pages: 156

RGSC-305BK
Brand: DCS Pages: 38

790.46783900
Brand: Sears Pages: 14

Millennia TGF326WHSB
Brand: Tappan Pages: 16

TGF605EU1
Brand: Tappan Pages: 20
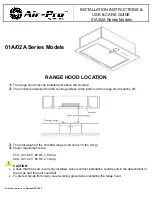
01A series
Brand: Air-Pro Pages: 18

Renaissance Series MRES30S
Brand: Dacor Pages: 16

ESM90TSX
Brand: Sienna Pages: 36

C836-60
Brand: U.S. Range Pages: 2

PN331-7BW
Brand: FiveStar Pages: 12

Roper FEP210VL0
Brand: Roper Pages: 5

SEC350X
Brand: Roper Pages: 16

SGS395X
Brand: Roper Pages: 16

79060702901
Brand: Galaxy Pages: 14


