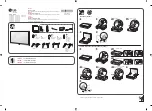
Samsung HG28NB670, Installation Manual
The Samsung HG28NB670 user manual está disponible para descargar de forma gratuita desde nuestro sitio web. Este manual de instalación en español proporciona instrucciones detalladas sobre cómo configurar y utilizar el producto. Descárguelo ahora mismo para obtener una guía completa sobre su dispositivo Samsung HG28NB670.
Share
Download


Reviews:
No comments
Related manuals for HG28NB670

LN32A300U
Brand: Samsung Pages: 62

LCD3233NEU
Brand: Hisense Pages: 50

L42V6300F3DE
Brand: TCL Pages: 16

SE55FGT
Brand: Seiki Pages: 28

DLV-32C7SMB
Brand: Daewoo Pages: 54

BeoVision L 2502
Brand: Bang & Olufsen Pages: 38

T-13MS
Brand: FUNAI Pages: 20

FL24114
Brand: F&U Pages: 35

MD-7078VTS
Brand: Medion Pages: 43

PPT80
Brand: PowerPoint Pages: 18

LDDW19
Brand: Reflexion Pages: 65

PT3235SB
Brand: Palsonic Pages: 25

LC190SL1
Brand: Sylvania Pages: 37

42LW5700
Brand: Samsung Pages: 108

40FBD274B-T
Brand: Finlux Pages: 26

43UN7300PTC.AAU
Brand: LG Pages: 20
43UK6500AUA
Brand: LG Pages: 2
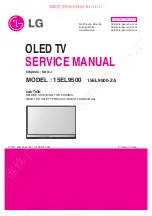
15EL9500
Brand: LG Pages: 25


