Samsung FE-N500 Series, User Manual
Discover the Samsung FE-N500 Series, a revolutionary device offering exceptional performance and functionality. To assist you in utilizing its features to the fullest, we provide an extensive user manual. Download the manual for free from manualshive.com and become an expert in navigating this remarkable product.
Share
Download


Reviews:
No comments
Related manuals for FE-N500 Series

G9081
Brand: Falcon Pages: 32

Profile P2S975
Brand: GE Pages: 52

P2B912
Brand: GE Pages: 60

P2B940DEH1WW
Brand: GE Pages: 64

66595272500
Brand: Kenmore Pages: 24

TOP30A
Brand: Awoco Pages: 13

KB-3411JK
Brand: Sharp Pages: 8

KB-3411JK
Brand: Sharp Pages: 40

KB-3411JK
Brand: Sharp Pages: 60

PROFESSIONAL RGV3304L
Brand: Fisher & Paykel Pages: 21

OR36SDBGX
Brand: Fisher & Paykel Pages: 50
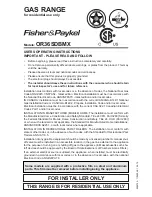
OR36SDBMX
Brand: Fisher & Paykel Pages: 56

GLCS376A
Brand: Frigidaire Pages: 2

Gallery Premier FGEF3077K
Brand: Frigidaire Pages: 2

Gallery Premier FGGF3076K
Brand: Frigidaire Pages: 2

Gallery GCRG3038AF
Brand: Frigidaire Pages: 2

Gallery FGGF3041KF
Brand: Frigidaire Pages: 2

Gallery FGEF3057KF
Brand: Frigidaire Pages: 2


