Samsung DV8*N62 series, User Manual
The Samsung DV8*N62 series is a cutting-edge electronic device designed to enhance your entertainment experience. Unlock the full potential of your device by easily accessing the comprehensive User Manual available for free download on our website. Discover all the features and functionalities of your Samsung DV8*N62 series and elevate your entertainment game.
Share
Download


Reviews:
No comments
Related manuals for DV8*N62 series

TITAN
Brand: PALSON Pages: 52

T884XL
Brand: Asko Pages: 24

GUD57EEMTDG
Brand: GE Pages: 20

ZRT3-H
Brand: ULTRAFRYER Pages: 38

MLG32PDB
Brand: Maytag Pages: 17

Easy Fry Compact digital
Brand: T-Fal Pages: 31

Performance MEDE250
Brand: Maytag Pages: 2

SC0004
Brand: Mediclinics Pages: 65

LE7111WB
Brand: Amana Pages: 4

130 FG-m
Brand: AEG Pages: 32

950 008 672
Brand: AEG Pages: 44
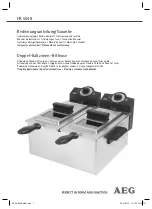
FR 5548
Brand: AEG Pages: 54

FR 5553
Brand: AEG Pages: 54

FT 350 FRITESSE PROFI
Brand: AEG Pages: 8

WTH85VL5SN
Brand: Bosch Pages: 44

WTM8327SZA
Brand: Bosch Pages: 40

WTMC332RCN
Brand: Bosch Pages: 52

WTM8326SZA
Brand: Bosch Pages: 40


