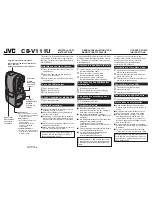
background image

Video Camcorder

8mm

VP-W60/W60B/W61/W61D/W63

Owner’s Instruction Book

Before operating the unit, please read 
this instruction book thoroughly, and retain it for 
future reference.

ELECTRONICS

VP-W60/W60B

This product meets the intent of 
Directive 89/336 CEE, 73/23 CEE, 93/68 CEE.

ENGLISH

START/
STOP

SELF

TIMER

ZERO

RETURN

STILL

COUNTER

RESET

WIDE

TELE

DISPLAY

GB

VP-W61/W61D/W63

Hi

Summary of Contents for 8 VP-W60B

Page 1: ...he unit please read this instruction book thoroughly and retain it for future reference ELECTRONICS VP W60 W60B This product meets the intent of Directive 89 336 CEE 73 23 CEE 93 68 CEE ENGLISH START STOP SELF TIME R ZERO RETURN STILL CO UN TER RESET WIDE TELE DISPLAY GB VP W61 W61D W63 Hi ...

Page 2: ...cting a Cassette 22 Preparing Making the First recording 23 Tips for Stable Image Shooting 25 Recording with the Viewfinder 25 Adjusting the Focus of the VIEWFINDER 25 Reviewing a recording 26 Viewing a Still Picture 27 Picture Search 27 Zooming In and Out 28 Digital Zoom 29 EASY mode for beginners 31 CUSTOM Creating your own customized recording settings 32 Basic Shooting Advanced Shooting Featur...

Page 3: ... 45 Snap Shot 46 White Balance 47 Demonstration 48 Lighting Techniques 49 Playing back the Tape To watch on a TV monitor 50 Various Functions in PLAYER mode 52 DSE in PLAYER mode 53 Cleaning and Taking care of the Camcorder 53 Cleaning the Viewfinder 53 Cleaning the Video Heads 54 Storing the Camcorder 54 Maintenance Self Diagnosis Display 56 Checking 57 Moisture Condensation 59 Troubleshooting Ch...

Page 4: ...CD Charge Coupled Device Precautions regarding the LENS Do not allow any metal objects to touch the terminals as this can cause a short circuit and damage the battery pack Keep the terminals clean The camera adapter or battery pack will not work properly if the terminals are dirty Check them before use and wipe them with a dry cloth or tissue if necessary ...

Page 5: ...mcorder for example When you take the camcorder from cold temperatures outside to warm temperatures inside during the winter When you take the camcorder from cool temperatures inside to hot temperatures outside during the summer 2 If the DEW protection feature activates leave the camcorder in a dry and warm room with the cassette compartment open and the battery removed 3 If the DEW protection fea...

Page 6: ...s chemical waste Warning Keep the LITHIUM BATTERY out of the reach of children Should the battery be swal lowed consult a doctor immediately The lithium battery maintains the clock function TITLE CUSTOM function and preset contents memory even if the battery pack or AC power adapter is removed The lithium battery for the camcorder lasts about 8 10 months under normal operation from time of install...

Page 7: ...rrectly to ensure the camera can be held steady see page 16 Do not insert your hand in the hand strap forcibly as it may result in damage to the buckle To ensure normal recording and clear pictures ensure that the heads are kept clean When playing back the pictures if they are noisy or hardly visible the video heads may be dirty If this happens clean the video heads with a dry type cassette cleane...

Page 8: ... your films by adding various special effects see page 38 Program AE Auto Exposure The Program AE allows the shutter speed and aperture to be adjusted to the type of subject being filmed see page 36 DIS VP W63 only The DIS compensates for unstable images caused by hand shake particularly at high magnification see page 33 22x High ratio zoom lens Zooming is a recording technique that lets you chang...

Page 9: ...orks in PLAYER mode see page 52 5 DATE TIME STOP DATE TIME works in CAMERA mode see page 40 STOP works in PLAYER mode see page 51 6 TAPE EJECT see page 22 Used to eject the tape 7 EVF Electronic Viewfinder 8 MIC MIC works in CAMERA mode 9 Remote sensor VP W61 W63 only see page 15 10 EASY EASY works in CAMERA mode 11 CUSTOM CUSTOM works in CAMERA mode 3 PLAY STILL 4 EDIT FF 5 DATE TIME STOP 7 EVF 1...

Page 10: ...M AE see page 36 PROGRAM AE Auto Exposure works in CAMERA mode 17 DSE see page 38 DSE works in CAMERA and PLAYER mode 18 BLC see page 35 BLC works in CAMERA mode 19 FADE see page 44 FADE works in CAMERA mode 20 DC Jack 21 Recharging Indicator 22 S VIDEO out VP W61 W63 only 23 Lithium Battery see page 17 Side View 23 Lithium Battery 13 MENU ON OFF 12 BATTERY EJECT 14 ENTER MF 15 UP DOWN Dial 20 DC ...

Page 11: ... turn off the camcorder PLAYER Select to playback 31 START STOP see page 23 START STOP works in CAMERA mode 32 Battery pack compartment see page 19 33 D ZOOM SNAP SHOT D ZOOM works in CAMERA mode VP W60 W60B W61 W61D only see page 30 SNAP SHOT works in CAMERA mode VP W63 only see page 46 24 ZOOM 25 Cassette Compartment 27 AUDIO VIDEO out 28 LENS cap 29 Hand Strap 33 D ZOOM SNAP SHOT 26 Hooks for S...

Page 12: ...dicates the power left in the battery d Manual Focus see page 34 Indicates manual focus is on Auto Focus is not displayed e BLC see page 35 Indicates BLC is activating f Program AE see page 36 Indicates Program AE mode is activating g Self record waiting timer VP W61 W63 only see page 15 Indicates 10 seconds timer h Self record recording timer VP W61 W63 only see page 15 30 seconds or END i Date s...

Page 13: ...modes are STBY REC STOP PLAY FF REW EJECT p EASY CUSTOM Shows when the EASY or CUSTOM mode is active q DEW condensation see page 59 Visable if moisture or condesation is detected within the camera r Digital zoom see page 29 Shows the digital zoom is active s Snap Shot VP W63 only see page 46 Shows the remaining available time for Snap Shot recording t PB DSE Shows that the PB DSE mode is active u ...

Page 14: ...3 only see page 15 Lithium Battery for Clock TYPE CR2025 see page 17 Optional Accessory 9 Scart adapter see page 50 10 Cassette see page 22 11 Carrying Case 12 S VIDEO cable see page 51 VP W61 W61D W63 only Note Optional accessories may be included with the camcorder depending on the country in which it is purchased 1 AC Power Adapter 2 AC cord 3 Battery Pack 5 Shoulder Strap 4 AUDIO VIDEO Cable S...

Page 15: ...when You purchase the camcorder The remote control doesn t work Insert Lithium Battery following the and markings Be careful not to reverse the polarity of the battery Self Recording with the Remote Control The Self Timer function on the remote control allows you to start and stop recording automatically Example recording yourself Two options are available WAIT 10S SELF 30S wait 10 seconds followe...

Page 16: ...again cancels the function Adjusting the Hand Strap and Shoulder Strap Hand Strap It is very important to adjust the hand strap correctly to ensure the camera can be held securely The hand strap enables you to Hold the camcorder in a stable comfortable position Press the Zoom and the red Record button without having to change the position of your hand 1 Pull open the Hand Strap cover and release t...

Page 17: ...e of installation under normal operation When the lithium battery becomes weak or dead the date time indicator flashes about 5 seconds when you set the power switch to CAMERA In this case replace the lithium battery with type CR2025 Lithium button cell 1 Remove the Lithium battery holder from the base of the camera 2 Insert the side of the lithium battery toward the bottom of the holder 3 Reinsert...

Page 18: ... socket type can be different according to the regional conditions 3 Connect the other end of the DC cable to DC jack of the camcorder 4 To set the camcorder to CAMERA mode a Hold down the tab of the power switch and push the switch to CAMERA mode b Make sure that the Lens Cap is opened c Make sure that the image appears in the Viewfinder Note If the adapter is used next to the TV or the camcorder...

Page 19: ...t flashing indicating the battery is charging Flashing once a second the battery is less than 50 charged Flashing twice a second the battery is between 50 75 charged Flashing three times a second the battery is between 75 100 charged Constantly stays on Charging is complet On for a second and off for a second there is an error and the charger needs to be reset 5 If recharging is completed separate...

Page 20: ...t is fully recharged The life and capacity of the battery pack will be reduced if the battery pack is left in temperatures above 40 C for a long period even when it is fully recharged Do not put the battery pack near any heat source fire or flames for example or left in direct sunlight Table of approximate continuous recording time based on model and battery type VP W60 W60B W61 W61D VP W63 Approx...

Page 21: ...ure and conditions The recording time becomes very short in a cold environment The continuous recording time in the operating instructions is measured using a fully charged battery pack in 77 F 25 C As environmental temperatures and conditions may be different when you actually use the camcorder the remaining battery time may not be the same as the approximate continuous recording times given in t...

Page 22: ...ns automatically Insert the cassette with the transparent window fac ing outward and the protection tab toward the top 2 Press the are labelled PUSH until the compartment clicks into place Note When you have recorded a cassette that you wish to keep you can protect it from being accidentally erased a Protecting a recording Slide the red tab on the cassette so that it covers the hole b Unprotecting...

Page 23: ... the red tab of the cassette is covering the hole STANDBY will not be displayed Have you removed the LENS CAP Make sure that the image you want to record is visable in the Viewfinder Make sure that there is enough remaining power for the expected recording time see page 21 We recommend that beginners who are using the camcorder for the first time switch the EASY mode on a To start recording press ...

Page 24: ...button or set power switch to OFF and then back to CAMERA This Auto Power Off feature is designed to save battery power and to protect the Tape Head and tapes Edit Search You can view a recorded picture with EDIT function in STANDBY mode EDIT allows you to reverse and EDIT allows you to forward for as long as you keep the button pressed If you press EDIT button briefly in STANDBY mode your camcord...

Page 25: ...bow against your side 3 Place your left hand under the camcorder to support it Be sure to not touch the built in microphone 4 Choose a comfortable stable position for the shots You can lean against a wall or on a table for greater stability Do not forget to breathe gently 5 Put your eye firmly against the eyepiece 6 Use the viewfinder frame as a guide to determine the horizontal plane 7 Whenever p...

Page 26: ...D 4 Press the REW button to rewind the tape to the beginning To stop REWIND press the STOP button Camcorder stops automatically after rewinding 5 Press the PLAY STILL button to start playback You can see the video you shot in the Viewfinder To stop the PLAY operation press the STOP button Note You can also watch it on a TV screen once connecting the camcorder to a TV or VCR see page 50 1 2 3 4 5 P...

Page 27: ... a Still Picture Press PLAY STILL button during playback To resume playback press the PLAY STILL button again Picture Search Press and hold FF or REW button during playback To resume normal playback release the button PLAY STILL REW FF ...

Page 28: ...conds from TELE WIDE to WIDE TELE Use these features for different shots Please note that over use of the zoom feature can lead to a reduction of battery pack usage time 1 Move the zoom lever a little for a gradual zoom move it further for a high speed zoom Your zooming is monitored on the OSD 2 T Telephoto side Subject appears closer 3 W Wide angle side Subject appears further away Note MACRO If ...

Page 29: ... page 33 1 Set the power switch to CAMERA mode 2 Make sure that the DIGITAL ZOOM feature is switched on see page 30 3 When you move the ZOOM lever to T side the picture will increase in size upto a maximum of 500 times 4 If you do not want to use the DIGITAL ZOOM set the DIGITAL ZOOM function to OFF in the MENU list see page 30 shows the digital zoom area shows the optical zoom area 500 x W T 500 ...

Page 30: ...h to CAMERA mode 2 Press the D ZOOM ON OFF button The DIGITAL ZOOM will be displayed on the screen and the DIGITAL ZOOM function will operate 3 To deactivate DIGITAL ZOOM function press the D ZOOM button again The DIGITAL ZOOM indicators disappear from the screen Note The D ZOOM ON OFF function will not operate in EASY REC or CUSTOM mode MENU CUSTOM SET CLOCK SET TITLE SET TITLE OFF DIS OFF PIP OF...

Page 31: ...inder at the same time However the Date Time will only be seen if it has been previously set DIS will be displayed on VP W63 only 3 Press the START STOP button to start recording Recording will begin using the basic automatic environment settings 4 Pressing the EASY button again turns the EASY mode off The camera will return to the settings that were set prior to the EASY mode being switched on No...

Page 32: ...me time Example When the CUSTOM SET is set as follows 7 Press the START STOP button to start recording Recording will begin using the new CUSTOM settings 8 To switch Custom off press the CUSTOM button once The camera will revert to the settings that were set prior to the CUSTOM mode being switched on Notes In CUSTOM mode the MENU MF DSE and P AE functions are not available If you want to use these...

Page 33: ... a vehicle 1 Set the power switch to CAMERA mode 2 Press the MENU ON OFF button The MENU list will appear 3 Turn the UP DOWN dial until DIS is highlighted 4 Press ENTER The DIS setting will change 5 Press MENU ON OFF button to end the setting When the DIS is set the DIS mark will displayed on the OSD Notes 1 It is recommended to deactivate the DIS function when using a tripod 2 The DIS function wi...

Page 34: ...tch on the Power switch If you are inexperienced with camcorders we recommend that you use the Auto Focus mode Manual Focusing In the following situations you should obtain better results by adjusting the focus manually a A picture containing several objects some close to the camcorder others further away b A person enveloped in fog or surrounded by snow c Very shiny or glossy surfaces like a car ...

Page 35: ...bject is outdoors and the background is overcast The light source is too bright The subject is against a snowy background 1 Set the power switch to CAMERA mode and press the BLC button Normal BLC Normal BLC enhances only the subject Note BLC function will not operate in P AE or EASY mode BLC on BLC off 4 Turn the UP DOWN dial up or down until the object is focused 5 If the picture won t focus zoom...

Page 36: ... stop on a given image with very little blur 3 PORTRAIT mode For focusing on the subject and not the background The PORTRAIT mode is most effective when used outdoors The shutter speed automatically varies from 1 50 to 1 1000 second depending on the picture 4 SPOTLIGHT mode To shoot correctly when there is only light on the subject and not the rest of the picture The shutter speed is 1 50 second 5...

Page 37: ...the appropriate symbol is displayed No Display Full Auto mode Notes The screen status that is changed by the P AE button will be recorded on the tape To end the P AE function press the P AE button once or several times until the P AE Icon is no longer displayed The P AE function will not operate in EASY or CUSTOM mode The BLC function will not operate in P AE mode STBY 0 00 00 CUSTOM 31 JAN 2001 ...

Page 38: ... inserting cutting effect on the image As a reference there are 50 fields in the normal picture VP W63 only 4 SEPIA This mode gives the image a reddish brown pigment 5 B W Black White This mode makes the image black and white 6 NEG Negative This mode reverses the colour of the image creating a negative picture affect 7 MIRROR This mode cuts the image in half using a mirror effect 8 ART Adds a pain...

Page 39: ... the desired mode is displayed 4 Press the START STOP button to start recording 5 To exit the DSE functions press the DSE button once or several times until no DSE mode is displayed on the Viewfinder Notes It is recommended that you set the DSE mode in STBY mode DSE functions will not operate in EASY or CUSTOM modes DIS PIP and SNAP SHOT functions will not operate in DSE mode STBY X XX XX SEPIA ...

Page 40: ...alled the LITHIUM BATTERY see page 17 The LITHIUM BATTERY is needed to maintain the clock 2 Set the power switch to CAMERA mode 3 Press the MENU ON OFF button then the MENU list will appear 4 Turn the UP DOWN dial until CLOCK SET is highlighted 5 Press ENTER The DATE and TIME is displayed The area BLINKING indicates which part will be changed The year will be the first to blink 6 Turn the UP DOWN ...

Page 41: ...t you have set the DATE TIME 2 Set the power switch to CAMERA mode 3 Press the DATE TIME button To record the date only press the DATE TIME button once To record the date and time press the DATE TIME button twice 4 Press the START STOP button to start recording Notes If your date and time settings are not maintained in the camcorder it means the LITHIUM BATTERY is discharged and should be replaced...

Page 42: ...odes The factory default language is ENGLISH but you can change the language 1 Make sure that you have installed the LITHIUM BATTERY or have the adapter attached 2 Set the power switch to CAMERA mode 3 Press the MENU ON OFF button The MENU list will be displayed 4 Turn the UP DOWN dial until TITLE SET is highlighted 5 Press ENTER Alist of available languages will appear MENU CUSTOM SET CLOCK SET T...

Page 43: ...Set the power switch to CAMERA mode 2 Press MENU 3 Turn the UP DOWN dial until TITLE OFF is highlighted 4 Press ENTER to choose between OFF AUTO 10S and CONTINUE 5 Press the START STOP button to record the title with your recording If you want to change the title recording time select title recording time Select from OFF AUTO 10S CONTINUE on MENU Notes The title moves horizontally from the right s...

Page 44: ...release the FADE button Recording starts and the picture and sound gradually appear fade in To Stop Recording using FADE IN FADE OUT 3 When you wish to stop recording hold down the FADE button The picture and sound gradually disappear fade out 4 When the picture has disappeared press the START STOP button to stop recording a FADE OUT Approx 4 seconds b FADE IN Approx 4 seconds Note The FADE functi...

Page 45: ...U List will be displayed 4 Turn the UP DOWN dial until PIP OFF is highlighted 5 Press ENTER the PIP ON and a small screen should appear 6 Check which part you are shooting on the PIP screen and move the Zoom button to the T position to activate the DIGITAL ZOOM 7 Setting PIP ON to OFF in the MENU will make the small screen disappear and switch the PIP mode off Notes The PIP screen will be recorded...

Page 46: ...recorded 3 Once the SNAP SHOT button has been pressed your camcorder will automatically return to STANDBY mode after approximately 6 seconds You can check the remaining available SNAP SHOT space by looking at the time displayed on the screen To stop SNAP SHOT shooting press the SNAP SHOT button again Notes If the camcorder is knocked or shaken while taking a SNAP SHOT the image may be blurred The ...

Page 47: ...ording to the outdoor ambience Setting a White Balance Mode 1 Set the power switch to CAMERA mode 2 Press the MENU ON OFF button then the MENU list will be displayed 3 Turn the UP DOWN dial until WHT BAL AUTO is highlighted 4 Press ENTER You can set it to INDOOR or OUTDOOR by pressing the ENTER button 5 Press MENU ON OFF button to exit the WHITE BALANCE setting screen Note The MENU ON OFF function...

Page 48: ... OFF 1 Set the POWER switch to CAMERA mode 2 Press MENU ON OFF button then the MENU list will appear 3 Turn the UP DOWN dial so that DEMO is highlighted 4 Press ENTER to select ON Demonstration will start 5 Set the POWER switch to OFF to end the Demonstration Note The MENU ON OFF function will not operate in EASY REC or CUSTOM mode Demonstration MENU CUSTOM SET CLOCK SET TITLE SET C RESET 0 00 00 ...

Page 49: ...eatest influence on picture quality is the level of brightness measured in lux The following table lists a few common situations the corresponding level of brightness and any associated recommendations Situations Brightness lux Recommendations Snow covered mountains or fields 100 000 ND filter recommended Sandy beach on a hot summer s day 100 000 On a sunny day in the middle of the afternoon 35 00...

Page 50: ...corder The yellow one Video The white one Audio L You can use a SCART adapter supplied optionally A provided SCART adapter will be one of the following two types Stereo type Mono type You can connect your camcorder to a TV through a VCR Set the input selector on the VCR to LINE The yellow one Video The white one Audio L You can use a SCART adapter supplied optionally To view the cassette on the te...

Page 51: ...source battery or AC Power Adapter to the camcorder Set the power switch to PLAYER mode 3 Insert the tape you want to watch Make sure that STOP is displayed 4 Press the PLAY STILL button The recorded pictures should appear on the TV after 2 to 3 seconds Press STOP to stop playing If the tape reaches its end during playback the tape will rewind automatically Note This camcorder does not support LP ...

Page 52: ...s Zero RETURN VP W61 W63 only The ZERO RETURN function works in STOP of PLAYER mode You can Fast Forward or Rewind to 0 00 00 automatically 1 Set power switch to PLAYER mode Make sure that STOP is displayed 2 Press ZERO RETURN button Z RETURN should displayed FF or REW works automatically Note The ZERO RETURN button does not work when the TAPE COUNTER reads 0 00 00 Notes Set the COUNTER RESET to C...

Page 53: ...your camcorder is in PLAYER mode Pressing the DSE button will scroll through the available settings Stop at the one you require Cleaning and Taking care of the Camcorder Cleaning the Viewfinder Releasing the Eyepiece 1 Pull the viewfinder up and then turn the screw counter clock wise 2 Pull the EYEPIECE away from the viewfinder 3 Clean the EYEPIECE and the VIEWFINDER screen with a soft cloth and c...

Page 54: ...ape 3 Press the PLAY STILL button 4 Press the STOP button after about 30 seconds Check the quality of the picture using a known good video cassette If it is still bad repeat the operation If the problem continues contact your local authorized service centre Storing the Camcorder 1 You must detach the BATTERY PACK from the camcorder when not in use 2 Keep the camcorder in a ventilated dry warm plac...

Page 55: ...ding on a television or to make a copy to a video cassette recorder the television or VCR must be PAL VP W60 W60B W61 W61D W63 compatible and have the appropriate audio video jacks PAL compatible area Australia Austria Belgium Bulgaria China CIS Czech Republic Denmark Egypt Finland France Germany Greece Great Britain Holland Hong Kong Hungary India Iran Iraq Kuwait Libya Malaysia Mauritius Rumania...

Page 56: ...ith a charged discharged battery TAPE END slow the tape has almost reached Prepare a new one its end TAPE END no the tape reached its end Change to a new one TAPE slow there is no tape in the camcorder Insert a tape TAPE slow the tape is protected Check the red tab from recording on the tape D EMG slow the camcorder has some 1 Eject the tape C EMG mechanical fault 2 Set to OFF R EMG 3 Detach the b...

Page 57: ... 22 The camcorder goes You have left the camcorder set to STANDBY off automatically for more than 5 minutes without using it see page 24 The battery pack is fully used up see page 21 The battery pack is The atmospheric temperature is too low see page 21 quickly exhausted The battery pack has not been charged fully see page 19 The battery pack is completely dead and cannot be recharged Use another ...

Page 58: ...d it set Explanation Solution The contrast between the subject and the background is too great for the camcorder to operate normally Make the back ground bright to reduce the contrast or use the BLC function while you are shooting see page 35 The view finder lens has not been adjusted Turn the viewfinder focus ring until the screen comes into sharp focus see page 25 Set the POWER switch to PLAYER ...

Page 59: ...mstances the camcorder has the built in moisture sensor If there is moisture inside the camcorder DEW is displayed If this happens none of the functions except cassette ejection will work Open the cassette compartment and remove the battery for at least two hours in a warm dry room If the DEW protection feature unexpectedly activated and you want to override it Please make sure that the condensati...

Page 60: ...ing time P5 120 120 min FF or REW time P5 120 approx 8 min Image device CCD Charge Coupled Device Optical zoom ratio 22x Focal length f 3 6 79 2 mm F 1 6 Filter diameter 46 mm Focus system Inner Macro Auto wide macro Min Illumination 0 3 lux visible Connectors Video out Mini jack 1 Vp p 75 ohms Unbalanced Audio out Mini jack 7 7 dBs imp less than 820 ohms General Power requirement DC 8 4 V 1 5 A P...

Page 61: ...E HOLDER 11 CLEANING 54 CONTENTS 2 CUSTOM 32 D DATE 40 DATE TIME 40 DC CABLE 18 DEMO 48 DEW 59 DIGITAL ZOOM 29 DIMENSION 60 DIS 33 DISPLAY 12 DSE 38 E EASY 31 EDIT 24 EJECT 22 F FADE IN 44 FADE OUT 44 FF FAST FORWARD 52 FILTER DIAMETER 60 FOCAL LENGTH 60 G GHOST 38 H HAND STRAP 16 Hi8 51 L LENS 9 LITHIUM BATTERY 17 M MIRROR 38 MOISTURE 59 MONAURAL AUDIO 50 MOSAIC 38 N ND FILTER 49 NEG 38 NTSC 55 ...

Page 62: ...S SAFETY INSTRUCTION 4 SAND SNOW MODE 36 SELF 30S 15 SELF END 15 SELF DIAGNOSIS 56 SELF RECORD 15 SELF TIMER 15 SEPIA 38 SHOULDER STRAP 17 SNAP SHOT 46 SPECIFICATION 60 SPORTS MODE 36 SPOTLIGHT MODE 36 START STOP 23 STILL 52 STOP 51 STROBE 38 SYSTEM 60 S VIDEO 51 T TAPE COUNTER 13 TAPE EJECT 22 TAPE END 56 TIME 40 TITLE 42 TROUBLE CHECK 57 TV MONITOR 50 V VIDEO 50 VIDEO HEAD 54 W WAIT 10S 15 WEIGH...

Page 63: ...r consult your dealer for assistance However if there is no alternative to cutting off the plug remove the fuse and then safely dispose of the plug Do NOT connect the plug to a mains socket as there is a risk of shock hazard from the bared flexible cord IMPORTANT The wires in the mains lead are coloured in accordance with the following code BLUE NEUTRAL BROWN LIVE As these colours may not correspo...

Page 64: ...et Home Page United Kingdom http www samsungelectronics co uk France http www samsung fr Australia http www samsung com au Germany http www samsung de Sweden http www samsung se Poland http www samsung com pl Spain http www samsung es Italia http www samsung it AD68 00375F ...

Reviews: